
Wow what a project. I started about noon on Saturday, and finished about 8pm on Sunday. This wasn�t straight through, as I took a lot of breaks in between working to do other things. Overall, the project was fairly simple. It was a lot of work, but nothing very difficult. Since I don�t have an air compressor, I rented a DeWalt Electric Impact Wrench from a tool rental place near here. It was $30 for 2 full days, and was very much worth it. It took the control arm bolts off in seconds. They were fused pretty solid too, considering the car has 180k on it. Surprisingly, the rubber bushings on the car were in great shape, and the bushings on the new rear end assembly were also, considering it only had 53k on it.
Once I got all the bolts out, I lowered the old rear end on a jack, and eventually, the springs fell out. I had a little trouble with the axle trying to twist forward because of the pressure from the springs. I kept compensating with additional jack stands and repositioning the hydraulic jack, and eventually, it came out fine. And because the axle was twisting forward, the upper control arm bolts didn�t want to come out, so I had to jack the axle back up and manipulate the arms so I could tap out the bolts. Once they were all out, the axle came down quite fast, but I kept the jack underneath it, and brought it to the ground.
Once it was down, I had to take the brake line box thing off. This is a little junction box, bolted to the top of the axle that connects the 2 steel brake lines (one from each wheel cylinder) to the rubber brake line that runs forward, and then connects to the main steel brake line from the master cylinder. When they took the axle out of the car at the junkyard, they just cut the rubber line, rendering it unusable. I tried taking the old one off the old axle, but the fittings absolutely wouldn�t budge. So I went to Autozone to see if they had one. They did, but it would have to be shipped, and wouldn�t get in till Sunday after 2. That was way too long to wait, so the guy at AZ said to heat up the fittings with a propane torch, and they would come right out. So I tried it, and it worked. Once I heated the fittings up (being careful not to get the rubber hose hot), they backed right out. I attached the assembly to the new axle.
With the brake line assembly on the new axle, it was ready to go into the car. I positioned it under the car, and jacked it into place. This time, I used the old drums stacked on top of each other to keep the axle from twisting forward with the pressure of the springs. It worked great. Once the axle was high enough, I put in the springs, then I attached the upper control arms, then the lower, and then the shock bolts. I only tightened them by hand until everything was in place. Once all the bolts were in, I lowered the axle again, and once it was sitting at the bottom of the control arm range and the jack was out from under it, I tightened the bolts back down with the impact wrench. That was all I did Saturday night.
After I got home from church Sunday, I reattached the brake line and the driveshaft. The driveshaft had me scared for a minute when I tried to attach it and it was an inch short. I freaked, thinking they had sold me the wrong rear end. Then I remembered that I pushed the driveshaft forward when I took it down, and there was still play in the front end of it. So I pulled it back and bolted it on. I was relieved, to say the least. After that was done, I built the brakes back on to the ends of the axle. My old brake pads were still almost new, since I had bad wheel cylinders on the old axle, and the brakes stopped working right after I did them last. After I finished the brakes, I bled them, then put the wheels back on. Bleeding the brakes was so easy. I have never done that before, but it was a snap. I had the kid pump on them while I loosened and tightened the bleeder valve. I got a little bleeder bottle from AZ for about $5. I may bleed them more often for fun.
I put the wheels back on, and took it for a drive. Everything works fine now. The vibration is gone, and it doesn�t sound like I am dragging 5 steel trash cans behind me anymore. It�s so good to have my car back. And for downgrading gears (3.08 to 2.73), it sure is peppy, even more so than before. I thought it would bring slower acceleration and worse gas mileage, but it�s having the opposite effect. Weird.
Since I didn�t change my speedo gear to a 2.73 gear, my speed is off. I knew this was going to happen, but I don�t feel it�s that big of a difference to do all that extra work. For now anyways. To find out how big of a difference between actual and speedometer speeds, I found a cop. He was sitting in a parking lot doing whatever, so I drove up to him and asked him if he could hit me with the radar when I drove by. I explained why to him, and he agreed. He was very nice about it. So he drove to the side of the road, and I went down and made a u-turn and came back at him. I kept the needle right exactly on 30. Once I passed him, I came back and talked to him again. He said he clocked me at 31, so that�s not bad. Tom said that the gap will increase with speed, so I need to do it again on a faster road. I�ll just have to be careful until then.
Needless to say, I�m happy as sh!t about this. I got my car back, it�s running great, and I didn�t have any problems with the job. Tomorrow, I�m going to swap seats and carpet with the Towncar, putting all leather in the Vic.
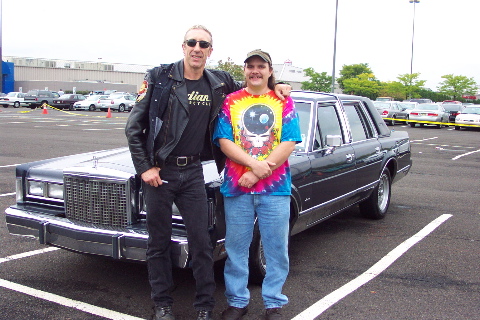
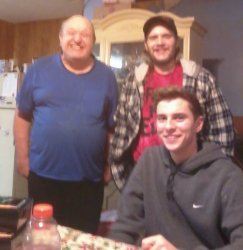
Pics of the weekend below.


Once I got all the bolts out, I lowered the old rear end on a jack, and eventually, the springs fell out. I had a little trouble with the axle trying to twist forward because of the pressure from the springs. I kept compensating with additional jack stands and repositioning the hydraulic jack, and eventually, it came out fine. And because the axle was twisting forward, the upper control arm bolts didn�t want to come out, so I had to jack the axle back up and manipulate the arms so I could tap out the bolts. Once they were all out, the axle came down quite fast, but I kept the jack underneath it, and brought it to the ground.
Once it was down, I had to take the brake line box thing off. This is a little junction box, bolted to the top of the axle that connects the 2 steel brake lines (one from each wheel cylinder) to the rubber brake line that runs forward, and then connects to the main steel brake line from the master cylinder. When they took the axle out of the car at the junkyard, they just cut the rubber line, rendering it unusable. I tried taking the old one off the old axle, but the fittings absolutely wouldn�t budge. So I went to Autozone to see if they had one. They did, but it would have to be shipped, and wouldn�t get in till Sunday after 2. That was way too long to wait, so the guy at AZ said to heat up the fittings with a propane torch, and they would come right out. So I tried it, and it worked. Once I heated the fittings up (being careful not to get the rubber hose hot), they backed right out. I attached the assembly to the new axle.
With the brake line assembly on the new axle, it was ready to go into the car. I positioned it under the car, and jacked it into place. This time, I used the old drums stacked on top of each other to keep the axle from twisting forward with the pressure of the springs. It worked great. Once the axle was high enough, I put in the springs, then I attached the upper control arms, then the lower, and then the shock bolts. I only tightened them by hand until everything was in place. Once all the bolts were in, I lowered the axle again, and once it was sitting at the bottom of the control arm range and the jack was out from under it, I tightened the bolts back down with the impact wrench. That was all I did Saturday night.
After I got home from church Sunday, I reattached the brake line and the driveshaft. The driveshaft had me scared for a minute when I tried to attach it and it was an inch short. I freaked, thinking they had sold me the wrong rear end. Then I remembered that I pushed the driveshaft forward when I took it down, and there was still play in the front end of it. So I pulled it back and bolted it on. I was relieved, to say the least. After that was done, I built the brakes back on to the ends of the axle. My old brake pads were still almost new, since I had bad wheel cylinders on the old axle, and the brakes stopped working right after I did them last. After I finished the brakes, I bled them, then put the wheels back on. Bleeding the brakes was so easy. I have never done that before, but it was a snap. I had the kid pump on them while I loosened and tightened the bleeder valve. I got a little bleeder bottle from AZ for about $5. I may bleed them more often for fun.
I put the wheels back on, and took it for a drive. Everything works fine now. The vibration is gone, and it doesn�t sound like I am dragging 5 steel trash cans behind me anymore. It�s so good to have my car back. And for downgrading gears (3.08 to 2.73), it sure is peppy, even more so than before. I thought it would bring slower acceleration and worse gas mileage, but it�s having the opposite effect. Weird.
Since I didn�t change my speedo gear to a 2.73 gear, my speed is off. I knew this was going to happen, but I don�t feel it�s that big of a difference to do all that extra work. For now anyways. To find out how big of a difference between actual and speedometer speeds, I found a cop. He was sitting in a parking lot doing whatever, so I drove up to him and asked him if he could hit me with the radar when I drove by. I explained why to him, and he agreed. He was very nice about it. So he drove to the side of the road, and I went down and made a u-turn and came back at him. I kept the needle right exactly on 30. Once I passed him, I came back and talked to him again. He said he clocked me at 31, so that�s not bad. Tom said that the gap will increase with speed, so I need to do it again on a faster road. I�ll just have to be careful until then.
Needless to say, I�m happy as sh!t about this. I got my car back, it�s running great, and I didn�t have any problems with the job. Tomorrow, I�m going to swap seats and carpet with the Towncar, putting all leather in the Vic.
Pics of the weekend below.


Comment