Announcement

Collapse
No announcement yet.

Mikey's new four-door

Collapse
X
 
  • Filter
  • Time
  • Show
Clear All
new posts

    Interesting stuff. Are the Eddy rods numbered dimensionally, i.e., 6552 = 0.065" x 0.052"?

    And, as always, if you need a hand with anything (even just cleaning out some space in the garage), just give me a holler.

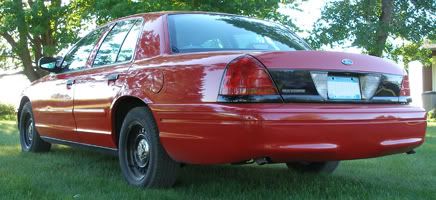
    2001 Ford Crown Victoria P71 - "The Fire Engine"
    1985 Lincoln Town Car Signature Series
    But God demonstrates his own love for us in this: While we were still sinners, Christ died for us. Romans 5:8

    Comment


      Sort of; I'm referring to the numbers stamped on the rods, which are indeed as you state. The actual Edelbrock part number is of course completely different than the dimensional numbering system ... I guess they just had the urge to be difficult!

      I'm still keeping your offer in mind! Haven't really had a chance to do garagey things the last couple Saturdays, what with the afternoon tea get-together that mostly wasn't and then whatever it was we were doing last week. I'll have to keep an eye on how I'm doing this weekend ... I've got a little shoulder issue that's been making me miserable this week, but it's scheduled to get taken care of on Monday.

      Hm, I just realized, my wife just got a wireless router last night ... I'll have to take the computator outside and see what its range is!
      2012 Mazda5 Touring | Finally working on the LTD again!

      Comment


        Hm, hadn't updated this thread in a little while. Currently the carb is at positon "11" (2 stages lean on power and cruise) and is fairly happy. Position "10" (leanest - I'd had it wrong in a previous post) did indeed seem to be as described above (slight drivability issues), in addition to somehow feeling just a trifle raw, like it was running more on the edge than I would have liked. Timing is still at 8 degrees initial. And wouldn't you know, the dumb thing is happy with the smallest pump shot and still the stock 5" Hg stepup spring.

        When Nater was out here a couple weeks ago, we reconnected the secondaries and went for a drive, finding that it's pulling rather well. I couldn't find my .092 jets to go one stage lean on the secondaries, so I obtained a pair through AutoZone for $10 (ouch) and tossed them in. So far so good, but I'm going to go ahead and try the .089s after I've had the chance to run these a tad more at WOT. I also have yet to experiment with the lighter (later opening) stepup springs.

        And oh yes, the fuel system upgrade is now partly in place (see pics). Summit 80gph pump is attached, and the humongo-normous Fram HPG1 canister-style fuel filter is dangling directly in front of the brake cylinder, along with my nice Holley regulator and Summit fluid-filled pressure gauge, via a homemade bracket that's brutally ugly but more or less effective. More details in the "Piecing together a fuel system" thread in OTB, including my cussing and swearing when Pirate said he thought the filter was likely to absorb two much heat in my first two mounting locations. Rigidity of this bracket isn't bad, but it is longer than originally intended, and I think adding some ribbing may be in order to further reduce its flexibility. Also, since having lots of fuel connections (even though pipe-thread and inverted-flare connections are normally quite reliable) just inches from a high-output ignition coil was making me nervous, I've temporarily rigged another coil on the p/s fenderwell for safety and peace of mind.
        Attached Files
        2012 Mazda5 Touring | Finally working on the LTD again!

        Comment


          More fuel system junk - carb modification!

          It's no secret that one of the things I've always hated the most about my Edelbrock/Carter AFB carburetors is the starboard fuel inlet. This inlet location works great if you're working on a Chevy, as the fuel pump is on the starboard side of the engine, but what if you're working on a Ford and your pump is on the port side? Even if you obtain one of Edelbrock's new "Thunder Series" AVS carbs for about $400 that feature dual inlets, the hookup process is still anything but convenient, and you're still stuck with that proprietary 5/8-20 straight thread they thought appropriate for their inlets, which limits fitting availability ... plus even if you were to attempt to drill the port side of a regular lid for an inlet, where the heck do you get a 5/8-20 tap?

          I got to thinking one day, and decided to myself, the heck with all that. My other fuel system componets right now all use NPT (national pipe taper) threads, and they're plenty safe and reliable, so why shouldn't the carburetor use NPT as well?

          So, I got out my drills and bought myself one of Harbor Freight's pipe tap and die sets for $13, and got to work. One problem with the inlet swap was how to plug the old inlet; the 3/8-NPT tap took care of that. No drilling required, I just ran it in, cleaned out the chips, and installed a pipe plug.

          The new inlet posed a little more complexity, mostly because the 3/8-NPT tap prefers a drilled hole of about 9/16" diameter, and the largest bits I have are 1/2". Turns out I was able to make it work anyway. I just punched the non-inlet out to 1/2" and wallowed the bit around a little, then by attaching the tap to a ratchet and carefully making many turns, I slowly hogged the hole bigger with the end of the tap itself and a few turns later, cut the threads.

          This all means that I have a newfound flexibility for inlet configurations. I can even make it into a dual inlet if I were to find a need for more fuel flow, just have to toss some pipe fittings together. For now, I've plugged the starboard side and installed a barb fitting in the port side, and run fuel from the regulator to the carb with just a piece of rubber hose. However, once I get myself some new tube nuts, it will be simplicity itself to toss in some inverted-flare adapters I already have, and hook up a hardline following this same routing.

          The cost to me so far? $13 for the tap set.


          2012 Mazda5 Touring | Finally working on the LTD again!

          Comment


            Nice setup mang!!! Are you sure that you're not angling yourself for some strip action?


            Packman

            Comment


              Quite. I do want to get to a strip eventually, just to see what it'll do, but what I really want is something that's safe and reliable. The huge HPG1 filter and 80gph pump are overkill at this power level, but I almost certainly won't have to upgrade those parts again in the future. And as Pirate pointed out to me one day, it really doesn't hurt to refer to the NHRA standard for fuel systems (max of 12 inches of rubber hose in the whole system, the rest can be any combination of steel, aluminum, or braided) when planning a system for the street. When I'm done replumbing the tank-to-pump sections and replace the rubber you see above with hardline, I hope to comply with that standard without having to spend $$$ on braided AN crap with ghey blue and red connectors that scream "I'm a 17 second Pro Street car wannabe with wheelie bars, 33x22 MT Sportsmans and BLUE anodized fuel fittings on my stock '86 305!"
              Last edited by 1987cp; 09-16-2009, 11:55 PM.
              2012 Mazda5 Touring | Finally working on the LTD again!

              Comment


                Balljoint swap ...

                ... and check out the new stance!

                I have room to fit 31" Pirelli Scorpion Zeros like everyone else is craving these days!
                Attached Files
                2012 Mazda5 Touring | Finally working on the LTD again!

                Comment


                  Just kidding.

                  Here are the actual pics, with the airshocks deflated.

                  It does sit quite a bit lower in front, though. Seems a touch lower even than when I got the car, which would be a tad less than ideal. I'll have to dig up the old pics with the cop springs and 351 motor and compare. Still, the important question is how it drives, and I'll be answering that hopefully as soon as this afternoon.
                  Attached Files
                  2012 Mazda5 Touring | Finally working on the LTD again!

                  Comment


                    Wow, it does sit a lot lower in front. Makes the 235-60-16s look bigger, though. Got any pics of the old balljoints? Did you do just the lowers?

                    *Edit*
                    On second thought, maybe it's not that much lower:


                    The rear being higher might be making the front seem a lot lower?
                    Last edited by torquelover; 11-11-2009, 12:23 AM.

                    Comment


                      The back does look a bit higher than in that old pic, doesn't it ? Though, I seem to recall you had a few items stored in the trunk when that pic was taken ... I'll have to get another pic today since it's actually been driven, since I suppose it's possible more settling had yet to take place from having just deflated the air shocks.

                      I did go for a quick drive last night. The feel is eerily familiar, like I've driven something that felt just like it ... oh wait, it has the front springs and all four shocks off the wagon! And just like on the wagon, these springs make that 1" rear swaybar feel quite stiff. The stance is OK, though I wouldn't mind it back up a touch so it doesn't "look" lowered. On the other hand, I do think this spring rate is too low, as where it used to feel like a skateboard in corners (IMO), now it really seems to jello around a bit much.

                      I measured the old springs and ran them through an online spring rate calculator (I got a much different answer when I did it by hand), and the rate came out at almost exactly the 700 lb/in mrltd lists for the later police cars. I need to measure the wagon springs next time they're out, but if their current effective rate really is around 430-450 lb/in, perhaps I'd benefit the most from an intermediate value like 550 or 600 for more ride compliance without wallowing. A 12" 600 lb/in spring should sit a tad lower than the stock 700s anyway, so it might be just about right without either spacers or trimming. (I measured the 700s at 12.75" tall at the middle of the top coil, dunno if that method is correct though.) On the other hand, I could just cut more off the wagon springs till it feels right, and then add thicker insulators of some sort to correct the height, but I might end up cutting a LOT off the spring, plus I seem to be finding precious little information pertaining to spring insulators of different thicknesses. Ho, hum.

                      Meanwhile, I guess I'll just enjoy the ride.
                      2012 Mazda5 Touring | Finally working on the LTD again!

                      Comment


                        Oh yeah, I did only do the lower balljoints, as the uppers will be replaced when I install the civilian upper control arms Scott sent me, which he reports to have had the balljoints replaced recently. Still very, VERY nervous about finding an alignment shop, though I at least have a couple of suggestions, one from a neighbor and one from a local member of
                        SBFtech.com who interestingly reports doing all his own alignment work on his project vehicles, using a shop only for his stock daily drivers.

                        As far as condition, while the old joints were obviously a good deal looser (easy to move the stud around by hand, for example), I didn't really notice any hugely worrisome slop either. Not bad for what you seemed to indicate is a 200k-mile balljoint. It will be very interesting to see how tight the frontend feels after getting all the urethene control arm bushings in there.

                        One possibly paranoid concern, I wonder how enormously it will affect the alignment settings if the nose moves up or down an inch or so after having it aligned. I guess I could use a straightedge and angle finder and try to find out .....

                        And an amusing anecdote, the p/s balljoint stud's cotter pin hole lined up nicely with the castle nut on the first go-round. The driver's side I had to pop back out twice and twist the stud before I was able to get the pin through it, though I felt much better doing that than attempting to drill extra holes in the stud. Thankfully, the new stud popped back out just fine with a few careful hammer blows to the spindle, unlike the old ones that forced me to break out the dreaded pickle fork and beat on it in a pretty major way while holding the hammer with both hands.
                        Last edited by 1987cp; 11-11-2009, 05:31 AM.
                        2012 Mazda5 Touring | Finally working on the LTD again!

                        Comment


                          Looking mean!!!


                          Packman

                          Comment


                            lol

                            Too bad the driving feel now sucks.
                            2012 Mazda5 Touring | Finally working on the LTD again!

                            Comment


                              Originally posted by packman View Post
                              Looking mean!!!

                              X2!!!! One of the nicest 4-doors ive seen in a while.

                              Comment


                                :lol: You should see it close up .... (though granted, I've only developed that reaction since I've gotten out of the habit of driving seriously crappy cars)

                                Say, being a SBFTecher and all, I don't suppose you know much about setting alignments at home? Supposedly John Deere Green can get it pretty close just by eye, and I suppose I might be able to harangue that one guy in south Lansing into coughing up some tips. If I do end up getting different springs entirely (and keeping in mind that I still haven't attempted to measure the camber change with respect to changes in ride height), it might be nice to delay a professional alignment until the "final" ride height is more certain.
                                Last edited by 1987cp; 11-11-2009, 05:21 PM.
                                2012 Mazda5 Touring | Finally working on the LTD again!

                                Comment

                                Working...
                                X