
Ideas courtesy of Scott aka Lincolnmania!
First thing you NEED to know is where to purchase the replacement dew wipe material, unless you are one of the lucky ones who can find some coveted NOS pieces..*cough* Tom *cough*. JCWhitney offers the replacement dew wipe material, and it is sooo very close to the original that one would never know that anything was replaced after the install.
Here is a link to the dew wipe material YOU will need if you decide to do this.

EDIT: JC Whitney no longer sells this item follow this link for purchase:

And an image displaying the dimensions.
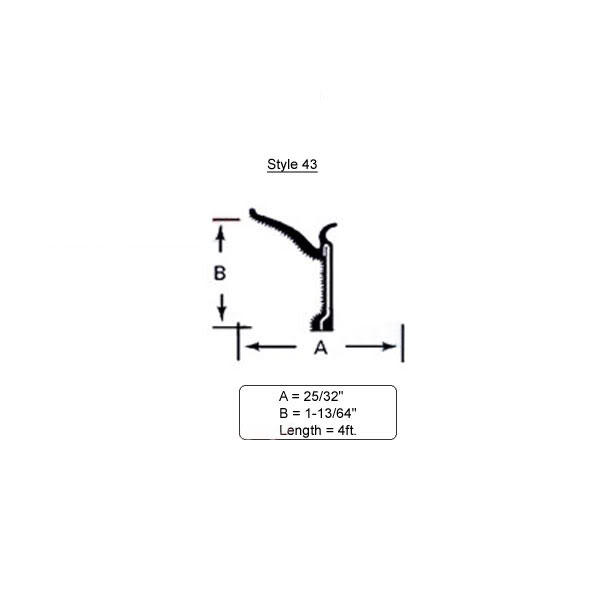
Just to make things clear it is style 43. And the price is beyond fare at just 21 dollars.
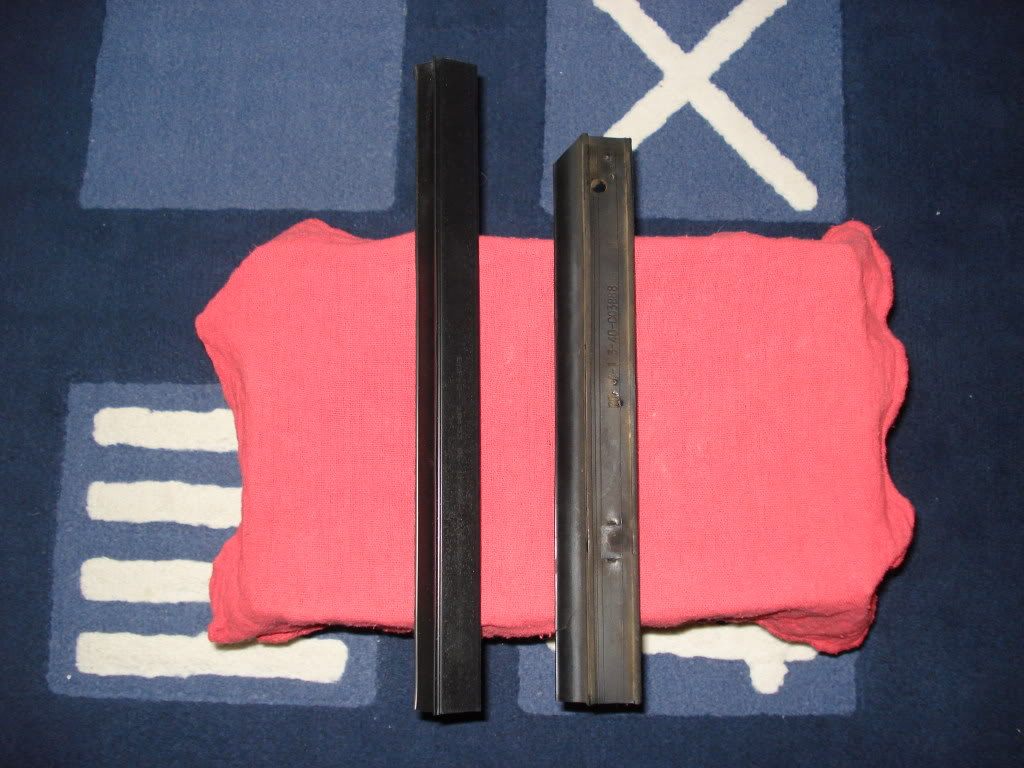
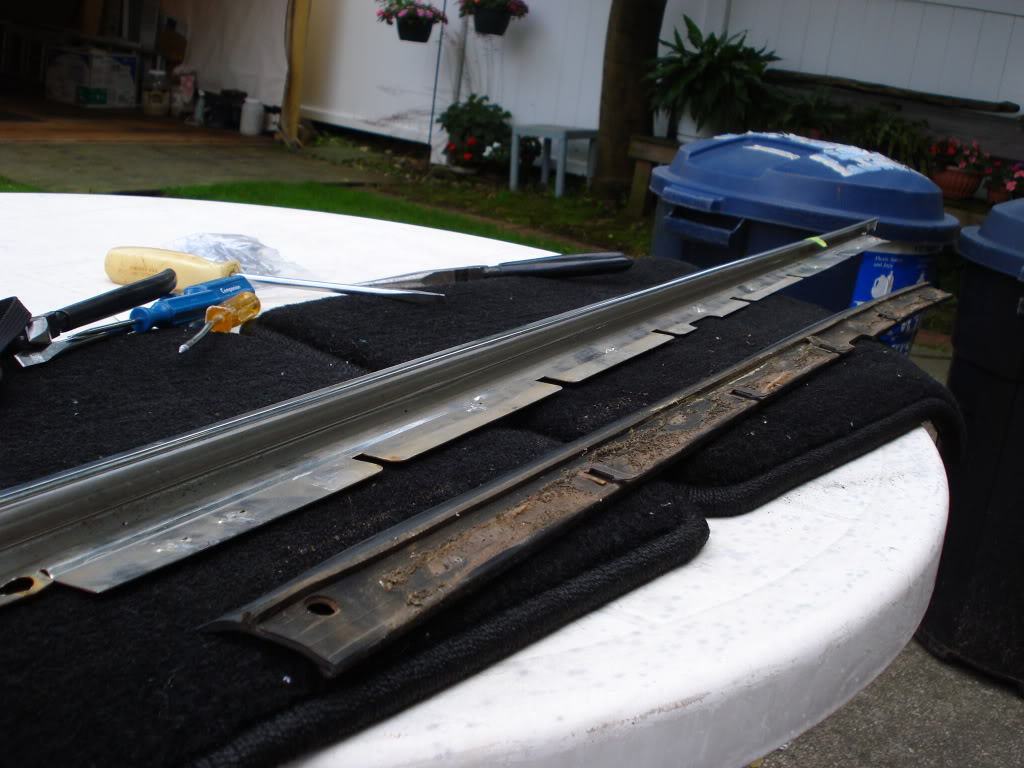
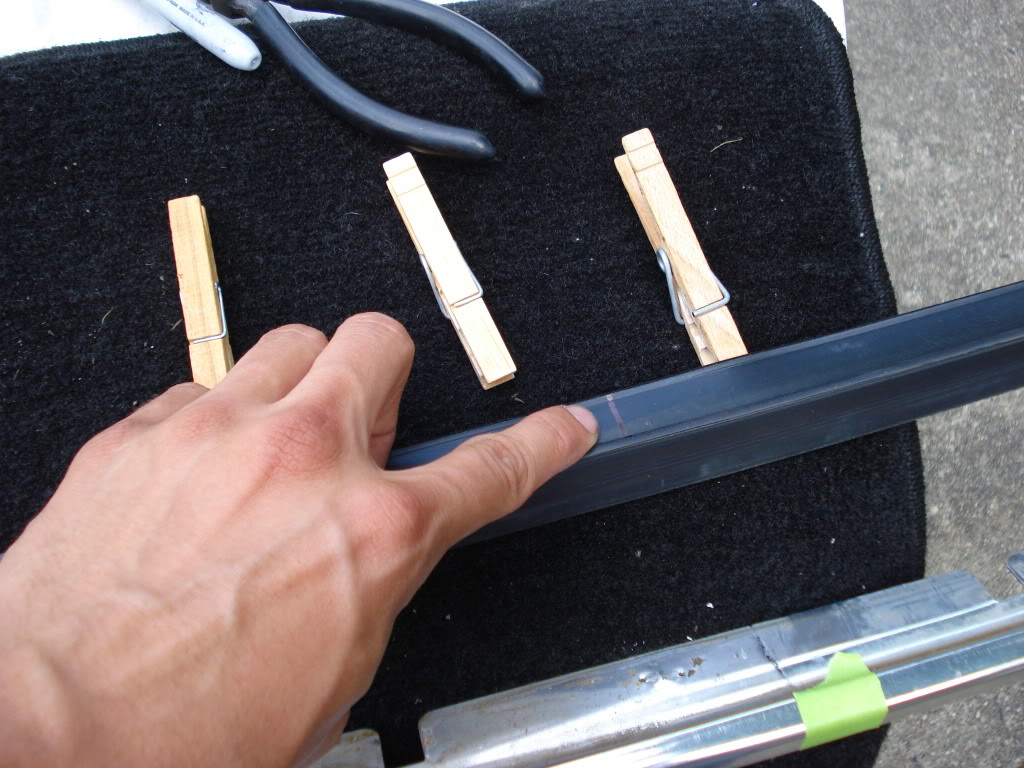
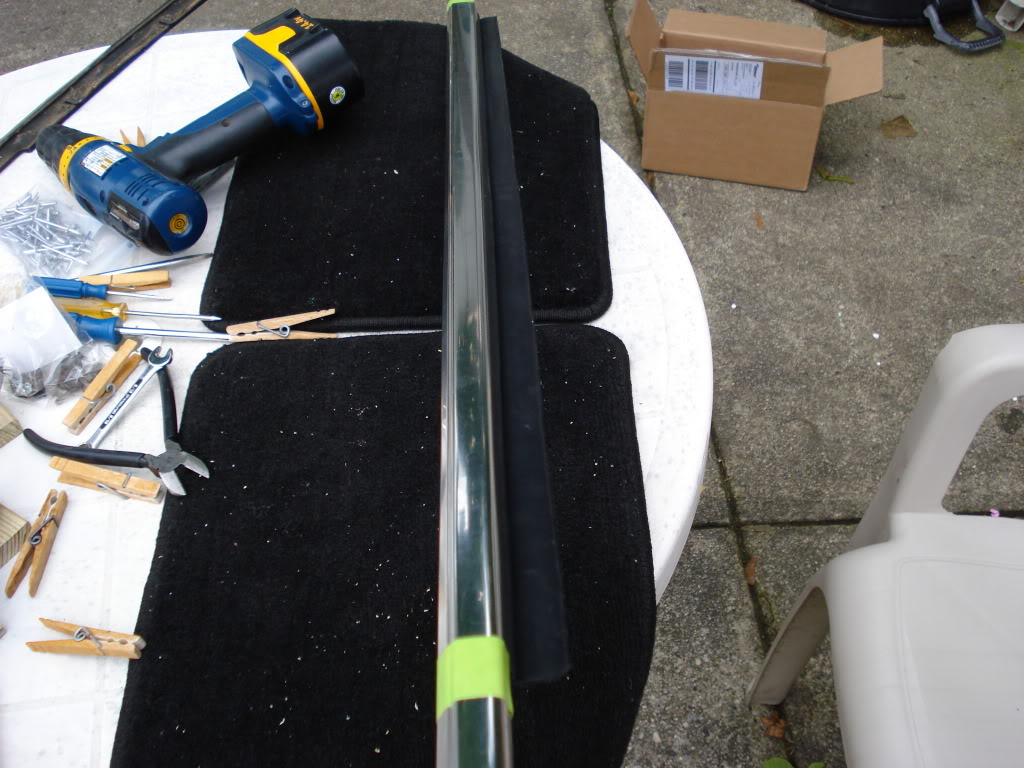
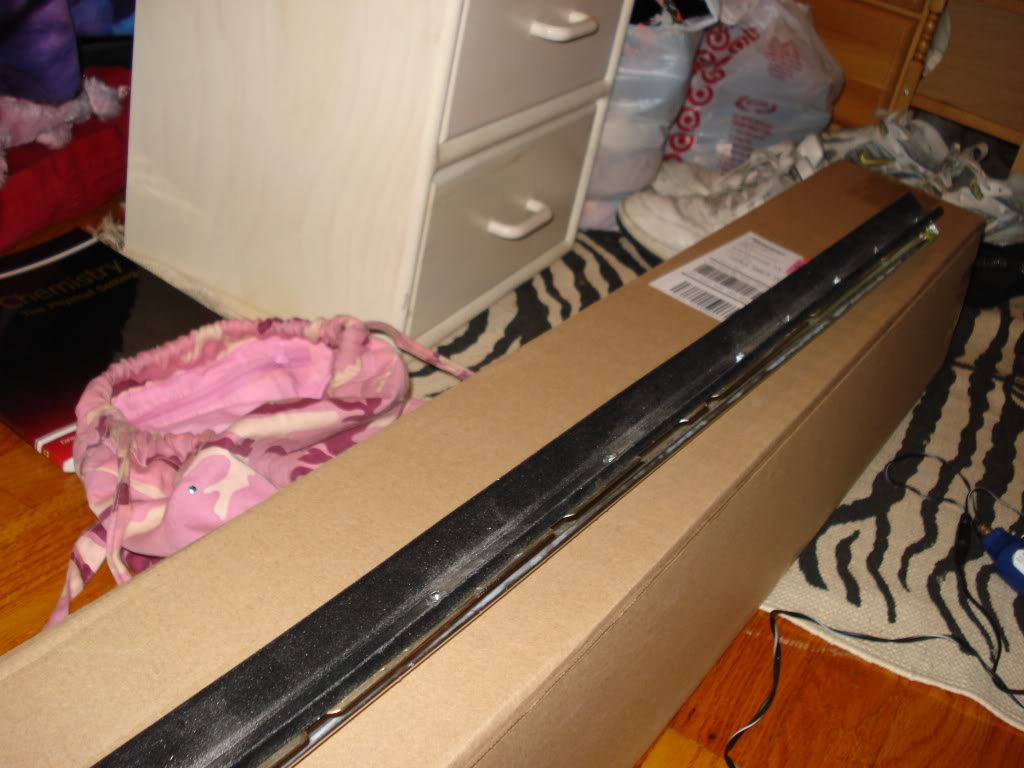
Here are some pictures comparing Fords original dew wipes to JCWhitneys' Fairchild Industries style 43 replacement dew wipe material.
The replacement is on the LEFT and Fords original is on the RIGHT.
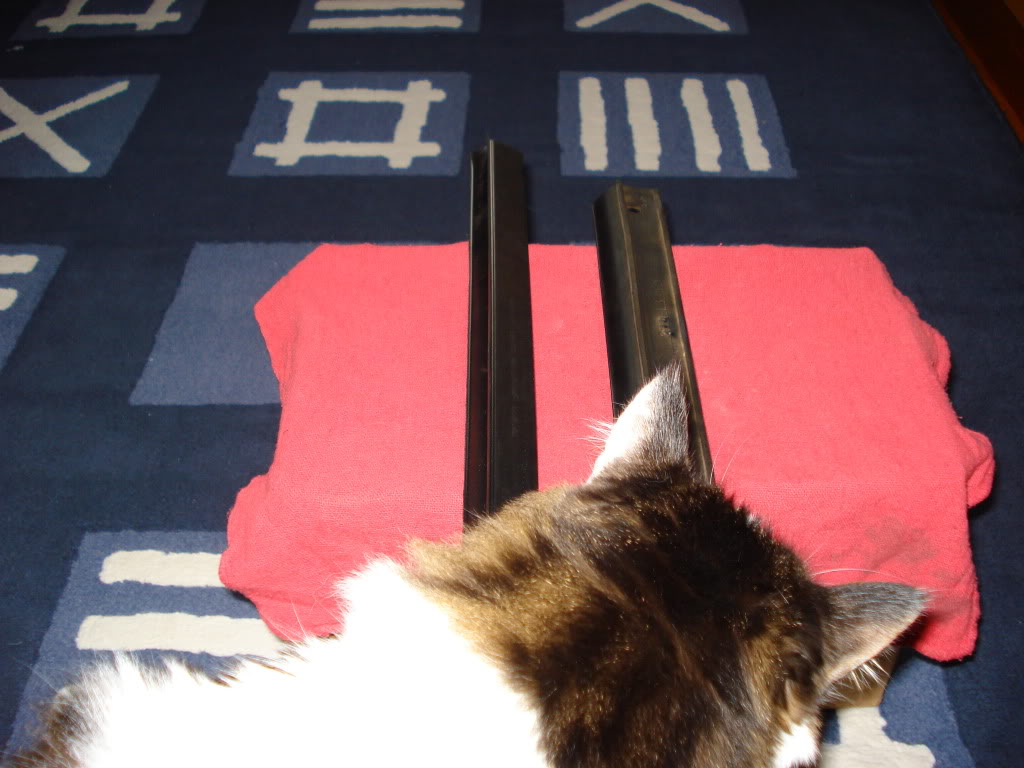
Damn cat.
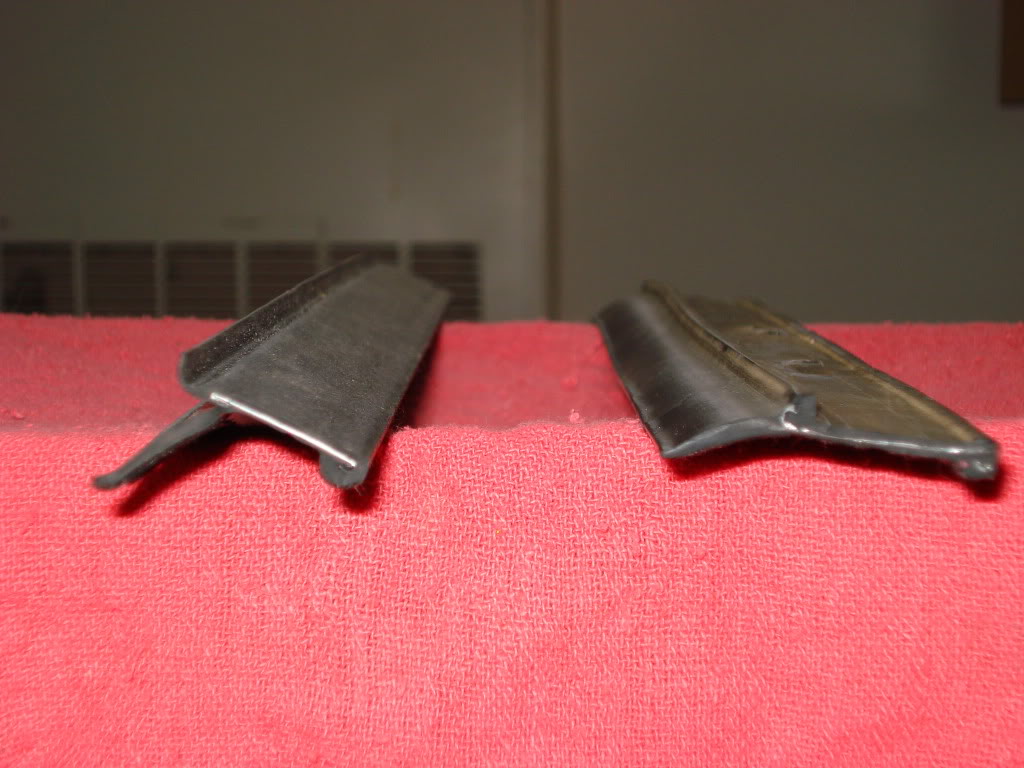
You can see that Fords original one is very flat, while the replacement is not. This helps create a better seal against your door glass.
Now why do this?
Honestly...why NOT?
Dew wipes keep pressure against the door window glass keeping out rain from your doors internals, it prevents foreign objects from entering as well, it wipes dew and rain from the window so you can see your mirrors, and it helps prevent your door glass from rattling around while you are driving and such.
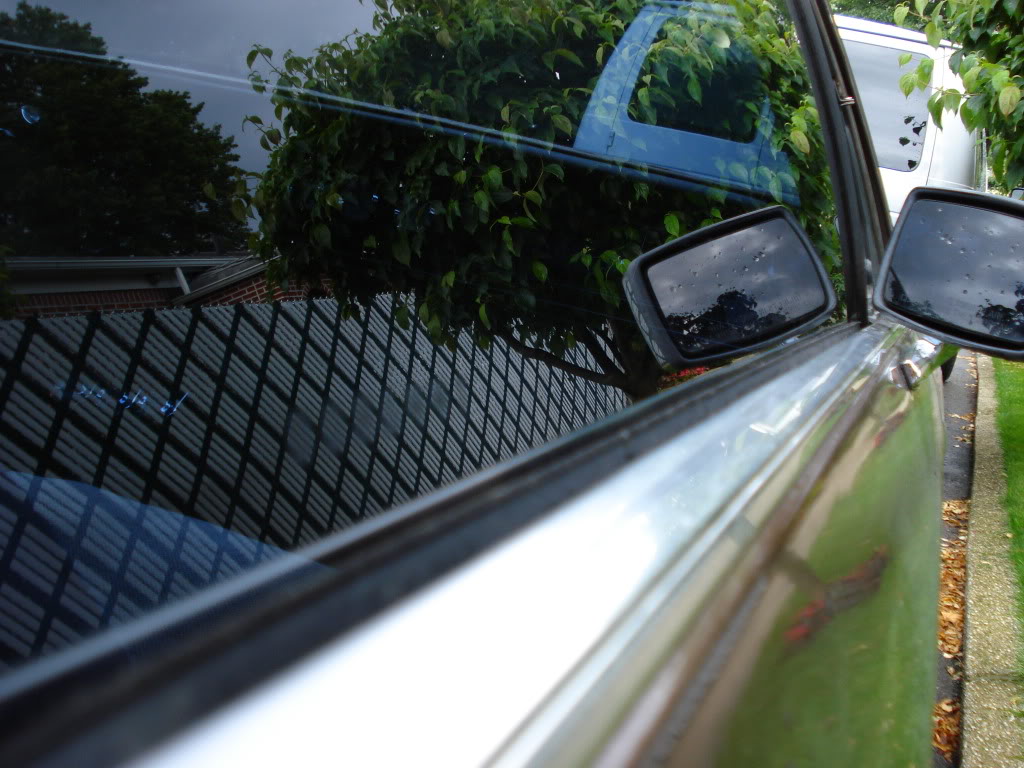
BEFORE
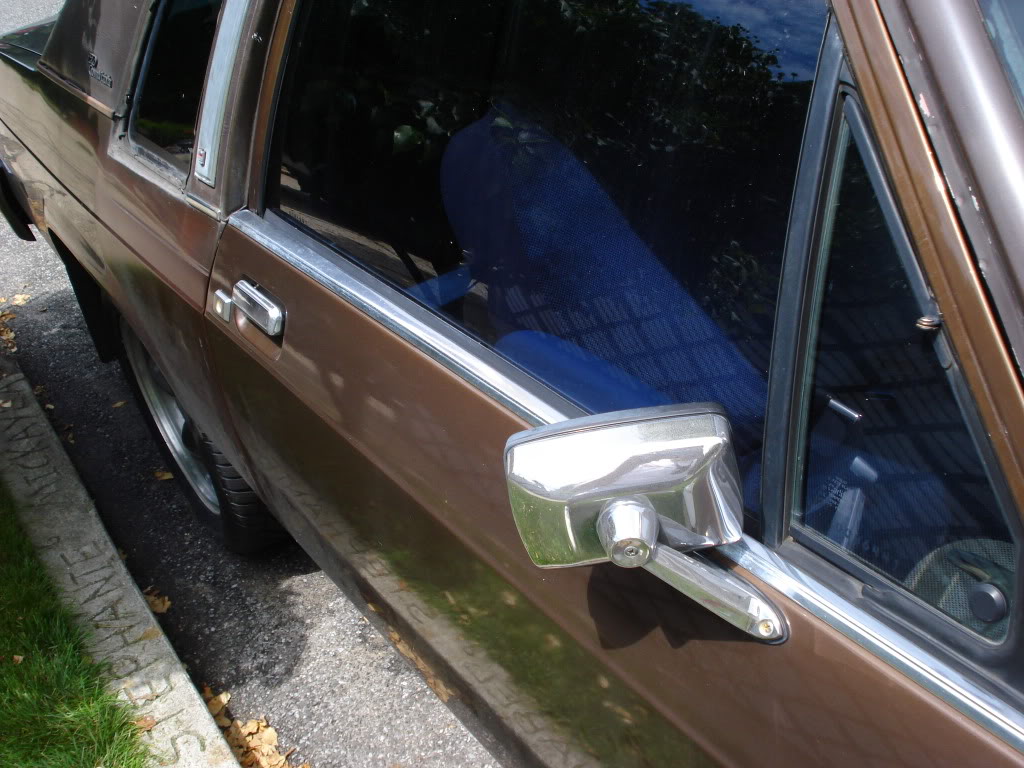
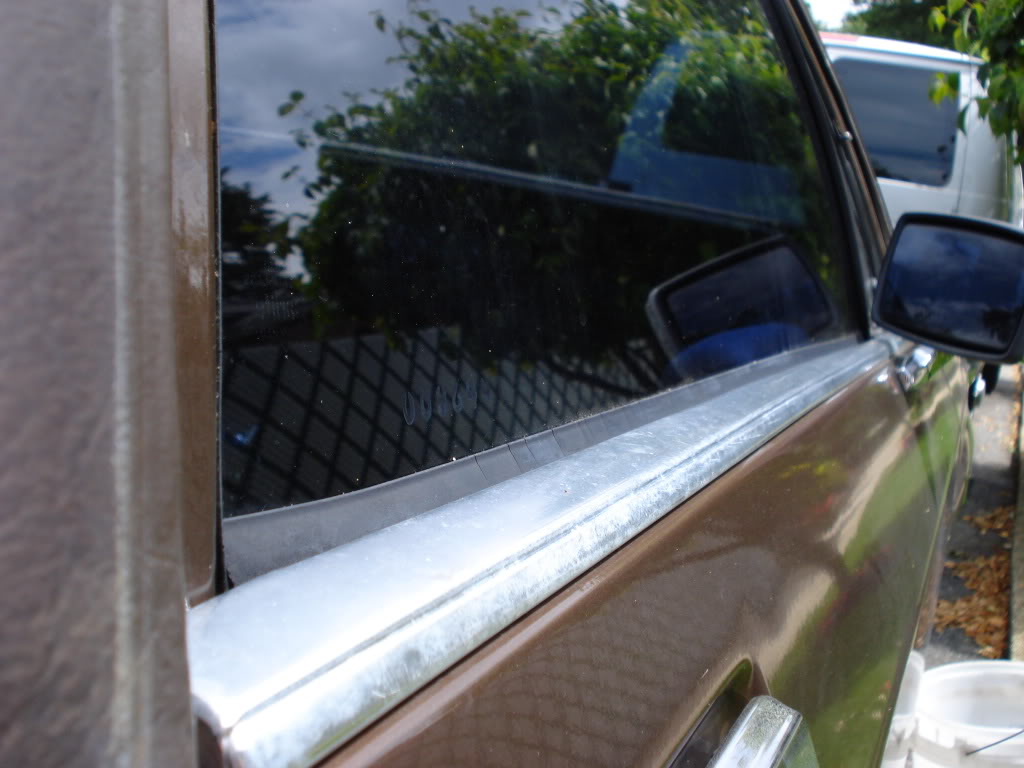
To get started with the install you will want to take some tape and make marks as to where you want the dew wipe to reach on the window. Odds are they shrunk and are allowing large quantities of water to come into your door. Marking it will allow you to see where you need to cut the material and eventually where the dew wipe should start and end on the dew wipe trim.
Below I have marked where I would like the new dew wipe to reach.
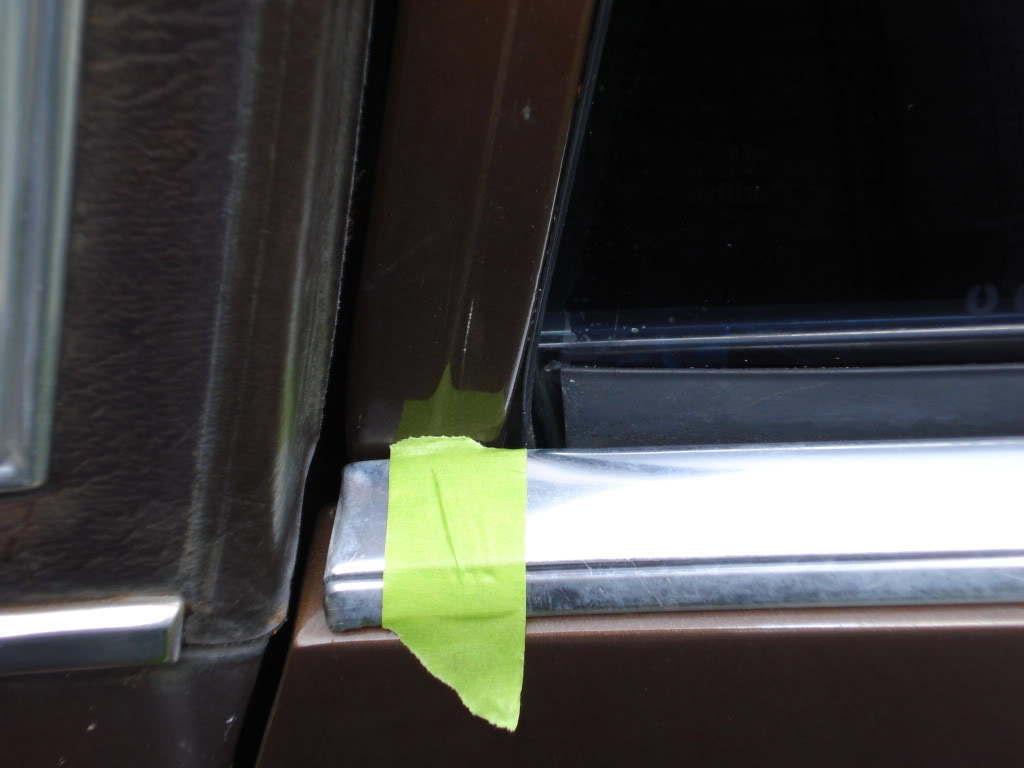
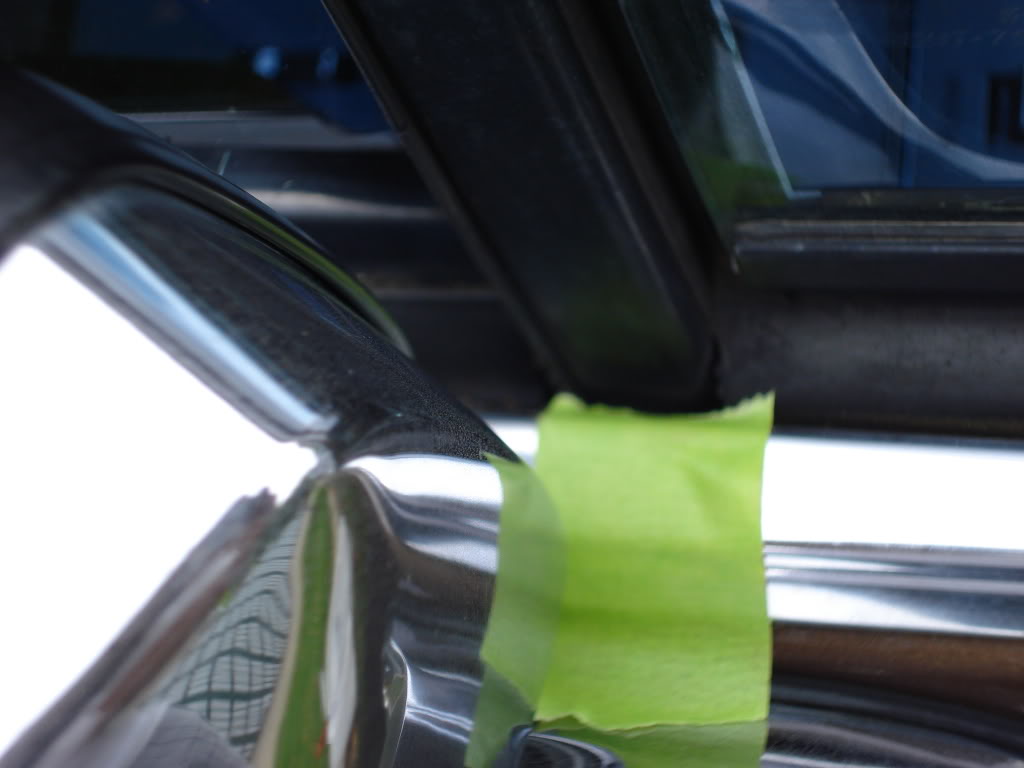
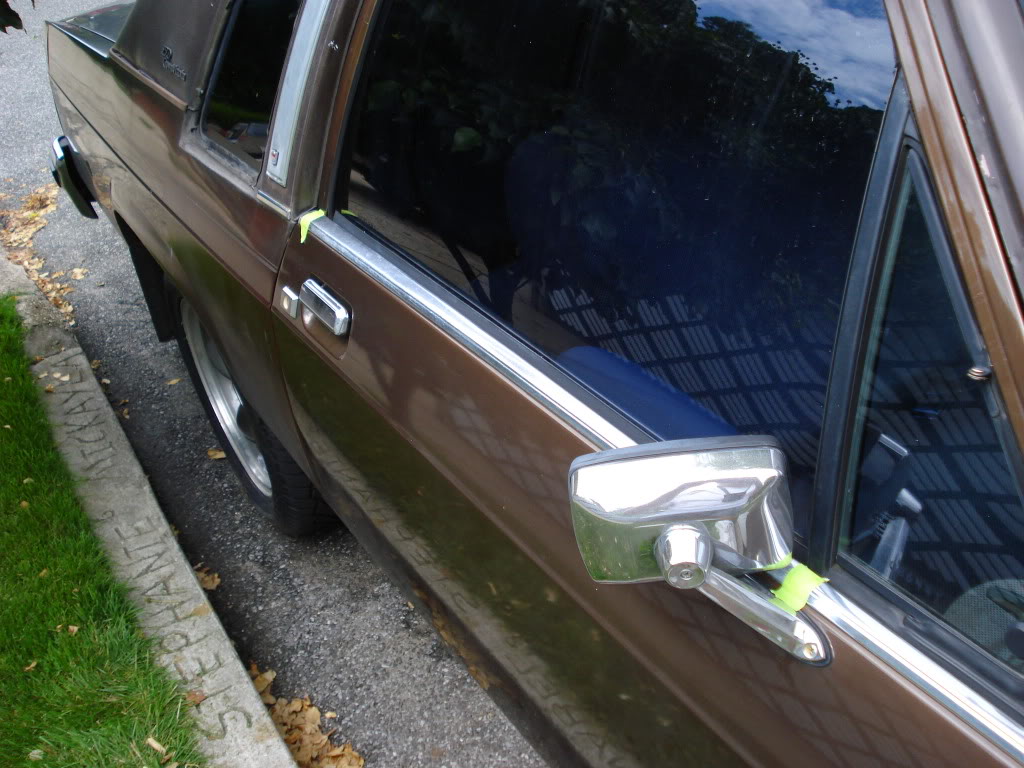
You can see how much more space I will be filling up by installing the new material.
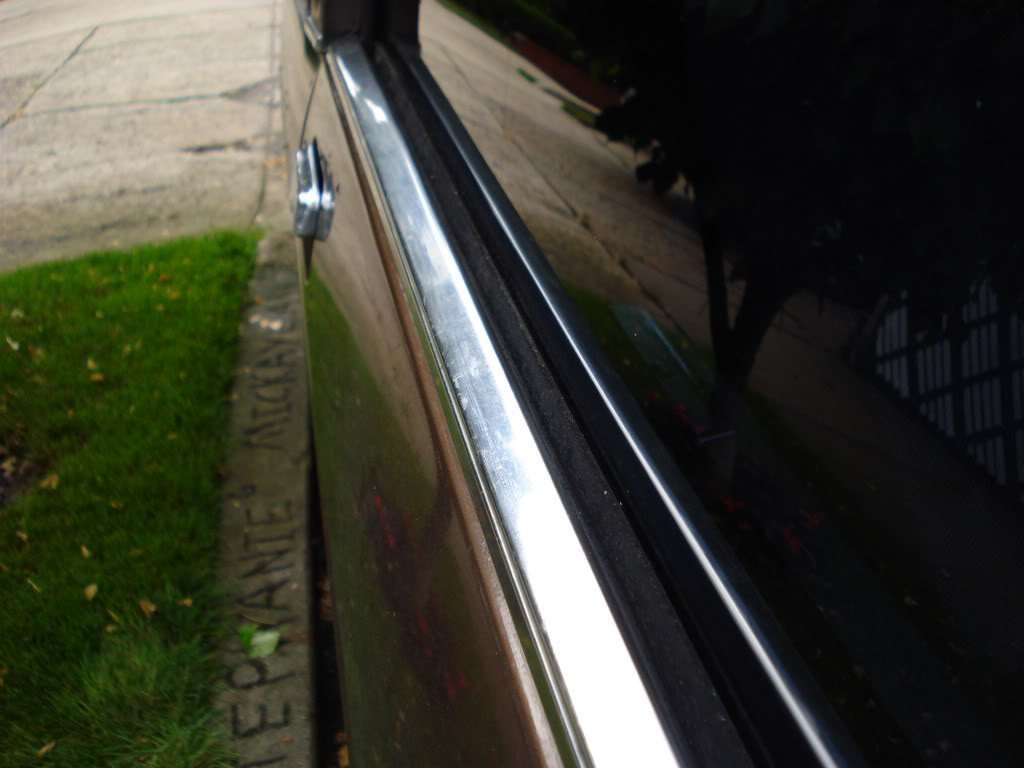
Next you have to remove the door panel of the respective door you intend to replace the dew wipe on. You NEED to remove it because three screws are preventing you from just pulling up the dew wipe from the outside. The three screws are located right above the green tape marked in the photos below.
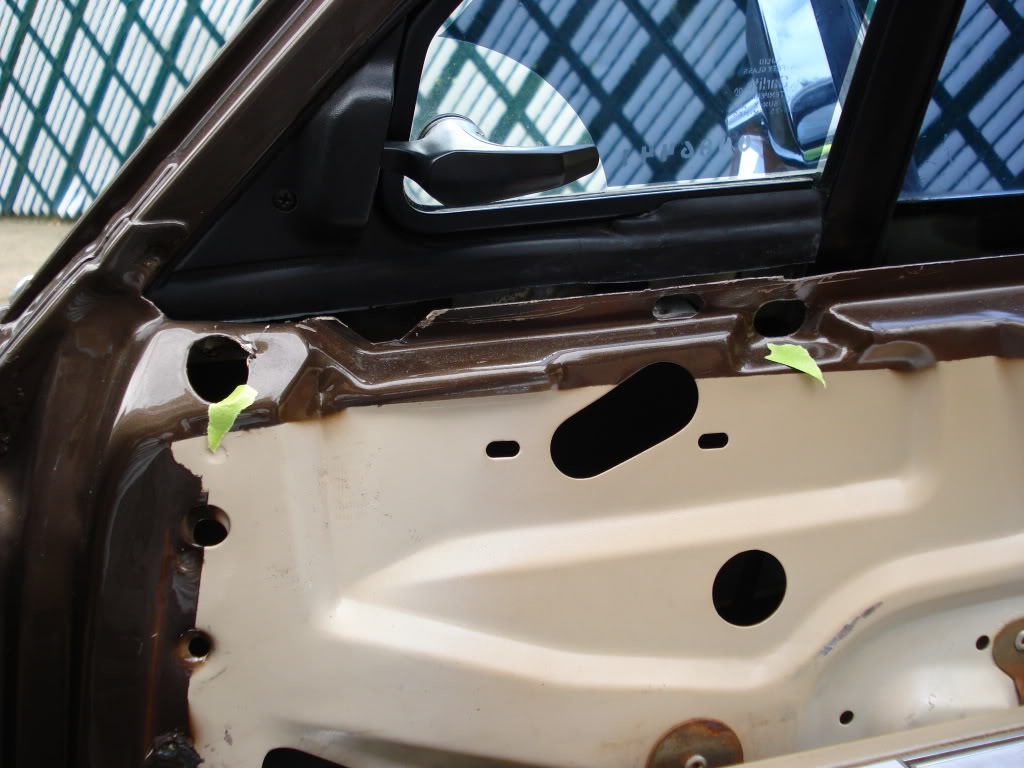
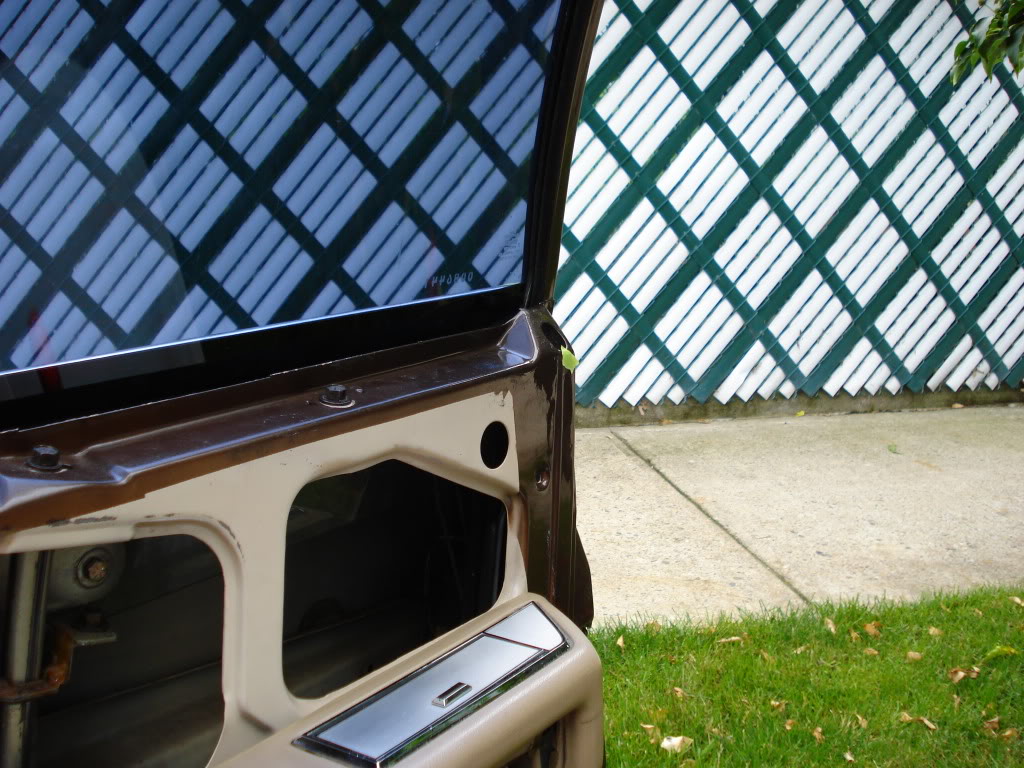
One on the beginning, one on the vent window mount and one on the end.
Next you need to loosen up the mirror screws. *WARNING* You may strip the heads of the screws if you do not use some rust penetrant on the threads of the screw found within the door internals first.
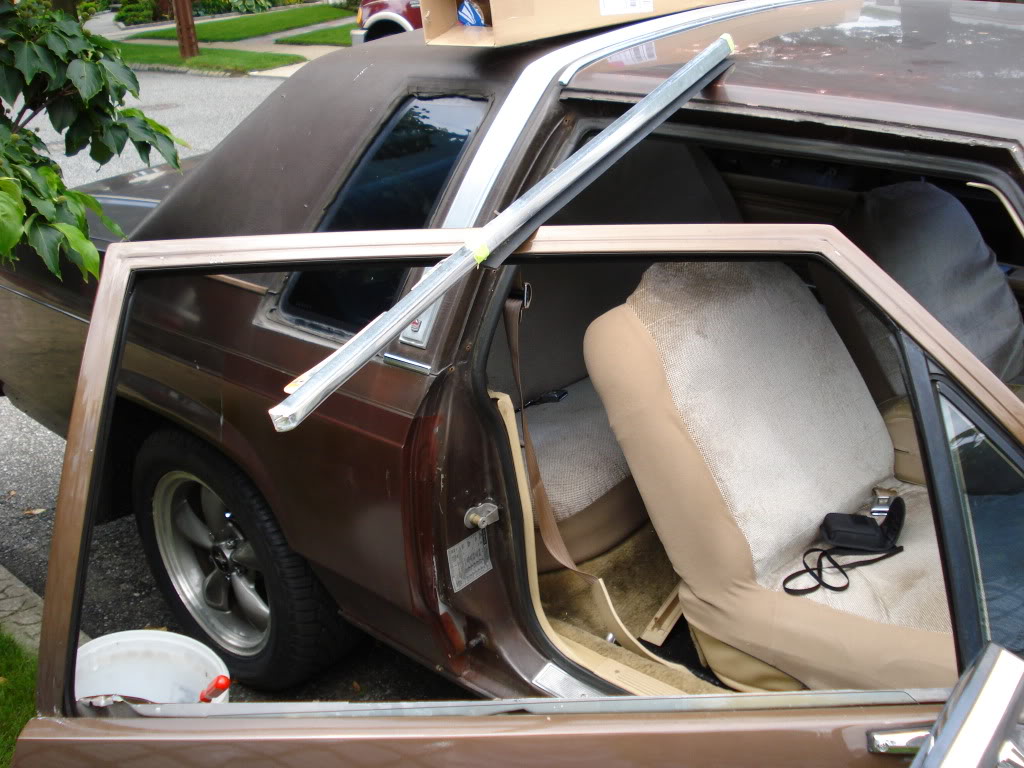
Here is the mirror loosened up and allowing the dew wipe enough clearance to be removed.
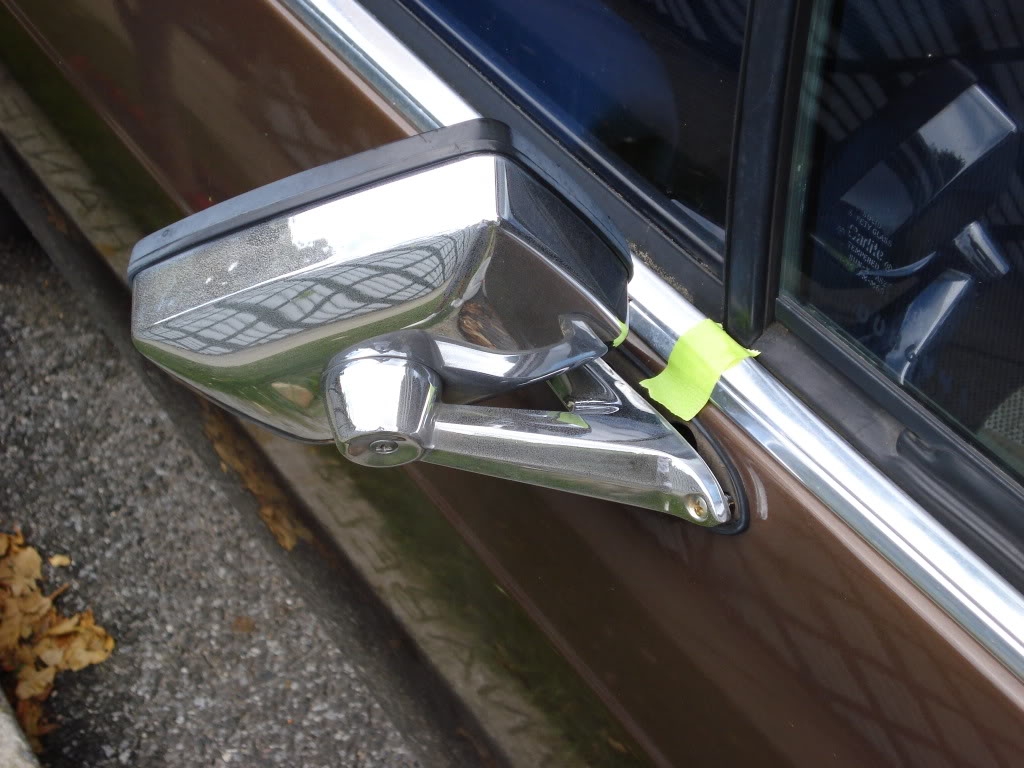
After the mirror is loosened you can now pull on the dew wipe (I like grabbing on to the dew wipe material) starting from above the exterior door handle working your way towards the front of the vehicle. It may give you some trouble along the way, but just wiggle and jiggle it in your hand till it is completely removed.
Removed from vehicle.
Now take the old dew wipe to a comfortable working space, because you will be working on it for quite some time.
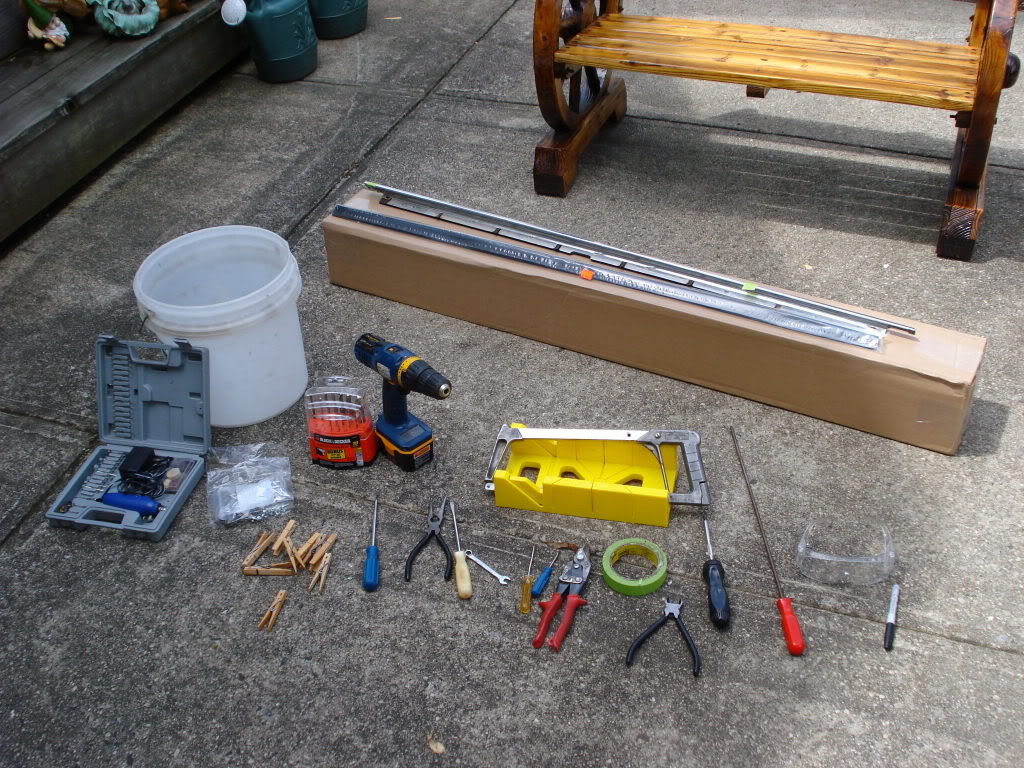
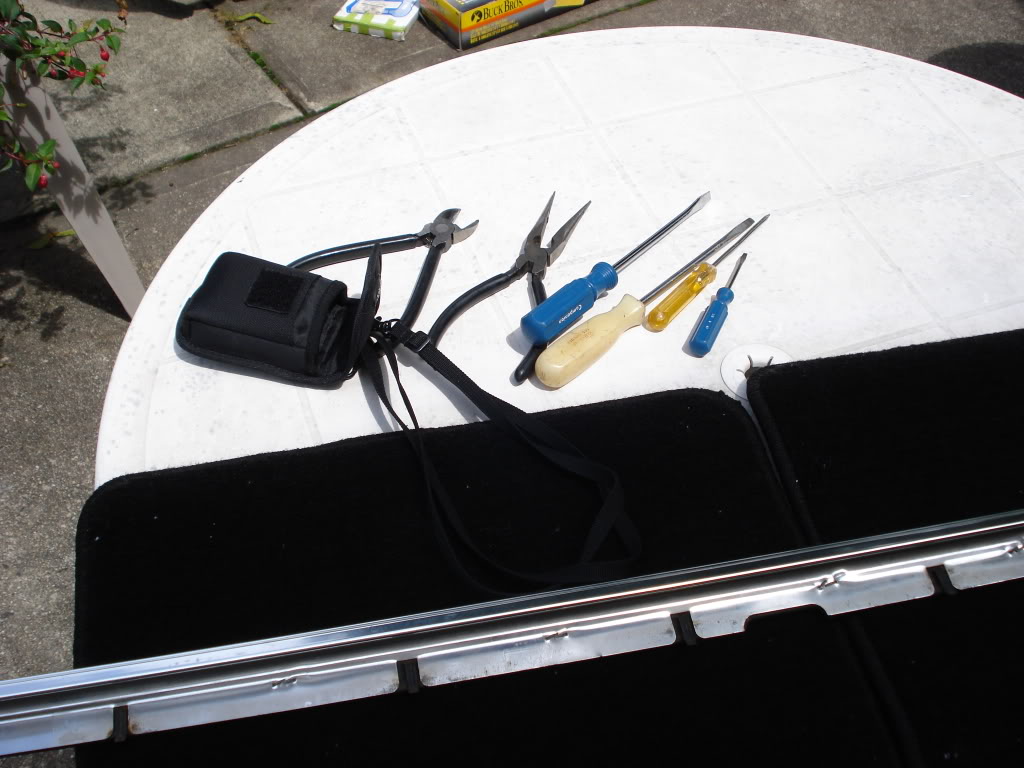
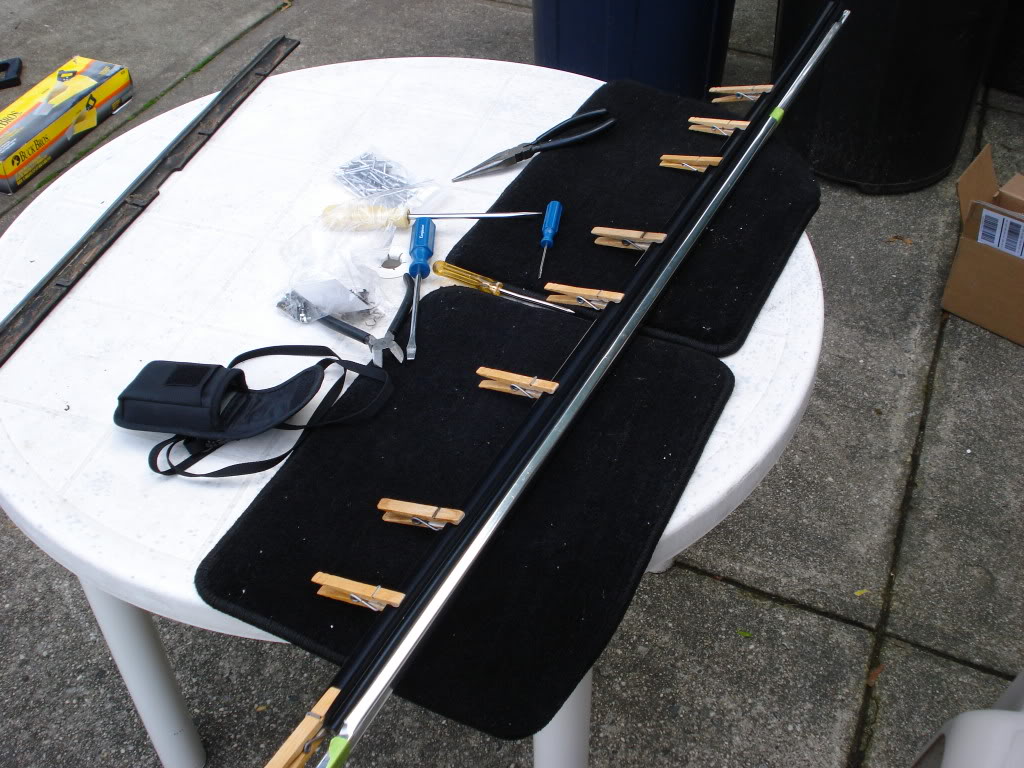
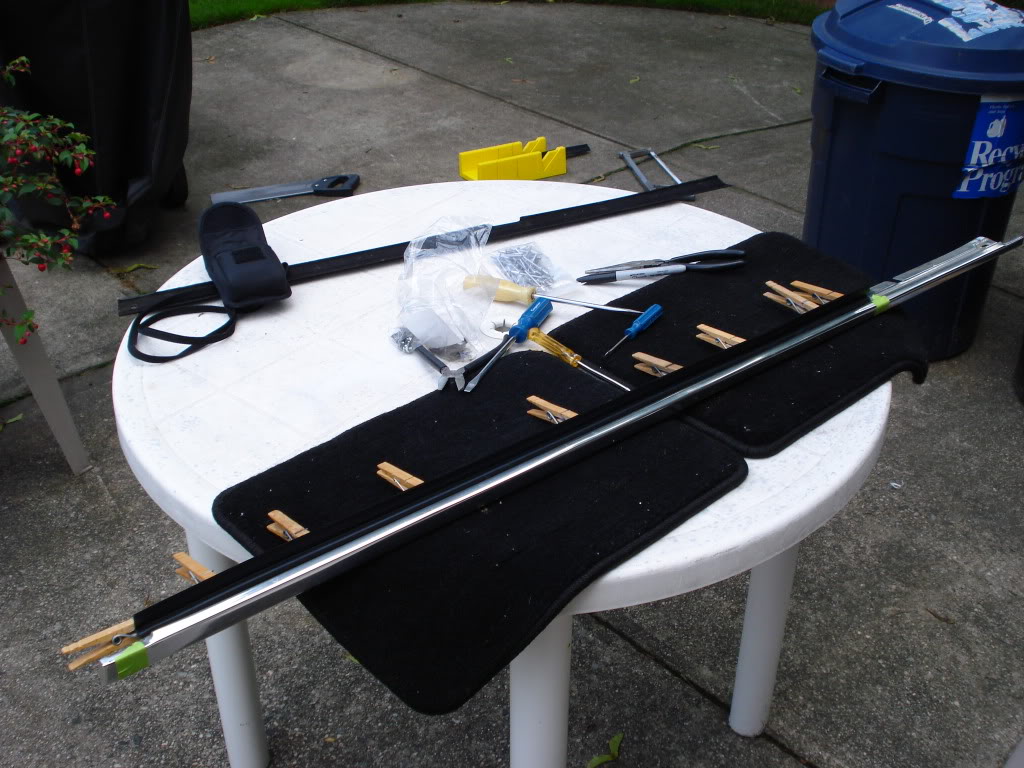
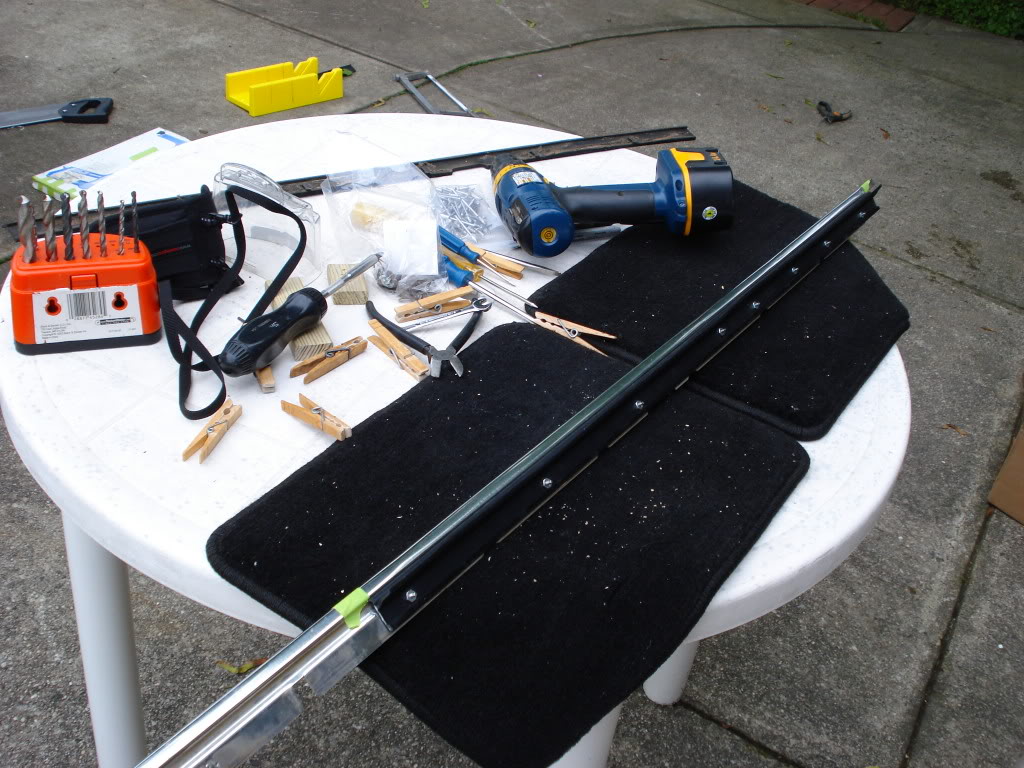
Here are all the tools I used or could have used for this entire install.
Next thing to do is to remove all of the staples currently holding the dew wipe material to the dew wipe trim.
Here you can see all of the staples holding the two pieces together.
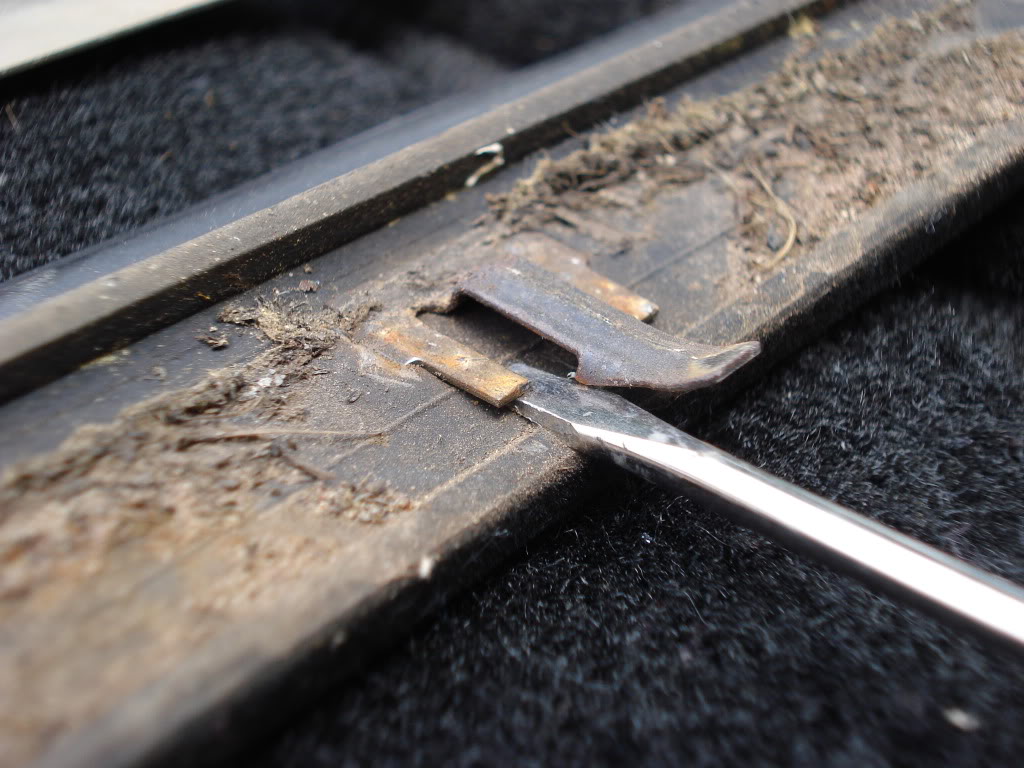
These staples are really strong. I needed to use an ice-pick to get the staple raised. *WARNING* Please be careful during this process.
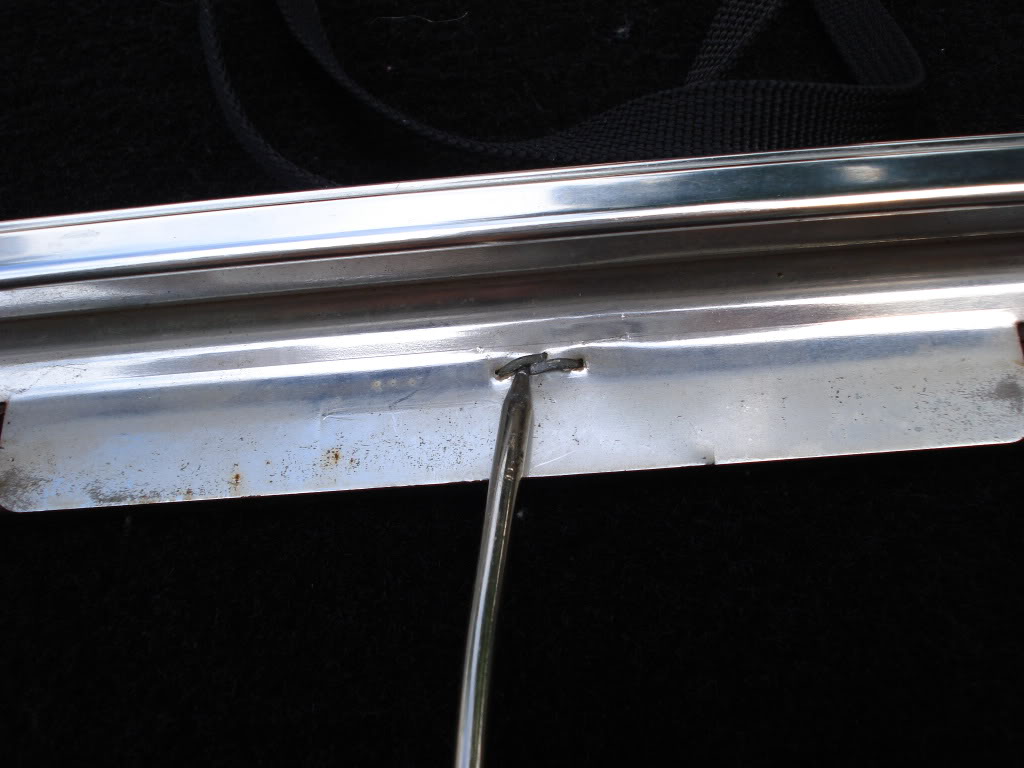
Then I uses a flat head screw driver to make the staple ends rise up.
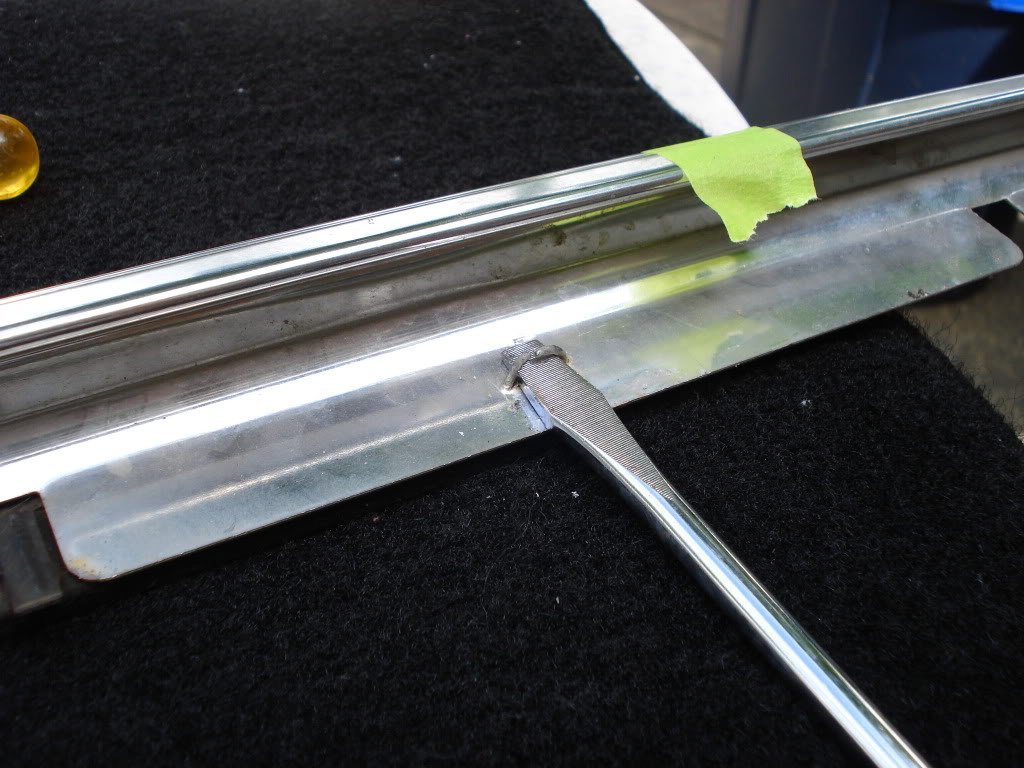
Now flip the trim over and use the flat head screw driver to fully remove the staple.
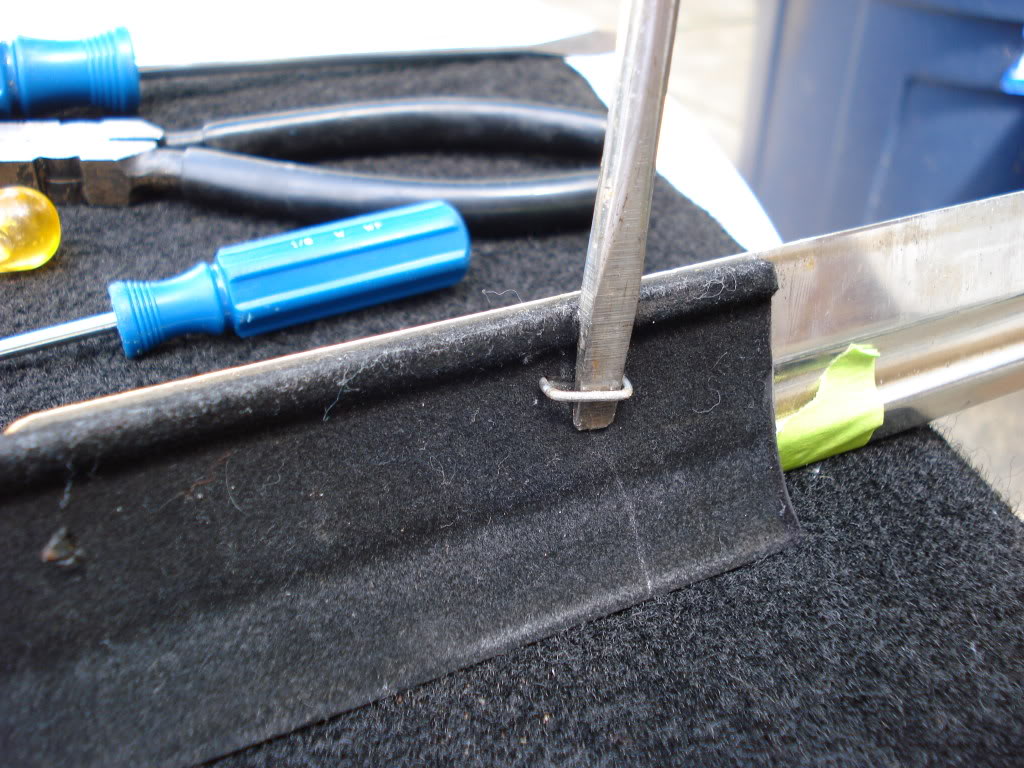
Staple fully removed.
The two pieces separated.
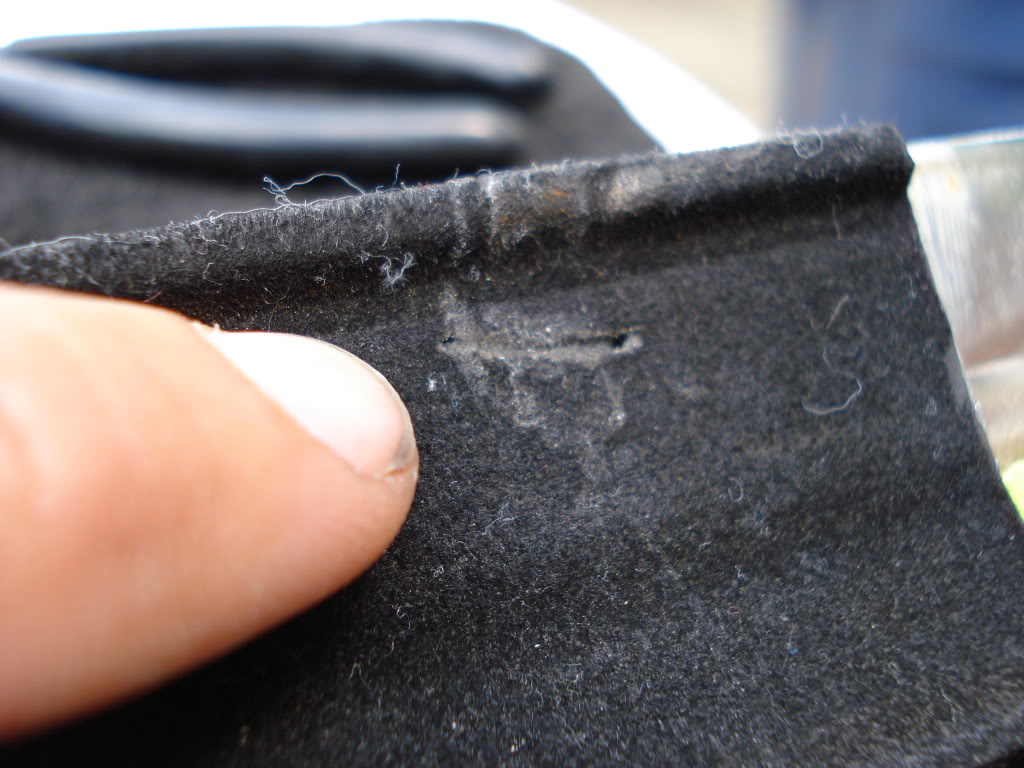
** The clips that are left on the old dew wipe material can be used if you really want to use them but it is not at all necessary. I did this install on both of my doors and they are not loose or coming loose at all. So I would say you would be fine as well. But if you want to remove it just push a tiny flat head screw driver underneath the clip and twist.
Once pried up, you can use needle nose pliers to remove the clip from the material.
Clips removed.
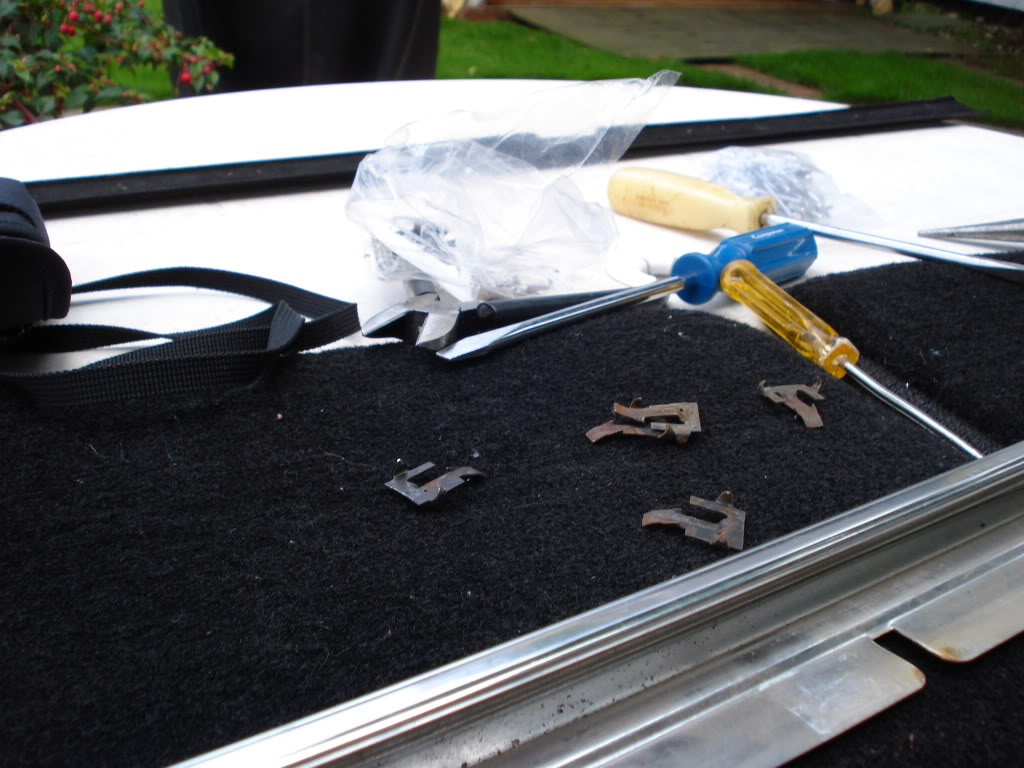
If you decide to reinstall them in the new material you will need to drill tiny holes then insert the clip fastener ends into the two respective holes you drilled and use some GOOD tough pliers to crush the clip ends securely fastening the clip to the new dew wipe material.**
Now that the two pieces are separated (dew wipe trim and dew wipe material) you can begin the reassembly.
To do this you will need some type of temporary fastener. I decided to use some clothes pins.
Begin by placing the new dew wipe material onto the dew wipe trim. Use your tape markings as a guide as to where the wipe will begin and end.

Mark where you need to cut the new dew wipe material.
Then cut.
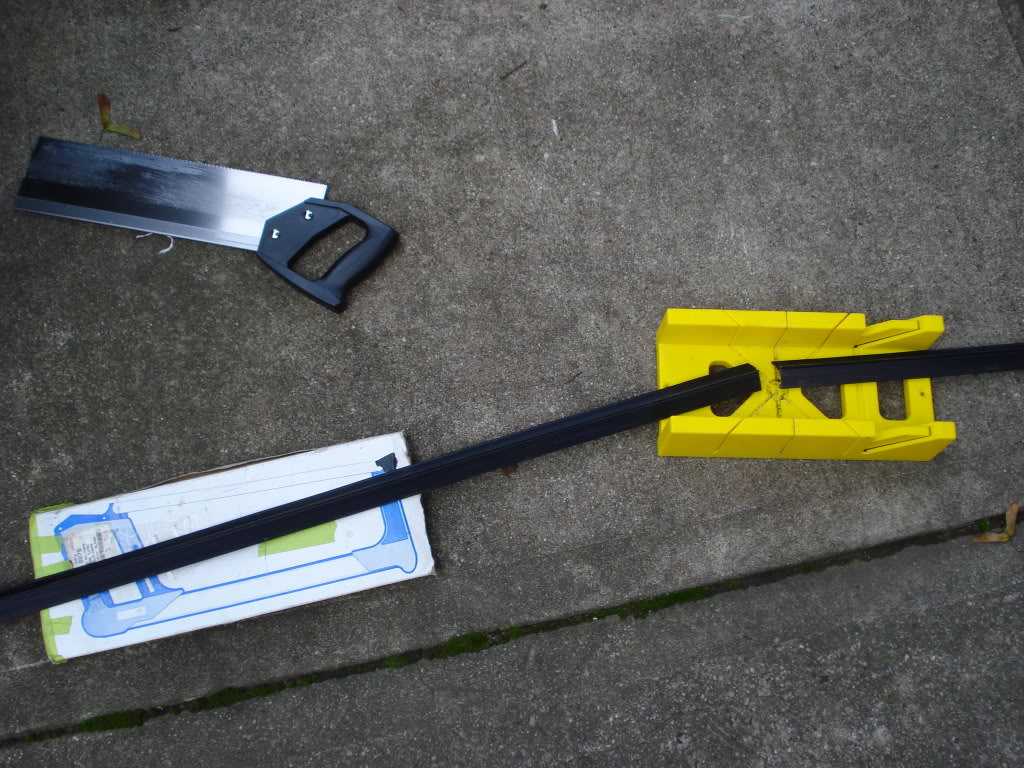
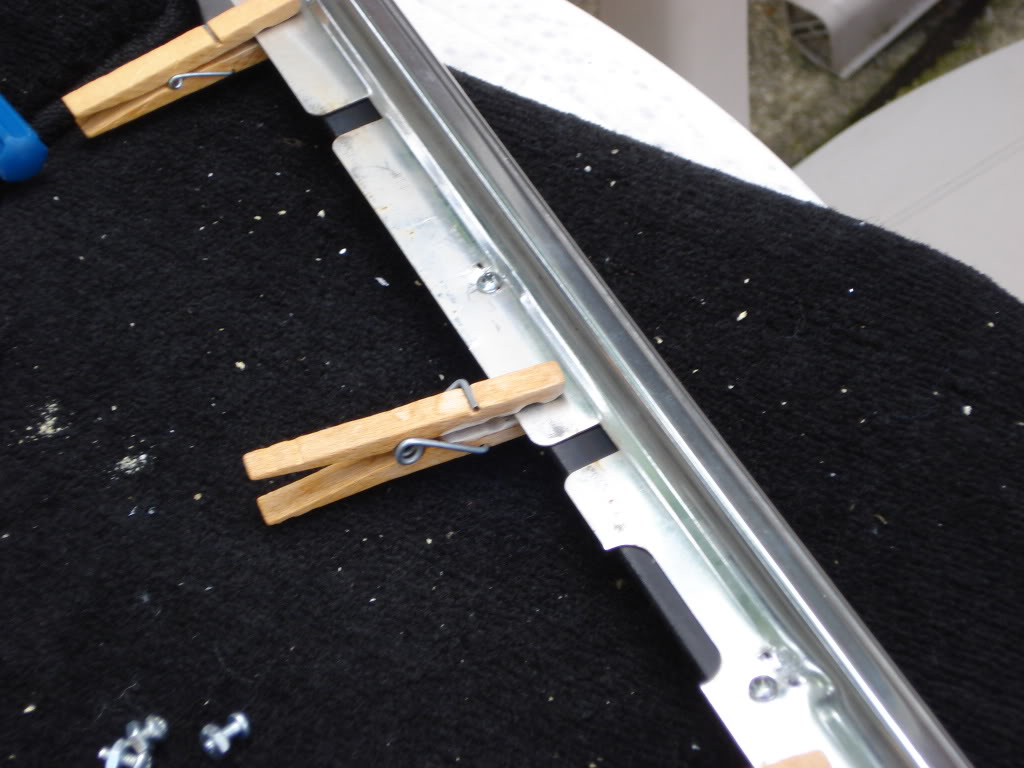
Now reassemble the dew wipe on the dew wipe trim using your preferred technique. The clothes pins really work well.
Now you have two roads you can follow. I had both tiny nut and bolts as well as tiny rivets to use to secure the trim to the new dew wipe material. I decided to use the nuts and bolts because I did this on my first install (drivers side door) and it work great, AND rivets are unforgiving. Nut and bolts can easily be removed and reinstalled.
Either road you choose you will have to drill some holes into and through the dew wipe material and dew wipe trim. You can screw and rivet as much as you prefer. The more the merrier. I drilled near the locations the staples were in.
Here you can see the tiny nut and bolts I used as well as some installed on the trim.

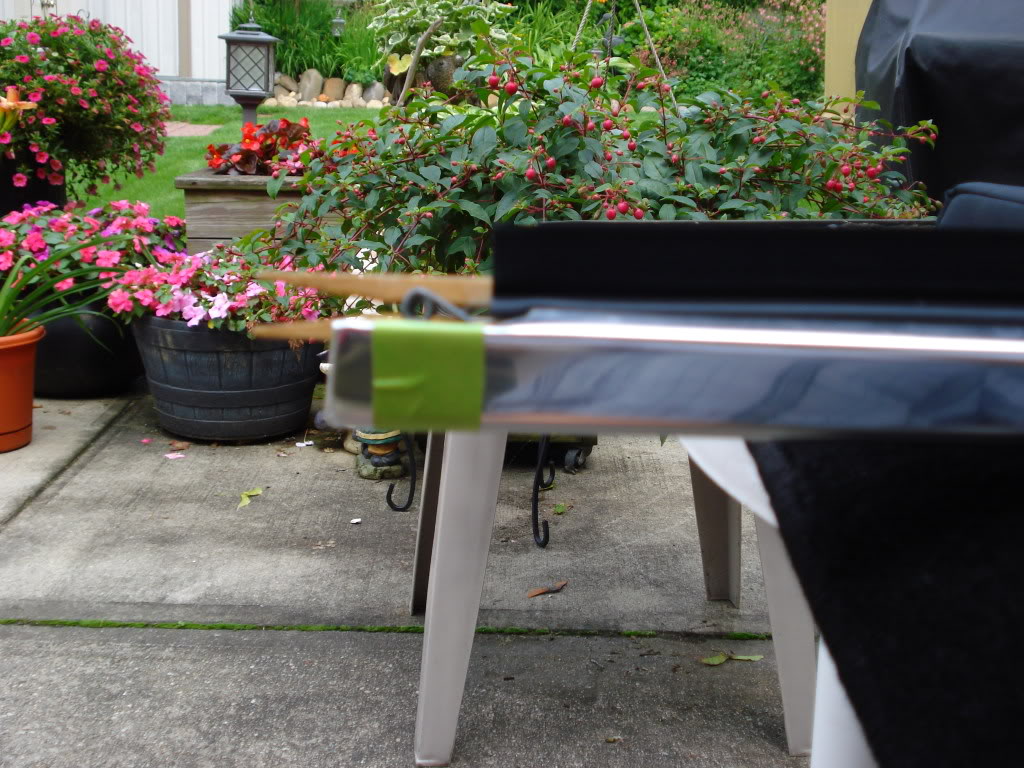
Here it is basically complete and ready to install, but not so fast because the length of the bolt I used is too long and would horribly scratch and scar the window if I attempt to install it as is.

Here you can see just how far the bolt sticks out.
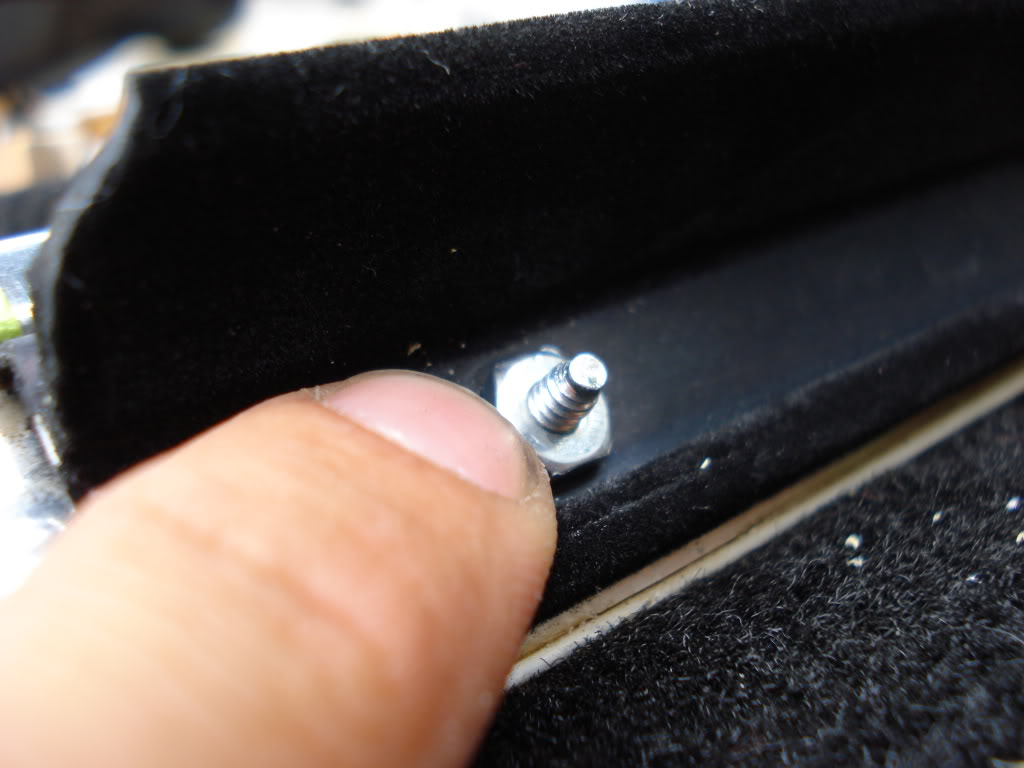
To chop that length down I used a rotary tool with some fancy attachment. And remember to wear protective goggles because a lot of sparks and metal shavings will fly around.
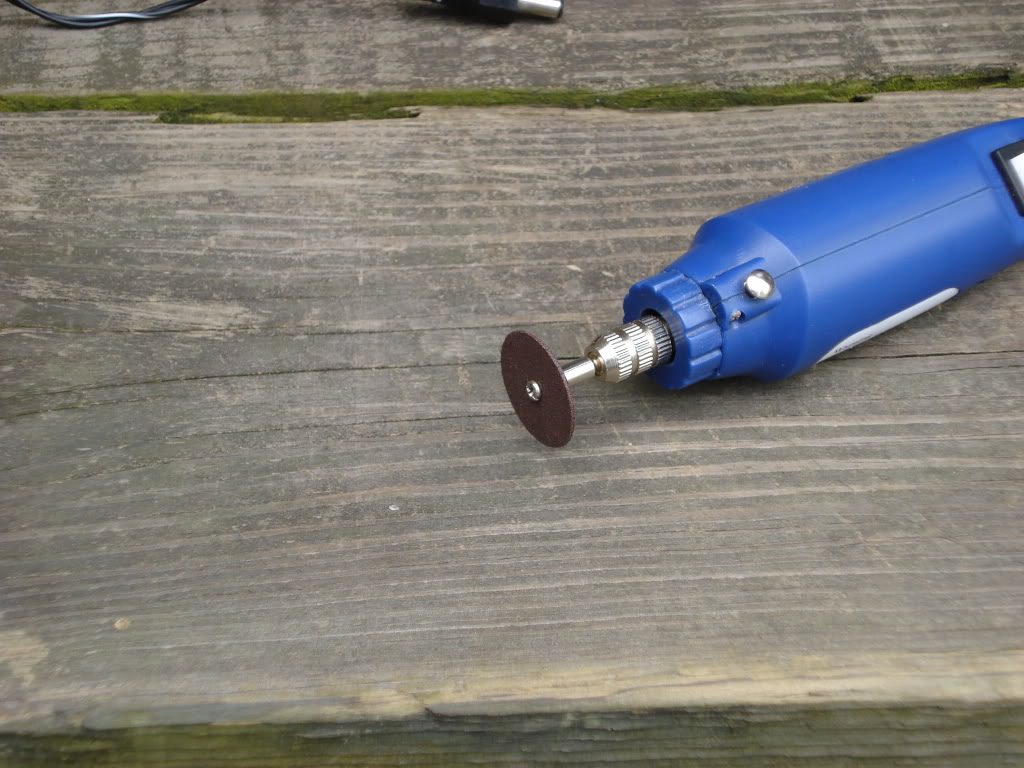
Just cut them off down to the nut. There really is not much clearance between the dew wipe material and the window so it is best to play it safe. **I would assume that those of you deciding to rivet the two pieces together would be in the clear to just install the new dew wipe and trim onto the vehicle.**
It started poring outside so I had to run inside. Luckily I was done cutting off the excess lengths.
Fully cut down.
And proof that it started raining on me.

After the rain stopped falling I went outside to install the dew wipe.
**Before reinstalling the trim make sure to bend, yes I said bend, the dew wipe in a specific manner to ensure that it will not rattle and to ensure that it will sit properly. I want you to bend the metal part that sits along the top edge of the door downward the entire length of the trim. Just a bit DO NOT go crazy with bending. Just a bit.**
Now you are ready to reinstall the dew wipe trim. Just place it back onto the door and secure the middle screw FIRST. Make sure to be pushing down HARD on the trim while you tighten that middle screw to ensure that the trim is fully down and flush.
Next, screw in the screw for the front of the dew wipe trim (closest to the front of the vehicle) making sure to push down the trim while you tighten it.
Then take the self tapping screw you removed from the trim above the door handle and a drill and long Phillips head screw bit. Put the screw on the bit and position your body though the window while standing parallel to the interior of the door. Lift the door frame with your back while pushing down hard on the dew wipe trim above the door handle and screw in the self tapping screw in the relative location where the third screw was originally located.
If all was done as said it should look like this.
And this
And preform like this.

*I am aware that some vehicles do not have passenger side mirrors, fancy 79ish driver side mirrors as well as some not having vent windows and the misfortune of owning four door vehicles. But the methods are universal and this install should be very similar to any such thing you attempt.*
If anything is unclear please make note of it and I will try to clear it up for you.
First thing you NEED to know is where to purchase the replacement dew wipe material, unless you are one of the lucky ones who can find some coveted NOS pieces..*cough* Tom *cough*. JCWhitney offers the replacement dew wipe material, and it is sooo very close to the original that one would never know that anything was replaced after the install.
Here is a link to the dew wipe material YOU will need if you decide to do this.
EDIT: JC Whitney no longer sells this item follow this link for purchase:
And an image displaying the dimensions.
Just to make things clear it is style 43. And the price is beyond fare at just 21 dollars.
Here are some pictures comparing Fords original dew wipes to JCWhitneys' Fairchild Industries style 43 replacement dew wipe material.
The replacement is on the LEFT and Fords original is on the RIGHT.
Damn cat.
You can see that Fords original one is very flat, while the replacement is not. This helps create a better seal against your door glass.
Now why do this?
Honestly...why NOT?
Dew wipes keep pressure against the door window glass keeping out rain from your doors internals, it prevents foreign objects from entering as well, it wipes dew and rain from the window so you can see your mirrors, and it helps prevent your door glass from rattling around while you are driving and such.
BEFORE
To get started with the install you will want to take some tape and make marks as to where you want the dew wipe to reach on the window. Odds are they shrunk and are allowing large quantities of water to come into your door. Marking it will allow you to see where you need to cut the material and eventually where the dew wipe should start and end on the dew wipe trim.
Below I have marked where I would like the new dew wipe to reach.
You can see how much more space I will be filling up by installing the new material.
Next you have to remove the door panel of the respective door you intend to replace the dew wipe on. You NEED to remove it because three screws are preventing you from just pulling up the dew wipe from the outside. The three screws are located right above the green tape marked in the photos below.
One on the beginning, one on the vent window mount and one on the end.
Next you need to loosen up the mirror screws. *WARNING* You may strip the heads of the screws if you do not use some rust penetrant on the threads of the screw found within the door internals first.
Here is the mirror loosened up and allowing the dew wipe enough clearance to be removed.
After the mirror is loosened you can now pull on the dew wipe (I like grabbing on to the dew wipe material) starting from above the exterior door handle working your way towards the front of the vehicle. It may give you some trouble along the way, but just wiggle and jiggle it in your hand till it is completely removed.
Removed from vehicle.
Now take the old dew wipe to a comfortable working space, because you will be working on it for quite some time.
Here are all the tools I used or could have used for this entire install.
Next thing to do is to remove all of the staples currently holding the dew wipe material to the dew wipe trim.
Here you can see all of the staples holding the two pieces together.
These staples are really strong. I needed to use an ice-pick to get the staple raised. *WARNING* Please be careful during this process.
Then I uses a flat head screw driver to make the staple ends rise up.
Now flip the trim over and use the flat head screw driver to fully remove the staple.
Staple fully removed.
The two pieces separated.
** The clips that are left on the old dew wipe material can be used if you really want to use them but it is not at all necessary. I did this install on both of my doors and they are not loose or coming loose at all. So I would say you would be fine as well. But if you want to remove it just push a tiny flat head screw driver underneath the clip and twist.
Once pried up, you can use needle nose pliers to remove the clip from the material.
Clips removed.
If you decide to reinstall them in the new material you will need to drill tiny holes then insert the clip fastener ends into the two respective holes you drilled and use some GOOD tough pliers to crush the clip ends securely fastening the clip to the new dew wipe material.**
Now that the two pieces are separated (dew wipe trim and dew wipe material) you can begin the reassembly.
To do this you will need some type of temporary fastener. I decided to use some clothes pins.
Begin by placing the new dew wipe material onto the dew wipe trim. Use your tape markings as a guide as to where the wipe will begin and end.
Mark where you need to cut the new dew wipe material.
Then cut.
Now reassemble the dew wipe on the dew wipe trim using your preferred technique. The clothes pins really work well.
Now you have two roads you can follow. I had both tiny nut and bolts as well as tiny rivets to use to secure the trim to the new dew wipe material. I decided to use the nuts and bolts because I did this on my first install (drivers side door) and it work great, AND rivets are unforgiving. Nut and bolts can easily be removed and reinstalled.
Either road you choose you will have to drill some holes into and through the dew wipe material and dew wipe trim. You can screw and rivet as much as you prefer. The more the merrier. I drilled near the locations the staples were in.
Here you can see the tiny nut and bolts I used as well as some installed on the trim.
Here it is basically complete and ready to install, but not so fast because the length of the bolt I used is too long and would horribly scratch and scar the window if I attempt to install it as is.
Here you can see just how far the bolt sticks out.
To chop that length down I used a rotary tool with some fancy attachment. And remember to wear protective goggles because a lot of sparks and metal shavings will fly around.
Just cut them off down to the nut. There really is not much clearance between the dew wipe material and the window so it is best to play it safe. **I would assume that those of you deciding to rivet the two pieces together would be in the clear to just install the new dew wipe and trim onto the vehicle.**
It started poring outside so I had to run inside. Luckily I was done cutting off the excess lengths.
Fully cut down.
And proof that it started raining on me.
After the rain stopped falling I went outside to install the dew wipe.
**Before reinstalling the trim make sure to bend, yes I said bend, the dew wipe in a specific manner to ensure that it will not rattle and to ensure that it will sit properly. I want you to bend the metal part that sits along the top edge of the door downward the entire length of the trim. Just a bit DO NOT go crazy with bending. Just a bit.**
Now you are ready to reinstall the dew wipe trim. Just place it back onto the door and secure the middle screw FIRST. Make sure to be pushing down HARD on the trim while you tighten that middle screw to ensure that the trim is fully down and flush.
Next, screw in the screw for the front of the dew wipe trim (closest to the front of the vehicle) making sure to push down the trim while you tighten it.
Then take the self tapping screw you removed from the trim above the door handle and a drill and long Phillips head screw bit. Put the screw on the bit and position your body though the window while standing parallel to the interior of the door. Lift the door frame with your back while pushing down hard on the dew wipe trim above the door handle and screw in the self tapping screw in the relative location where the third screw was originally located.
If all was done as said it should look like this.
And this
And preform like this.
*I am aware that some vehicles do not have passenger side mirrors, fancy 79ish driver side mirrors as well as some not having vent windows and the misfortune of owning four door vehicles. But the methods are universal and this install should be very similar to any such thing you attempt.*
If anything is unclear please make note of it and I will try to clear it up for you.


")


Comment