Announcement

Collapse
No announcement yet.

1990 country squire resto/lowrider in UK

Collapse
X
 
  • Filter
  • Time
  • Show
Clear All
new posts

    #61
    Finally got the inner sills/rockers welded in, but not before I painted the sides that will not be accessible when they are in


    Heres a few views of the welded in panels-ready for grinding, sealing and painting


    The white streaks are paint trails when attempting to get paint inbetween the joints - successfully!

    Heres an imortant step. Rustproofer poured into the panels and heated up till it flows out of all the joints and drips onto the floor


    You can see the brown fluid on the bottom of the welded seam


    You can also see a nasty rust spot under the passenger door! Thats on my list!

    Heres a photo of one of the new poly body to frame mounts that arrived yesterday


    Andy.
    www.lowcamaro.com

    Comment


      #62
      Beautiful work.


      I missed it: where did you get the poly mounts?

      85 4 door 351 Civi Crown Victoria - Summer daily driver, sleeper in the making, and wildly inappropriate autocross machine
      160KMs 600cfm holley, shorty headers, 2.5" catted exhaust, 255/295 tires, cop shocks, cop swaybars, underdrive pulley, 2.73L gears.
      waiting for install: 3.27's, Poly bushings, boxed rear arms, 2500 stall converter, ported e7's, etc

      06 Mazda 3 hatch 2.3L 5AT (winter beater that cost more than my summer car)

      Comment


        #63
        Originally posted by johnunit View Post
        Beautiful work.


        I missed it: where did you get the poly mounts?
        Thank you

        http://www.energysuspensionparts.com...p?prod=9.4102#

        Andy.
        www.lowcamaro.com

        Comment


          #64
          Forecast is not good for the next few days, but I don't care! I need to get the frame back as soon as possible so I can get this car to the bodyshop.
          So its finish off a little bit of welding and prep the underside for its new silver paint!

          This involved removing all seam sealant to check underneath for rust and wire brushing and surface rust removal-all on the passenger side.

          Heres a few photos going along the rockers and towards the back. i feel quite proud of this. The view before it all started was horrendous. The view now is fantastic.
          Apart from the brown surface rust, it is now clear and green! Or is it..............

          Front


          Going further back


          Heres the rear seat belt reinforcing plate that is concealed above the frame when it is in


          Only surface rust which will disappear under the media blasting! I will pour rustproofer in behind it before I seal it off.

          This is directly above the rear wheelarch


          and just a bit further back


          This is where it gets interesting!
          Heres the frame mounting point just behind the rear wheels. The black lines are metal fatigue cracks. It is not down to corossion. It is exactly the same on the otherside. Hmm, design flaw?


          Heres 1 more views of the back


          Still some rust removal to do, but we are almost there.

          Andy.
          www.lowcamaro.com

          Comment


            #65
            Thought i would try out this rustremoving gel


            Here it is applied where the middle seatbelt reinforcing plate was (and will be again!)


            I will post another photo up tomorrow after it has done its work!

            Some nice little jobs to do here.....
            All the seat belt bolt reinforcing plates and the seat bolts reinforcing plates are rusting and so is the steel underneath. Like this one


            Very simple to remove - 4 spot welds drilled, chuck plate in acid bath for a few days, media blast and paint rusty steel on car, weld panel back and repaint everything.

            Its all in the details!
            Andy.
            www.lowcamaro.com

            Comment


              #66
              You're making me look forward to the body resto on my truck
              1983 Grand Marquis 2Dr Sedan "Mercules"
              Tremec TKO conversion, hydraulic clutch, HURST equipped!

              Comment


                #67
                Originally posted by Grand_Marquis_GT View Post
                You're making me look forward to the body resto on my truck
                Fantastic! I am finding this really good fun to do (even though its outside in the wind and rain and a UK winter!). Certainly hard work though, but the results are very motivating at this stage when most of the welding is done now.
                Can't wait for the paint to go on!

                Will you start a build thread on here when you do yours?

                Andy.
                www.lowcamaro.com

                Comment


                  #68
                  Wow looks like you do some good work.

                  1980 Lincoln Continental Mark VI Signature Series
                  351 4 bbl, AOD, 3.08 open
                  duel exhaust with cherry bombs

                  Comment


                    #69
                    Originally posted by Grand_Marquis_LSS View Post
                    Wow looks like you do some good work.
                    Thank you sir

                    Media blasted and seam sealed loads of welded joins today. That stuff is smelly and "harmful" so it was out with the air fed mask and get stuck in.

                    I got everything set up to go underneath, set myself up underneath and got comfy and......... forgot my masking tape to get a smooth edge! "Sod it" said I so I just put it all on and I will clean up the edges tomorrow. It will also give me a chance to see how well it has stuck.


                    Just got to weld up the metal fatigue cracks and we can start painting the passenger side.


                    But something is not quite right. The capive nut is spinning and the metal seems thin and weak. But it welded up okay with no burning through so it can't be thin due to rusting.

                    Theres no alternative but to open up the panel and have a look inside.

                    Where to drill though? Difficult to assess where the hole needs to be on the inside of the cargo area. So lets take a guess................here (black spot)


                    Here we go then


                    Heres the view .........


                    Just can't see what is happening apart from rust!

                    So another hole drilled and here we are


                    The captive nut cage has broken free on one side and the nut has slipped out under it.

                    It looks as if I have no option but to remove the panel that I have drilled completely and replace the panel where the captive nut is. And all other panels that need patching around it! Then weld a new inner panel in.
                    This will put me a few days behind, but needs to be done. And I am assuming the other side will need doing also.

                    Andy.
                    www.lowcamaro.com

                    Comment


                      #70
                      Digging deeper then.............
                      Heres the dodgy frame mount revealed after i cut out the panel in front of it


                      Heres a closer view. You can just see where I welded the cracks up from underneath


                      So my decision to remove was correct. There is a bit of rust there that needs stopping.

                      Right. Lets media blast and see what happens


                      The corner looks very rusted and in fact went through when I prodded it! The lap joint under it will need cutting out and replacing too.

                      Heres the panel I cut out with the cage on it


                      Underside of it


                      Lets get welding then and reinforce that area better........

                      Andy.
                      www.lowcamaro.com

                      Comment


                        #71
                        Holey crap you're meticulous
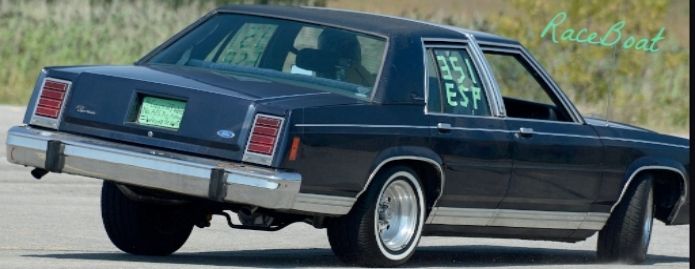
!!! If I have my mom's car Crown Vic down for more than 3 days I'm in trouble.


                        Packman

                        Comment


                          #72
                          what exact color is your camaro? I like that red alot

                          Comment


                            #73
                            Originally posted by jayh View Post
                            what exact color is your camaro? I like that red alot
                            Its PPG bright red, code D717. 2k not water based.

                            Warning: This colour is BRIGHT!!

                            Andy.
                            www.lowcamaro.com

                            Comment


                              #74
                              You wanna come over and take care of the rust on mine when you're done?
                              sigpic


                              - 1990 Ford LTD Crown Victoria P72 - the street boat - 5.0 liter EFI - Ported HO intake/TB, 90 TC shroud/overflow, Aero airbox/zip tube, Cobra camshaft, 19lb injectors, dual exhaust w/ Magnaflows, Cat/Smog & AC delete, 3G alternator, MOOG chassis parts & KYB cop shocks, 215/70r/15s on 95-97 Merc rims

                              - 2007 Ford Escape XLT - soccer mom lifted station wagon - 3.0 Duratec, auto, rear converter delete w/ Magnaflow dual exhaust

                              - 2008 Mercury Grand Marquis Ultimate Edition - Daily driver - 4.6 2 valve Mod motor, 4R75E, 2.73s. Bone stock

                              Comment


                                #75
                                Here's the corner cut out where the rust is


                                Here's a panel fabricated with a Step (or joddle) in it that you can just see


                                In place


                                This is a close up view of the underside of the captive nut for the frame bolt. You can just see cracks all over. This is very weak and contributed to the metal fatigue cracks on the hatch floor that I welded up. So my decision to remove a perfectly good outer panel was well and truly justified.


                                I am going to strengthen up the area to prevent further cracks and weld back the exterior panel. Thats tomorrows job.

                                Andy.
                                www.lowcamaro.com

                                Comment

                                Working...
                                X