
You've culled every box actuator out of the yards over the years, and you don't want to pay $195 for an original at the parts counter, what do you do? You find something else of course! I was thinking aftermarket actuator originally,but figured, oem should be better, its not a drop in fit, but it certainly is workable.
Advantages:
-OEM quality (vs aftermarket questionable quality).
-Easier to get used.
-Can buy a brand new one for $69.
-Easy retrofit.
Disadvantages:
-Not a drop in replacement.
Parts you'll need:
-modern panther lock actuator and pigtail.
-lock rod connector block
-1/4-20 bolt, assortment of washers and a nylock nut. Don't ask me how long. Do what I did, look at it and make an educated selection.
Tools you'll need:
-the usual for changing a lock actuator
-soldering iron
-heatshrink tubing
-hammer & drift
-drill
-bolt cutters
+anything I forgot to list.
So in 10.something easy steps; Retrofitting a late model actuator into your box;
1. The Good, the Bad, and the Ugly.
Heres whats keeping this from being a quick swap out: they changed the length of the lock rod. But hey, thats an easy workaround. I'm using an actuator from a 1998 MGM.

2. The Originals.
Unfortunately, swapping lock actuators in the bracket ain't going to work either. One thing of note, the original lock bracket is free to rotate, in a later photo you'll see that the original is rather elaborate using a snap-ring to hold it together. You will want to mount your new bracket so it can let the bracket rotate freely as well. I have to go back to do this. The arc of travel of the lock lever may require this little design feature of the original to let things operate smoothly. Or course, my luck may be that I have a lazy "new" motor (it bench tested a-ok).
Anyhow, use your hammer and drift to punch out the "nail" of the original rivet and drill out the rivet so you can remove the bracket.

3. Short Cut to Hell
And now the fun starts, cut off the original lock rod. Bolt cutters make it quick 'n easy. Plus, they where closer. Where you cut doesn't matter much, we've got plenty of adjustment with what we are working with.
You'll see above the box lock rod the lock rod coupler I'm using. I get these from aftermarket power lock kits. You can make your own easily from a small block of metal. Drill a couple through holes, intersecting holes for set screws & thread 'em.

4. Mix 'n Match
Put the pieces together, and this is our new actuator assembly.

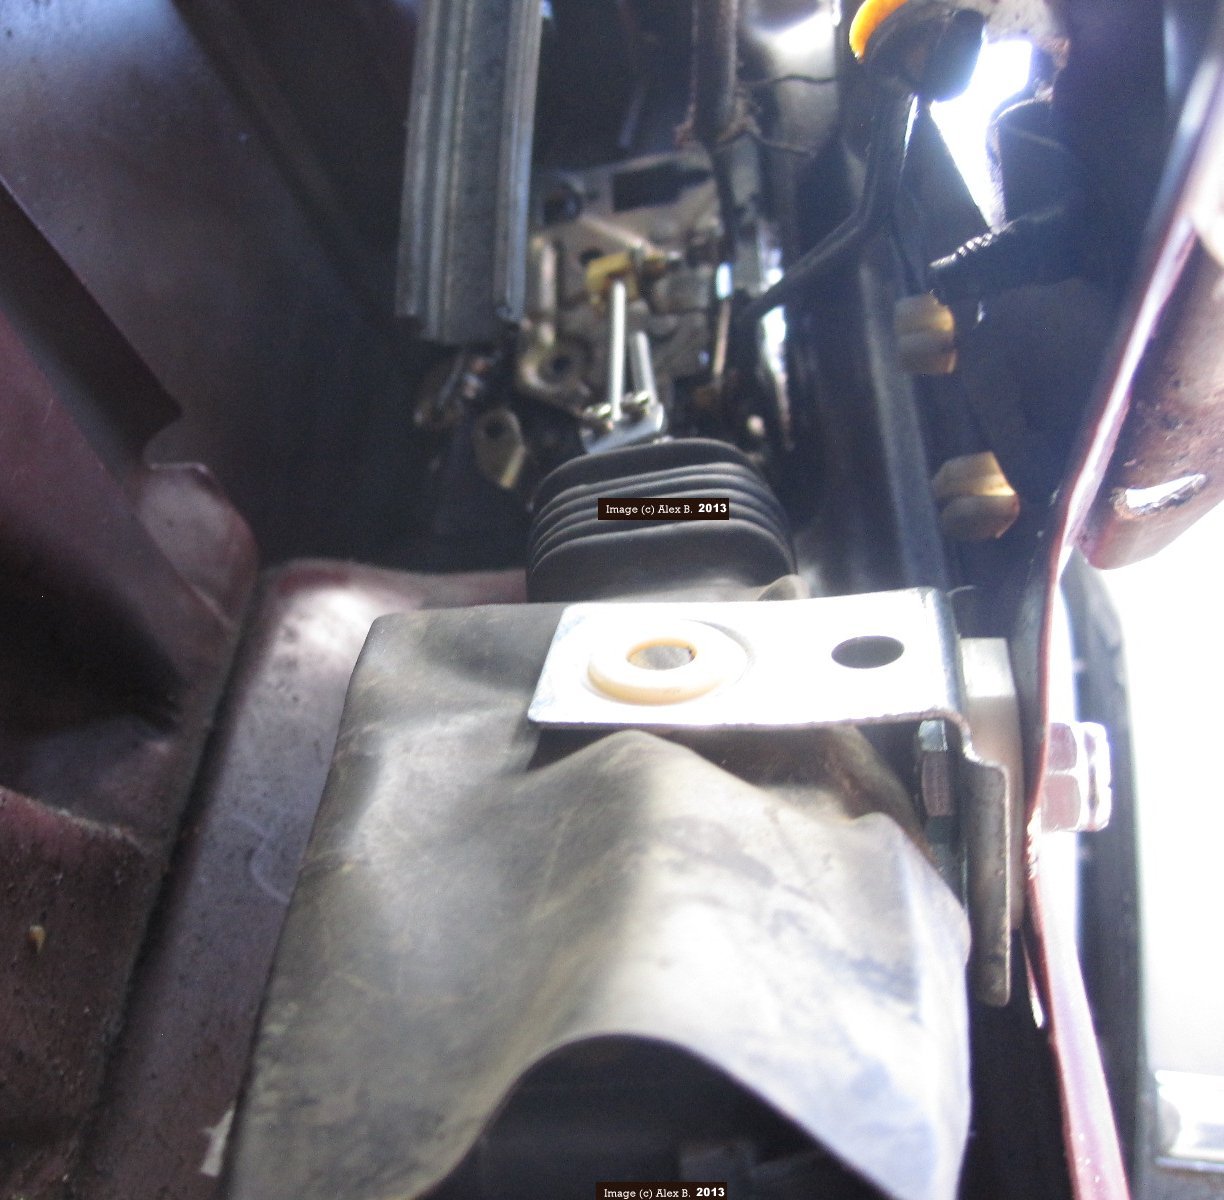
5. Fitment
Bolt in the new.
6. Do Adjust your Set
Adjust the rods and secure the set screws.

7. Electron Conduits
Next up, is making an adaptor so you do not have to cut your original wiring. I prefer this over splicing to original wiring because I can revert back if I wish, or make adaptors for something else easily.
Jerry-rig the wiring and test which way you'll need to hook up the wires.
Grab your hacksaw and cut around the crimp ridge of the original actuator. Remove it. Clean up the "inside" contacts (remove brushes and springs, bypass the thermal lockout) and solder on the pigtail you salvaged with your new actuator to the old brush holders.
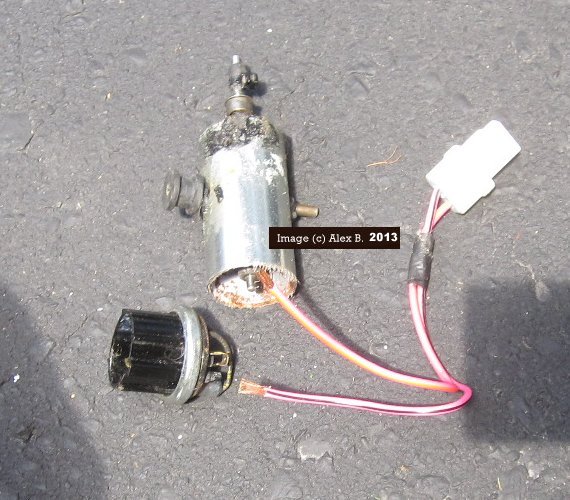
8. Adaptarific!
Tada! One homebrew lock actuator adaptor.

9. Some (more) Assembly Required
Install your homebrew electron routing device, tywrap it so it doesn't rattle around.

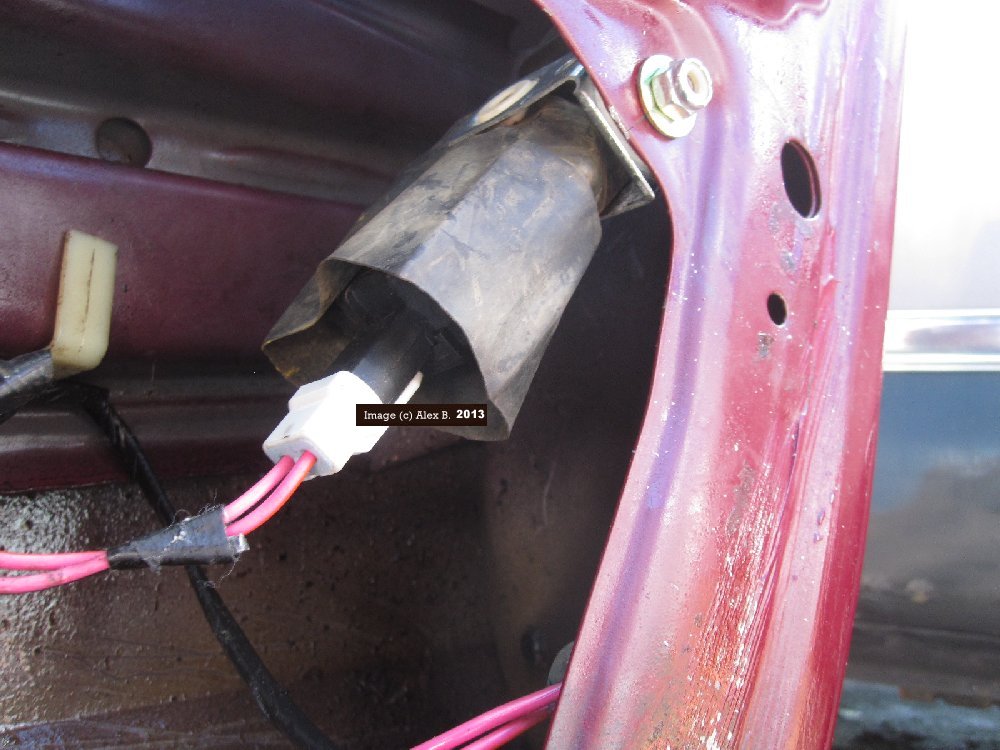
10. The Final Product
Nestled in its new home.
Lock goes up.
Lock goes down.
The End.
Alex.
Advantages:
-OEM quality (vs aftermarket questionable quality).
-Easier to get used.
-Can buy a brand new one for $69.
-Easy retrofit.
Disadvantages:
-Not a drop in replacement.
Parts you'll need:
-modern panther lock actuator and pigtail.
-lock rod connector block
-1/4-20 bolt, assortment of washers and a nylock nut. Don't ask me how long. Do what I did, look at it and make an educated selection.
Tools you'll need:
-the usual for changing a lock actuator
-soldering iron
-heatshrink tubing
-hammer & drift
-drill
-bolt cutters
+anything I forgot to list.
So in 10.something easy steps; Retrofitting a late model actuator into your box;
1. The Good, the Bad, and the Ugly.
Heres whats keeping this from being a quick swap out: they changed the length of the lock rod. But hey, thats an easy workaround. I'm using an actuator from a 1998 MGM.
2. The Originals.
Unfortunately, swapping lock actuators in the bracket ain't going to work either. One thing of note, the original lock bracket is free to rotate, in a later photo you'll see that the original is rather elaborate using a snap-ring to hold it together. You will want to mount your new bracket so it can let the bracket rotate freely as well. I have to go back to do this. The arc of travel of the lock lever may require this little design feature of the original to let things operate smoothly. Or course, my luck may be that I have a lazy "new" motor (it bench tested a-ok).
Anyhow, use your hammer and drift to punch out the "nail" of the original rivet and drill out the rivet so you can remove the bracket.
3. Short Cut to Hell
And now the fun starts, cut off the original lock rod. Bolt cutters make it quick 'n easy. Plus, they where closer. Where you cut doesn't matter much, we've got plenty of adjustment with what we are working with.
You'll see above the box lock rod the lock rod coupler I'm using. I get these from aftermarket power lock kits. You can make your own easily from a small block of metal. Drill a couple through holes, intersecting holes for set screws & thread 'em.
4. Mix 'n Match
Put the pieces together, and this is our new actuator assembly.
5. Fitment
Bolt in the new.
6. Do Adjust your Set
Adjust the rods and secure the set screws.
7. Electron Conduits
Next up, is making an adaptor so you do not have to cut your original wiring. I prefer this over splicing to original wiring because I can revert back if I wish, or make adaptors for something else easily.
Jerry-rig the wiring and test which way you'll need to hook up the wires.
Grab your hacksaw and cut around the crimp ridge of the original actuator. Remove it. Clean up the "inside" contacts (remove brushes and springs, bypass the thermal lockout) and solder on the pigtail you salvaged with your new actuator to the old brush holders.
8. Adaptarific!
Tada! One homebrew lock actuator adaptor.
9. Some (more) Assembly Required
Install your homebrew electron routing device, tywrap it so it doesn't rattle around.
10. The Final Product
Nestled in its new home.
Lock goes up.
Lock goes down.
The End.
Alex.
Attached Files
Comment