
Just like everything else in the fuel system of my '90 wagon, the fuel level sending unit looked bad and was nonfunctional. This sending unit is specific to 1990-91 wagons, so finding a new or good used one is a rare occurrence. With no other options, I decided to dig into mine to see if it could be made to work. This process should work on any car with a separate sending unit (1979-89 Box Sedans, and 1979-91 Wagons).
First thing to check before removing the sending unit is to make sure it is the sending unit causing the problem and not the gauge, or wiring. Disconnect the connector and ground one of the pins in the connector. One of the two should cause your fuel gauge to read full. If you do get a full reading with at least one of the connector pins grounded, the problem is sending unit. If your gauge never reads full, then it's the gauge or the wiring.
Assuming the sending unit is bad, go ahead and remove it. There's a lock ring that comes out - I used a screwdriver and a hammer to rotate mine.
Next thing to look for is a float - it's a round cylinder that may be brass or plastic. If yours is missing like mine, or full of gas, this is very likely your problem. Do not assume, however, go head and check the rest of the unit to make sure it is okay. Mine was not!
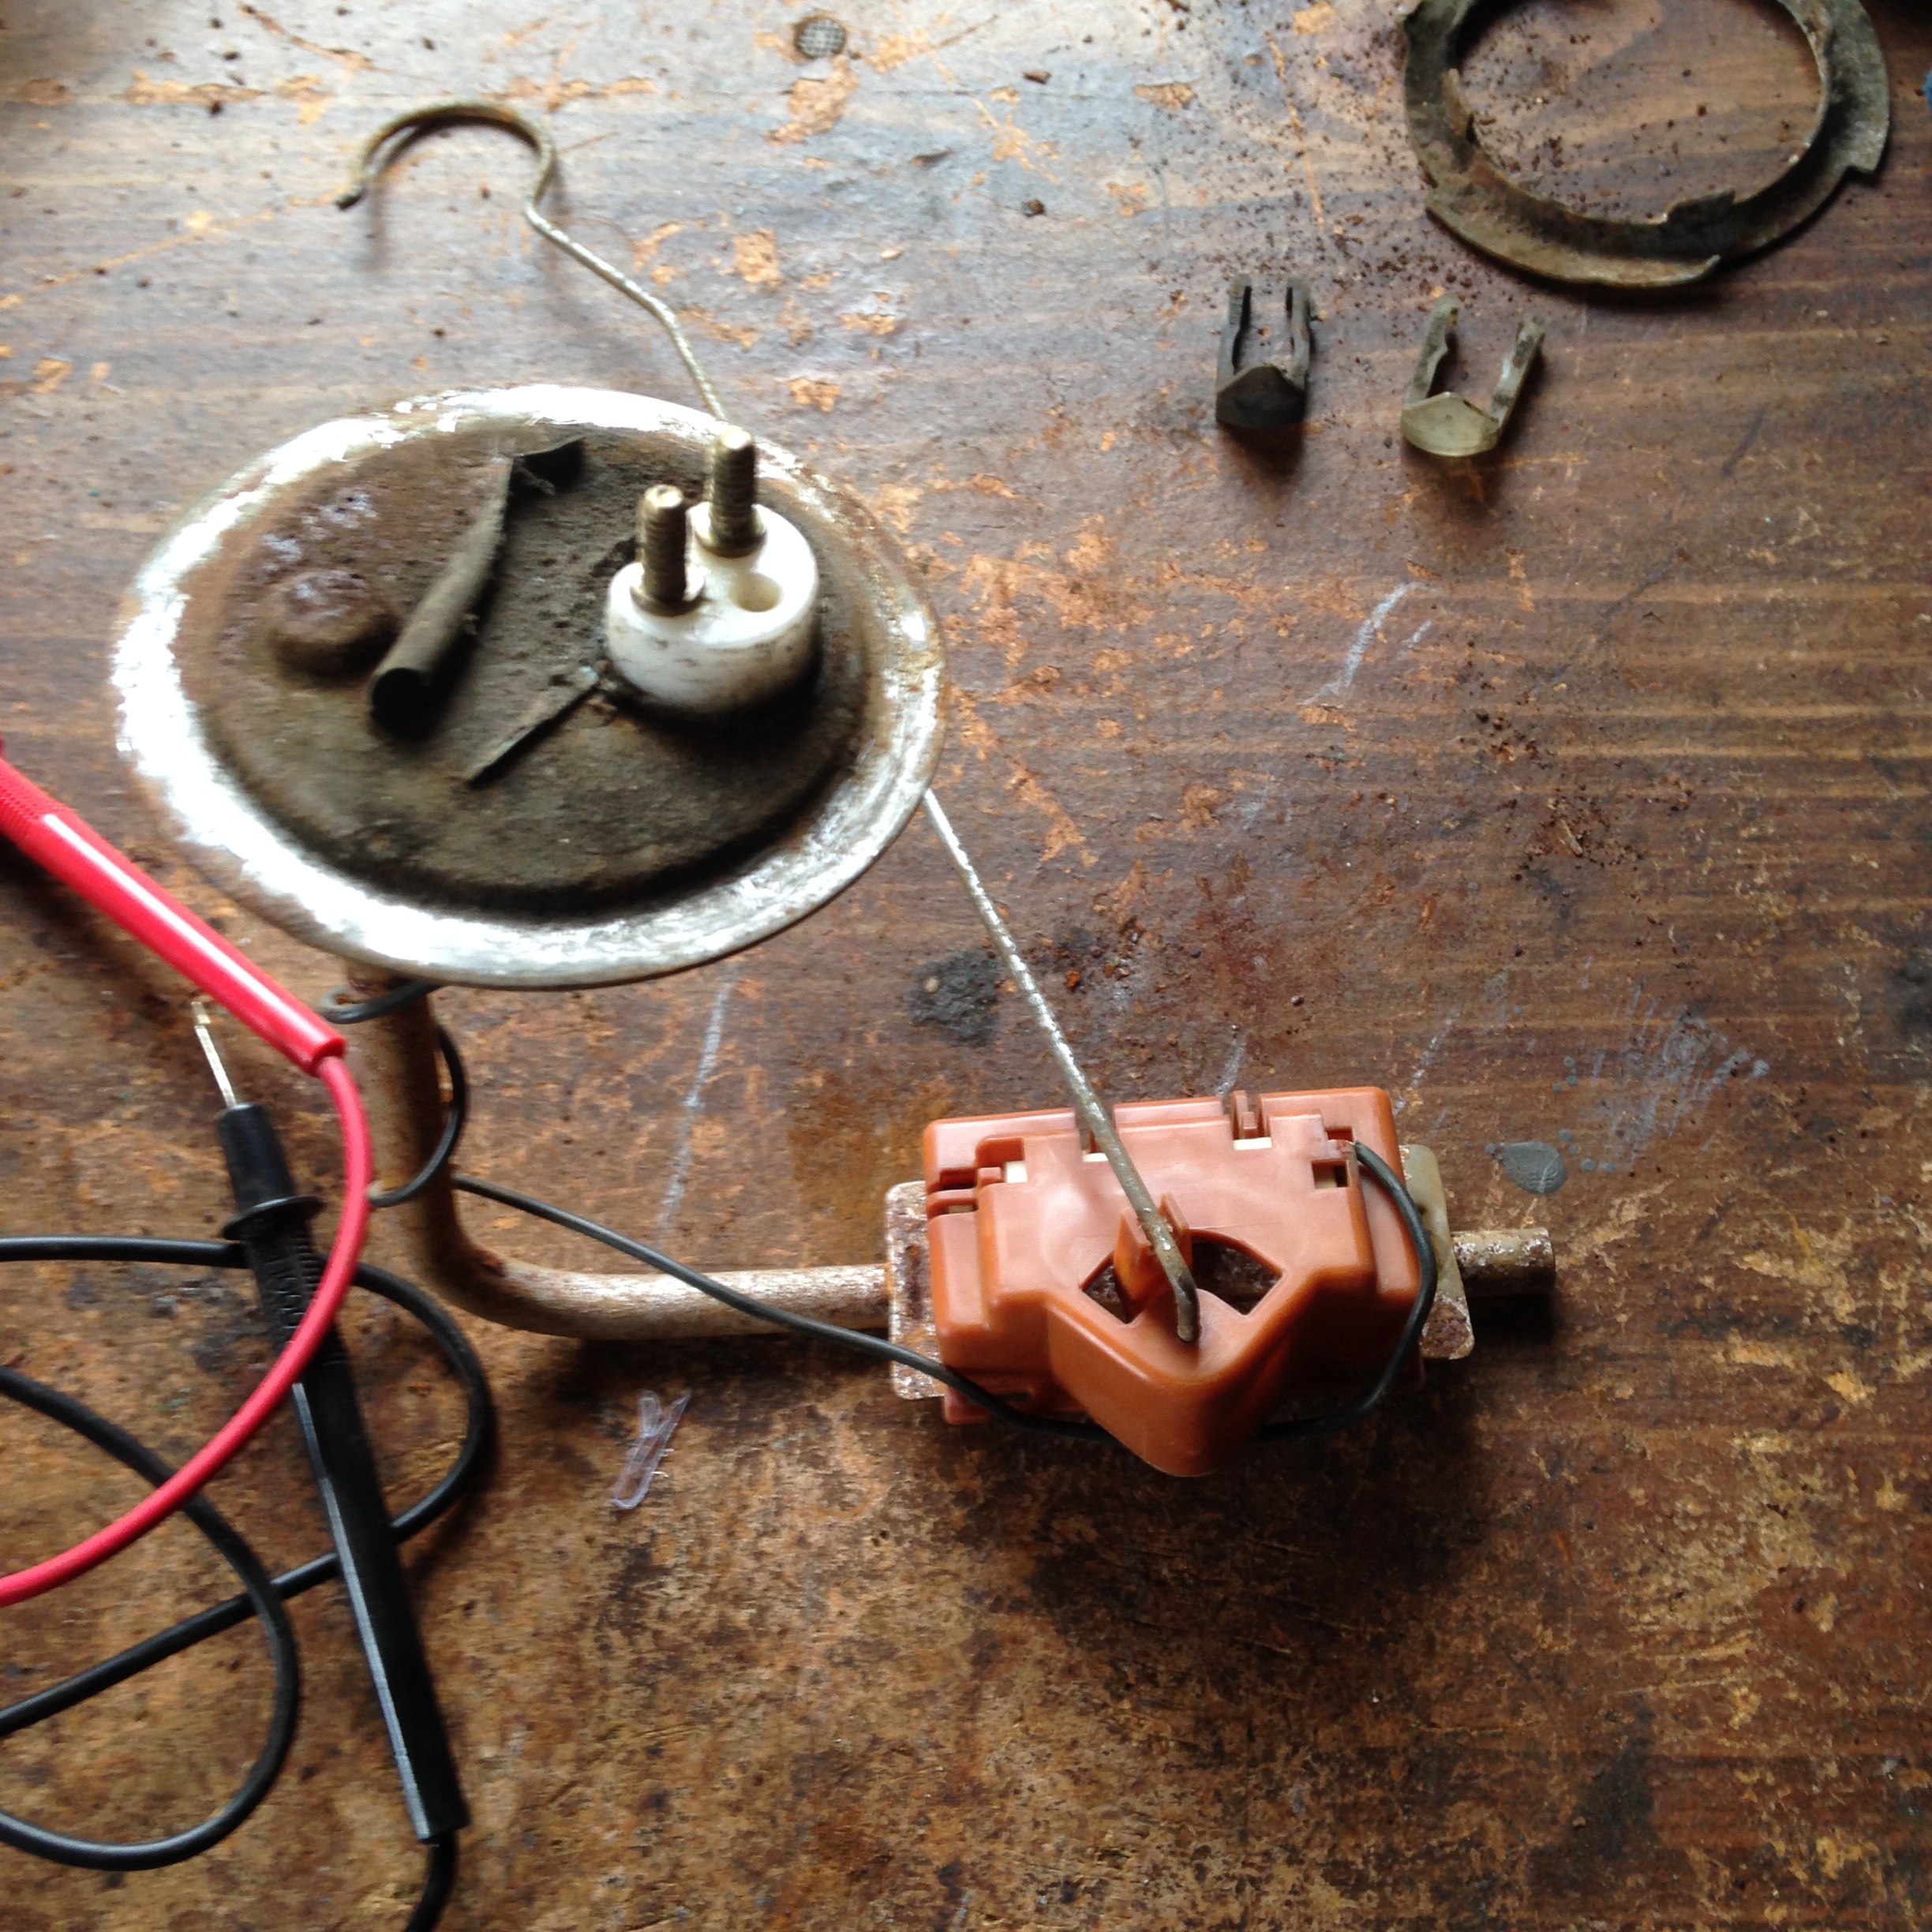
Next thing is to check the sending unit. It works based on a variable resistance circuit. For 1979-89 cars, it should vary between about 73 ohms empty to 10 ohms full. For 1990-91 (and later I suspect) cars, it should vary between 22 ohms empty and 145 ohms full. After a visual check of the wire for any obvious connection problems, it's time to begin troubleshooting the sending unit.
Using an voltmeter set to measure resistance, check the resistance between the unit body and the pin with the wire going to it. If it reads infinite, your sending unit has a bad connection somewhere in it.
Remove the cover. It snaps on and off which is nice and user serviceable unlike anything made in the last ten years. No need to disconnect the wire, which should be a soldered connection to the resistor board.

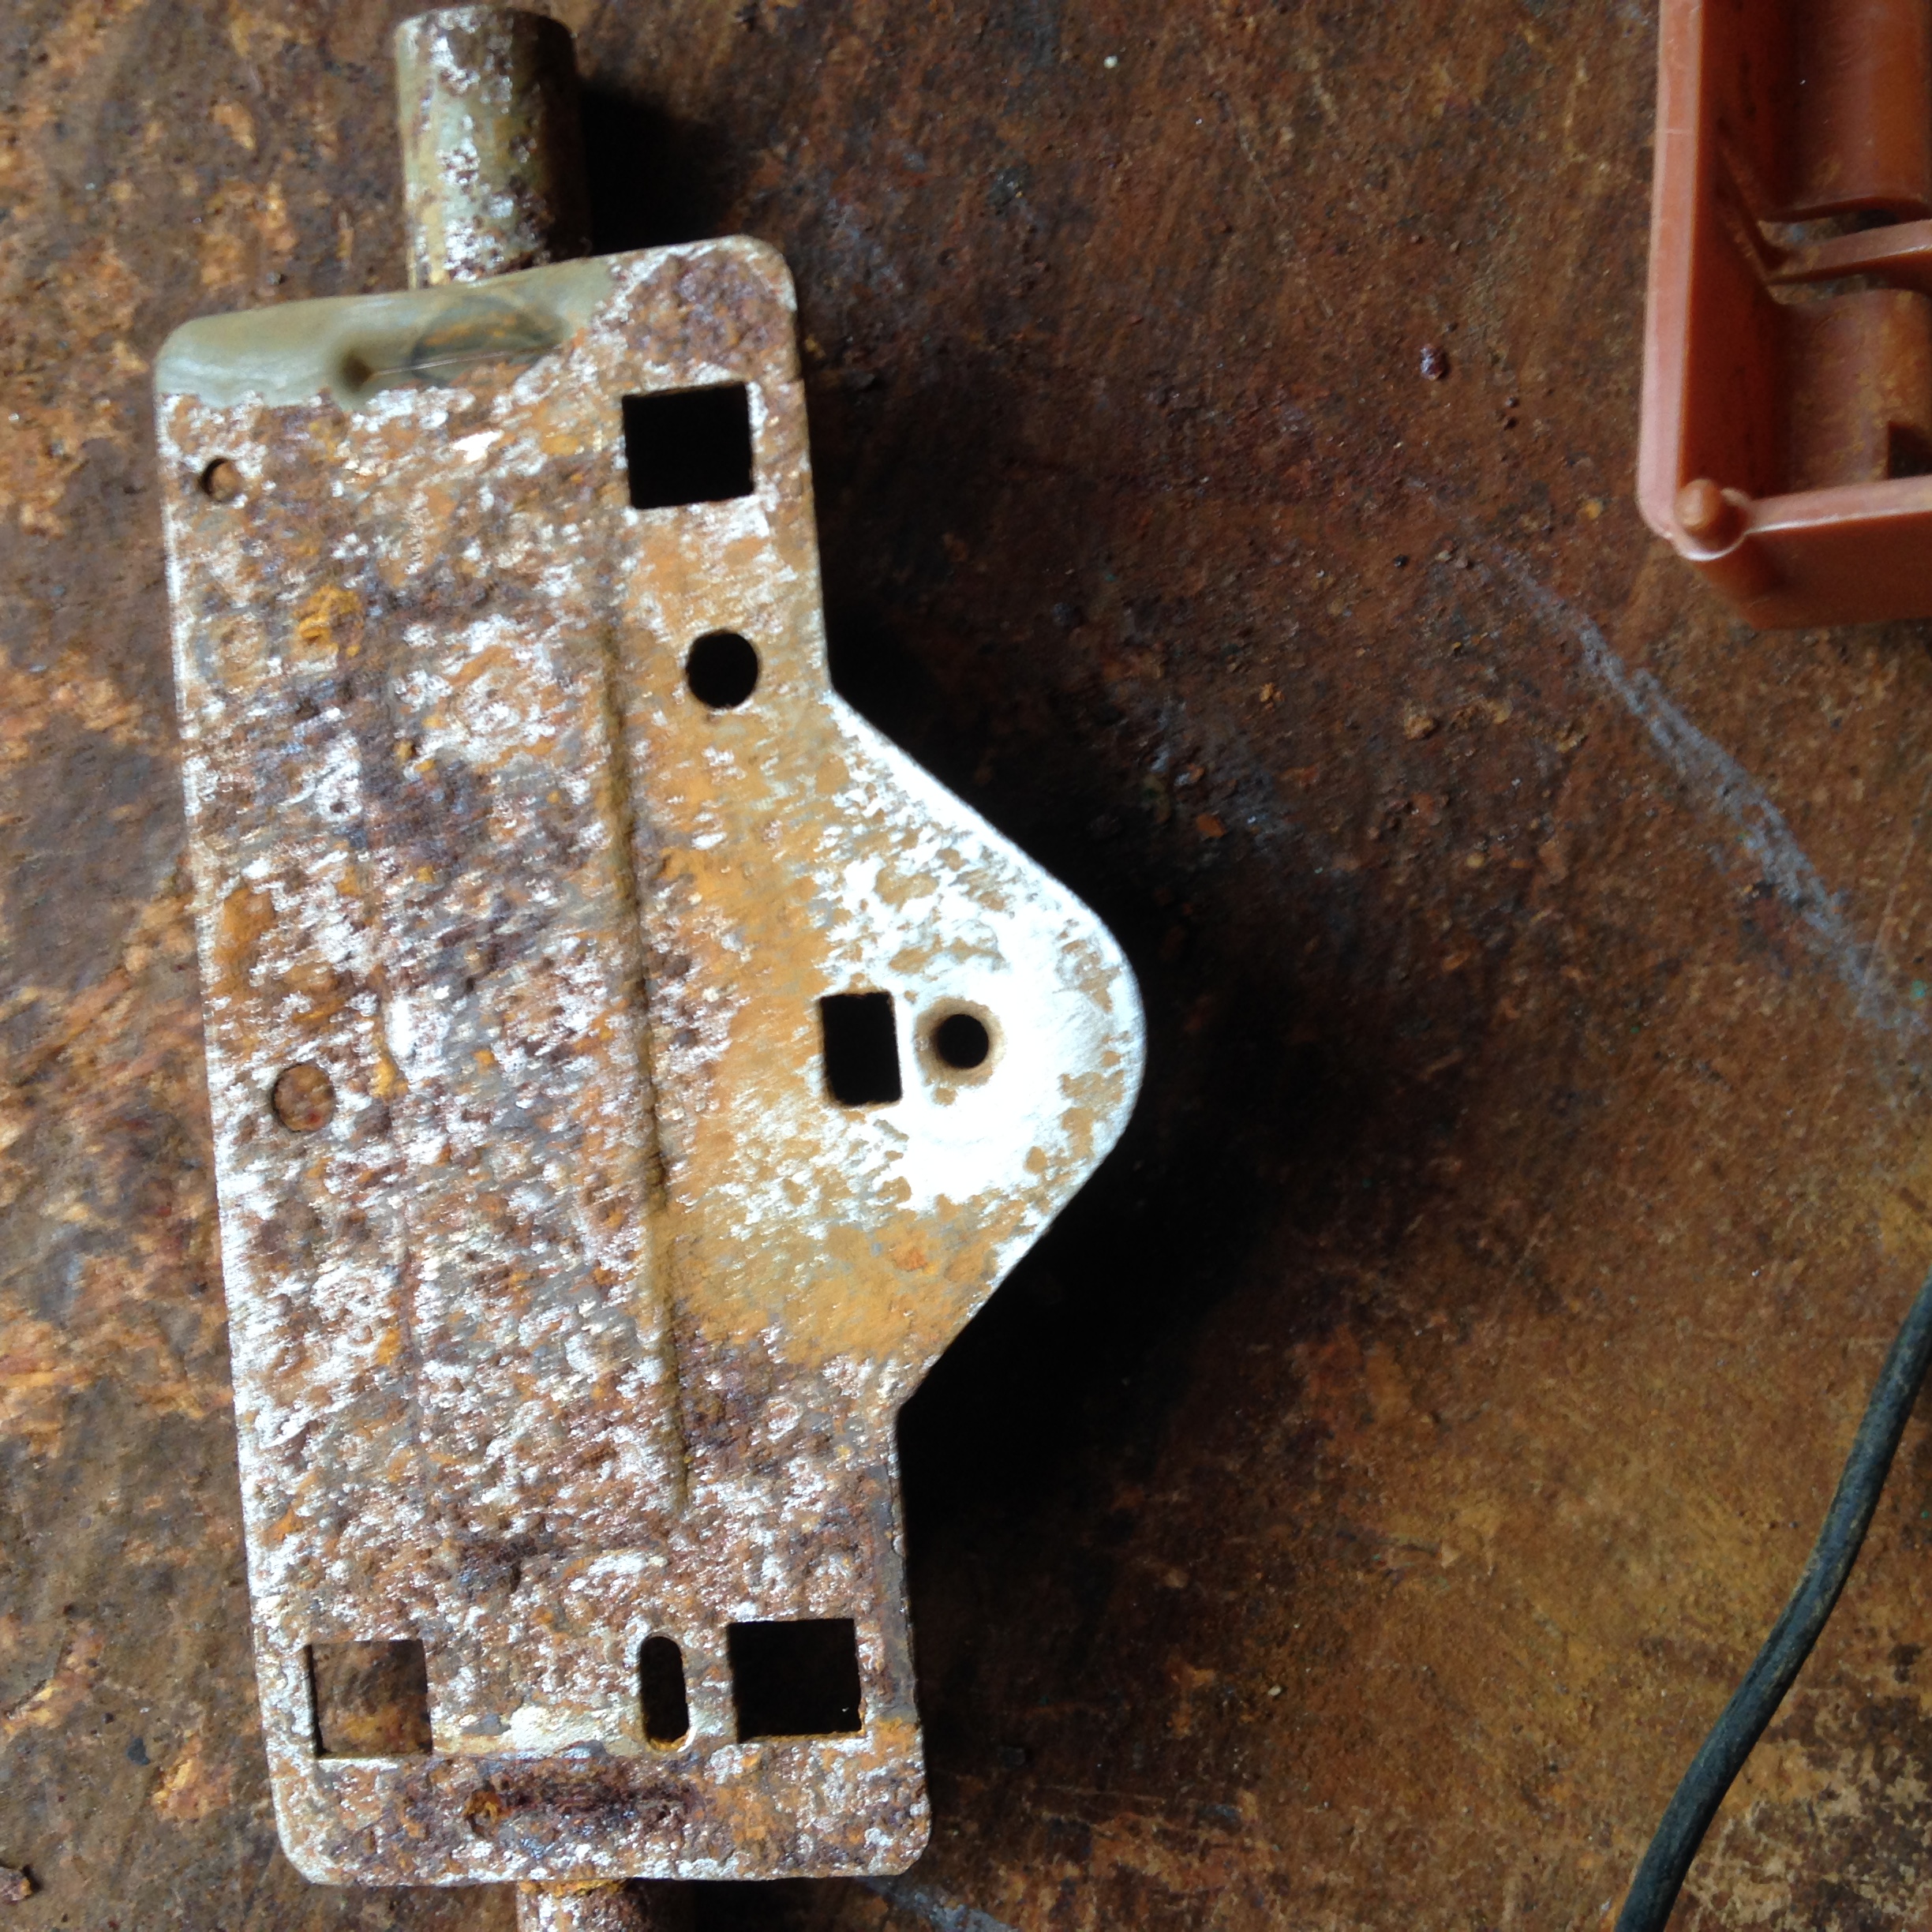
Clean the contact point of the steel mounting plate, if rusty. I used some medium sandpaper. If yours isn't rusty, you may skip this step. There is not much else that can go wrong with this part.
Now we need to check out the plastic box, float arm, and resistor plate. I disassembled mine because everything copper was green - the pictures you see here are after cleaning.

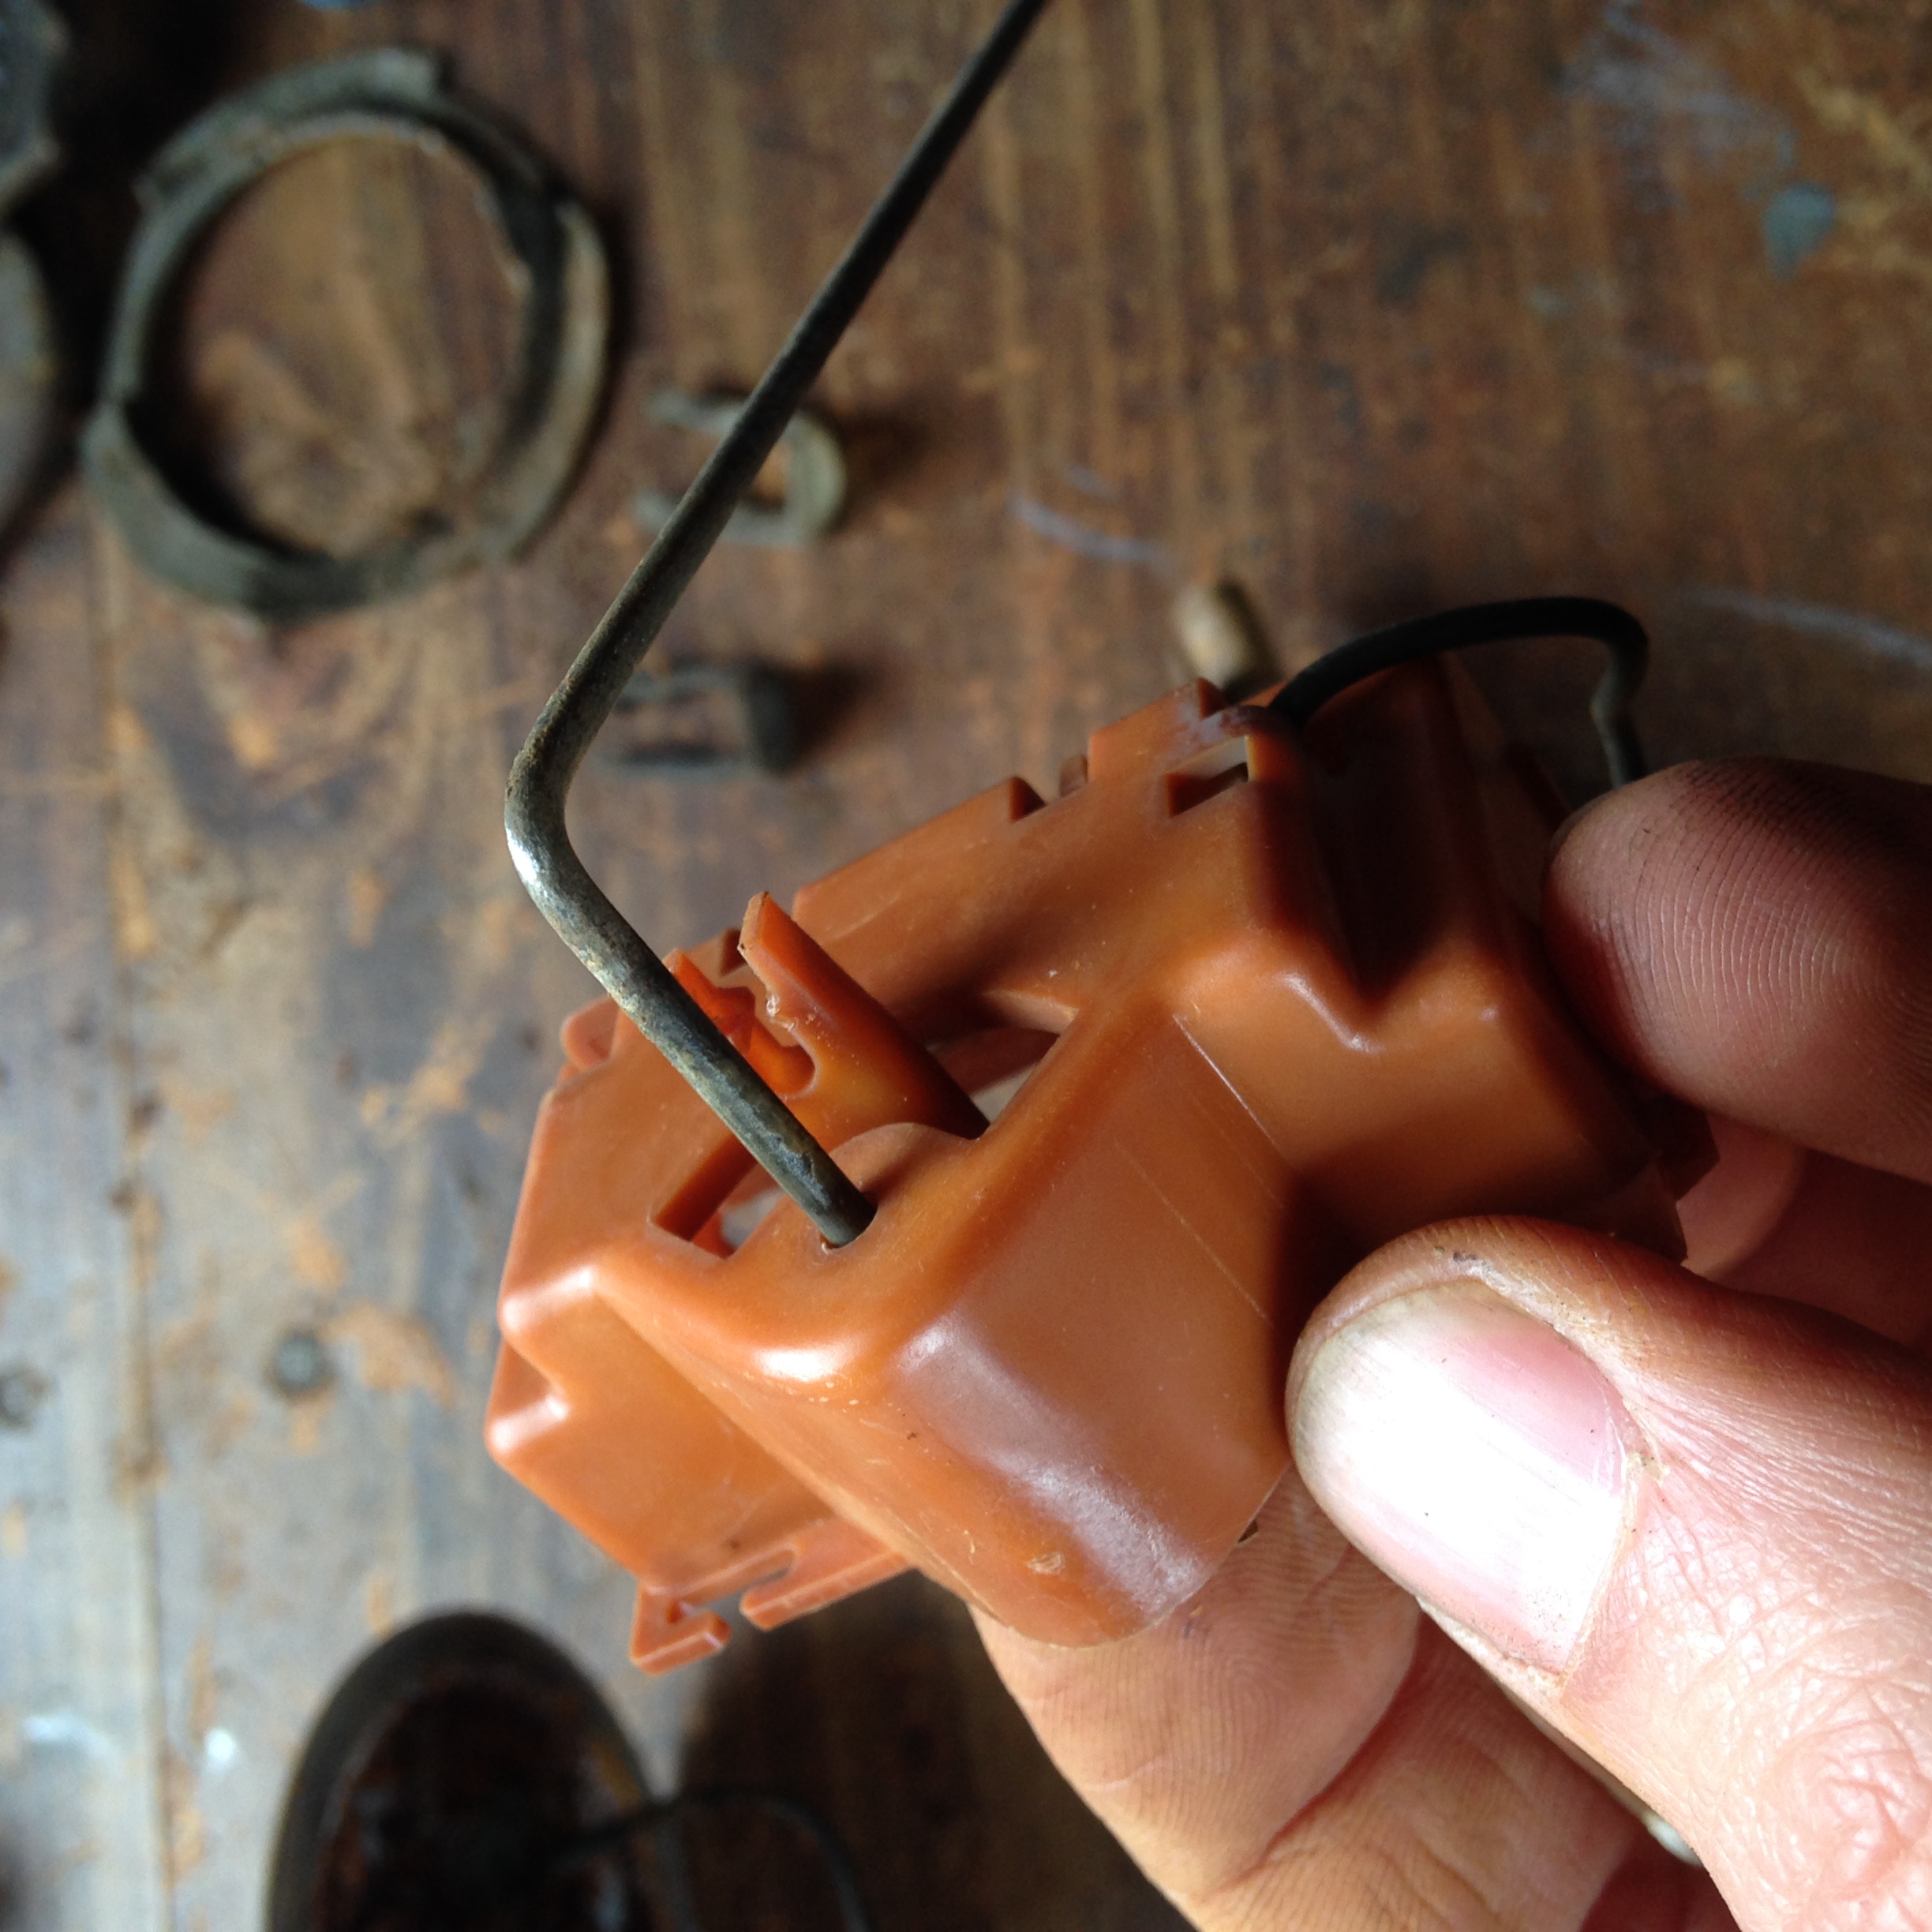
I removed the float arm by pulling on it and prying the plastic retainer pins with a screwdriver. It will pop out but takes some force. Careful here - if you break this, you'll be SOL. The good news is that this part is available from Mustang vendors but you'll need to buy a whole sending unit from them.
This next little part was the problem with my unit. Using the voltmeter again, be sure you have continuity between the two copper "feelers" on one end and the metal button on the other side, which appears to be stainless steel. Mine had a lot of green corrosion around it. Ten minutes in white vinegar had it cleaned up and continuity restored.


This is the resistor board. Again, a dip in vinegar works wonders. I also used some medium sandpaper to clean it up. Between one end to the other, your resistance should be between the specs listed above. If it's not, replace the board. I think this is fairly common to Ford sending units of the period - perhaps repop mustang parts will work if you need one.

Now it's reassembly time. Snap the float arm back to the plastic/copper piece. Be sure the stainless steel button has excellent contact (almost spring loaded) with the resistance board. You may need to bend it. Otherwise a bump in the road may cause your gauge to stop working intermediately.

Continued Below -
First thing to check before removing the sending unit is to make sure it is the sending unit causing the problem and not the gauge, or wiring. Disconnect the connector and ground one of the pins in the connector. One of the two should cause your fuel gauge to read full. If you do get a full reading with at least one of the connector pins grounded, the problem is sending unit. If your gauge never reads full, then it's the gauge or the wiring.
Assuming the sending unit is bad, go ahead and remove it. There's a lock ring that comes out - I used a screwdriver and a hammer to rotate mine.
Next thing to look for is a float - it's a round cylinder that may be brass or plastic. If yours is missing like mine, or full of gas, this is very likely your problem. Do not assume, however, go head and check the rest of the unit to make sure it is okay. Mine was not!
Next thing is to check the sending unit. It works based on a variable resistance circuit. For 1979-89 cars, it should vary between about 73 ohms empty to 10 ohms full. For 1990-91 (and later I suspect) cars, it should vary between 22 ohms empty and 145 ohms full. After a visual check of the wire for any obvious connection problems, it's time to begin troubleshooting the sending unit.
Using an voltmeter set to measure resistance, check the resistance between the unit body and the pin with the wire going to it. If it reads infinite, your sending unit has a bad connection somewhere in it.
Remove the cover. It snaps on and off which is nice and user serviceable unlike anything made in the last ten years. No need to disconnect the wire, which should be a soldered connection to the resistor board.
Clean the contact point of the steel mounting plate, if rusty. I used some medium sandpaper. If yours isn't rusty, you may skip this step. There is not much else that can go wrong with this part.
Now we need to check out the plastic box, float arm, and resistor plate. I disassembled mine because everything copper was green - the pictures you see here are after cleaning.
I removed the float arm by pulling on it and prying the plastic retainer pins with a screwdriver. It will pop out but takes some force. Careful here - if you break this, you'll be SOL. The good news is that this part is available from Mustang vendors but you'll need to buy a whole sending unit from them.
This next little part was the problem with my unit. Using the voltmeter again, be sure you have continuity between the two copper "feelers" on one end and the metal button on the other side, which appears to be stainless steel. Mine had a lot of green corrosion around it. Ten minutes in white vinegar had it cleaned up and continuity restored.
This is the resistor board. Again, a dip in vinegar works wonders. I also used some medium sandpaper to clean it up. Between one end to the other, your resistance should be between the specs listed above. If it's not, replace the board. I think this is fairly common to Ford sending units of the period - perhaps repop mustang parts will work if you need one.
Now it's reassembly time. Snap the float arm back to the plastic/copper piece. Be sure the stainless steel button has excellent contact (almost spring loaded) with the resistance board. You may need to bend it. Otherwise a bump in the road may cause your gauge to stop working intermediately.
Continued Below -
Attached Files
Comment