
Ok, here goes.
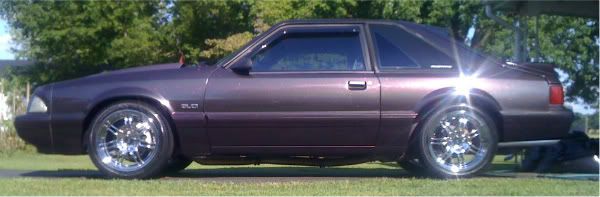
Every thing I've learned about my 1991 grand marq.
--------------------------------------------------------------------------------
Ok, first off excuse my grammar I'm just too lazy to worry about it outside of college. I'm sitting here drinkin my coffee in the morning and figured I haven't contributed much to this site as far as help goes so I figured I would compile all I have learned about my 1991 grang marq.
First, I'd like to say how much I hate ford engineering. I hate it as much as I hate going pee after I go swimming and 20 hairs clog up my pee hole then piss squirts in 40 directions. That being said when the systems are functioning properly theres no sweeter ride on earth.
The VERY FIRST thing you need to do is replace the t.v. grommet!!!! Look at this link http://www.grandmarq.net/vb/showthre...v+grommet+part it has the part number that you can get at a ford dealer also it has a link that shows installation.
Next get rid of the smog pump it isn't needed at all. Removing this will give you more room to change the plugs on pass side, eliminates the possibity for a few vacuum and exaust leaks. you can follow this thread
Or if you want to do it the way I did it but use the thread as a guide. I took a sawzal and cut the metal pipe going around to the back of the engine pass side; I cut it right when it changes to metal, crimped it with channel locks and jb welded the cut end just to be sure. Then un bolt the two bolts holding the assembly right next to the pass side valve cover theres two rubber hoses to cut now with sawzal one going down and to the front disconnect the black and the white vacume lines throw this assembly on the floor and stomp the shit out of it then throw it as far into the woods as you can. Then i just plugged the bottom hose up with a old spark plug and hose clamp but you can use a big bolt.
But later next time I'm under the transmission I'm going to take the tube off between the cats it goes between them right in front of the bottom of the trans bell housing, crimp the nipples that come out of the cats and jbweld them. Now unbolt the smog pump and give it the same treatment you gave the other assembly.
I will cover the vacuum lines first then the belt.theres five vacuum lines to deal with in this operation, the black one, the white one, the big one that came off the smog pump, and two red vacuum supply lines. The big line from the smog pump I just screwed a bolt into it. The black and white lines go to the drivers side of the upper intake on the back side of the throttle body opposite of the egr valve. There's two solinoids with wires plugged into both; leave the wires plugged into them but unplug the vacuum lined going to them. One has red and white the other red and black. The important thing to remember is that the red ones are supply vacuum the are the only ones that have to be plugged.
I just used some fine thread screws then put a little gasket sealer around the seem between the screws and the rubber (aren't sure if the sealer was needed but i used it just to be sure). TADAHHH!! You are done with the vacuum lines...there are prettier ways of doing this but I'm not trying to win a beauty contest.
Now for the belt. First, I read here, gadget says he uses a 5060538 belt but that was the wrong size for mine. Scott told me to use 560k6 belt. It worked but it was real tight.. I mean real tight. I had to walk it on and the idler pully is in all the way, but it worked. Thanks gadget and Scott.
I recommend the next size up if its available.
Now, the upper intake removal. These cars are old. I guarandamntee it that the vacuum lines under the plenum are old and wore out. So I took the upper intake off and changed the valve cover gaskets, all the vacuum hoses, and pcv valve and screen underneath it. Before you start this, go to the ford dealership and pick up a pcv screen(pcv breather) and pcv valve. Then go to parts store and get valve cover gaskets and upper intake gasket kit. Make sure that this kit has the throttle body and EGR SPACER gasket.
First thing is to take off the air cleaner assy. I use 8 mm socket for all the hose clamps on this car. Also, there are 2 8mm bolts on the bottom front of the air cleaner box and 2 7/16 bolts on the on the air inlet above the radiator. Remove the air filt assy. OK, now take the top plate off the upper intake four torx screws they are the same size as the module screws, so I used my module tool and pliers. After that is off there is a bracket. Remove the vacuum lines and wire plugs from it and set it aside. Now there are 2 nuts holding the linkage bracket on the throttle body. I think 13mm. Remove the bracket (you may want to disconnect the tv linkage and the other linkages first). There are 2 small water lines going to the backside of the throttle body with hose clamps on them remove them (I cant remember if these were 8mm or not). Unplug the tps, egr, idle air valve, and hose going to the oil fill. There 4 13mm nuts holding the throttle body on. Take the throttle body and egr spacer off. Now there two shiny bolts under that plate you took off (the plate that says 5.0)... those are the two middle bolts and there are four more bolts to take off; if you cant find them look at the upper intake gasket.
Now there two of these bolts that are annoying because if you back them out too far with your socket, your socket gets stuck, you'll see. Once you get these six bolts out, lift up the upper intake and start unplugging the vacuum lines, remove the intake. Now I promise you the inside of this thing is gonna be caked with gunk unless someone had an expensive intake cleaning done recently. What I did was plug the vacuum ports on it then set it throttle opening up in a parts washer, filled it up with barsol, and let it soak over night. This isn't needed but should be done if possible. At this point, replace the vacuum hoses along with the pcv screen and valve. If you can't get the screen out, use a long pointed screw, screwed right into the top of the screen and vicegrips to pull it out. Don't even bother checking the hoses, just change them. Take off the egr, clean it along with the spacer and throttle body.
At this point you should change the valve cover gaskets even if not needed because it's a pain in the ass to do with the upper intake on. The bolts are 11mm. The passenger side is ok but the drivers side is a little annoying. There is a bracket on the very back bolt between the firewall and the valve cover. Unplug the two (salt and pepper shakers) wire connections by pushing down on the tab on top of each and wiggling them off... while there check for corrosion. Then I used an 1/8 drive deepwell 11mm, a swivel, and extension on the hold down nut. Then there was the valve cover bolt right under it. Reinstall every thing in reverse. This job took me about 5 hours because it was the first time for me.
Man this is a long post. Next one, I'll go into the the other goodies I have, but some other time.
In my opinion, these things ive listed above are a must do weather you have problems or not.
 :naughty:


Comment