Originally posted by 86VickyLX
View Post
 |
-
Good, because so is the tax man, lolThe ones who accomplish true greatness, are the foolish who keep pressing onward.
The ones who accomplish nothing, are the wise who know when to quit. -
I am just about done with the driver door panel. I altered the shape a little bit on top and added some padding to make it soft so it looks and feels better now.
Since a couple of people have expressed interest in these I'll do write up as I do the passenger side door.
First I should mention what parts I used to make these. I used 2 front door panels from 03+ Vic, Marquis or Marauder(if you are straight savage). New panels are made by cutting 2 sedan panels and joining them together to make a single panel.
- Speaker covers came from first gen Lexus IS300. They have screw holes in the back and are very easy to mount.
- Door light is also from IS300. It fits nicely into an empty spot on Panther door panel and factory lens attaches like it was made for it.
- Door pull handles are from first gen Ford Escape.
- Door handles that open the door are from Jaguar XJ (late 80s-mid 90s).
- Door handle cables are modded SN95 Mustang.
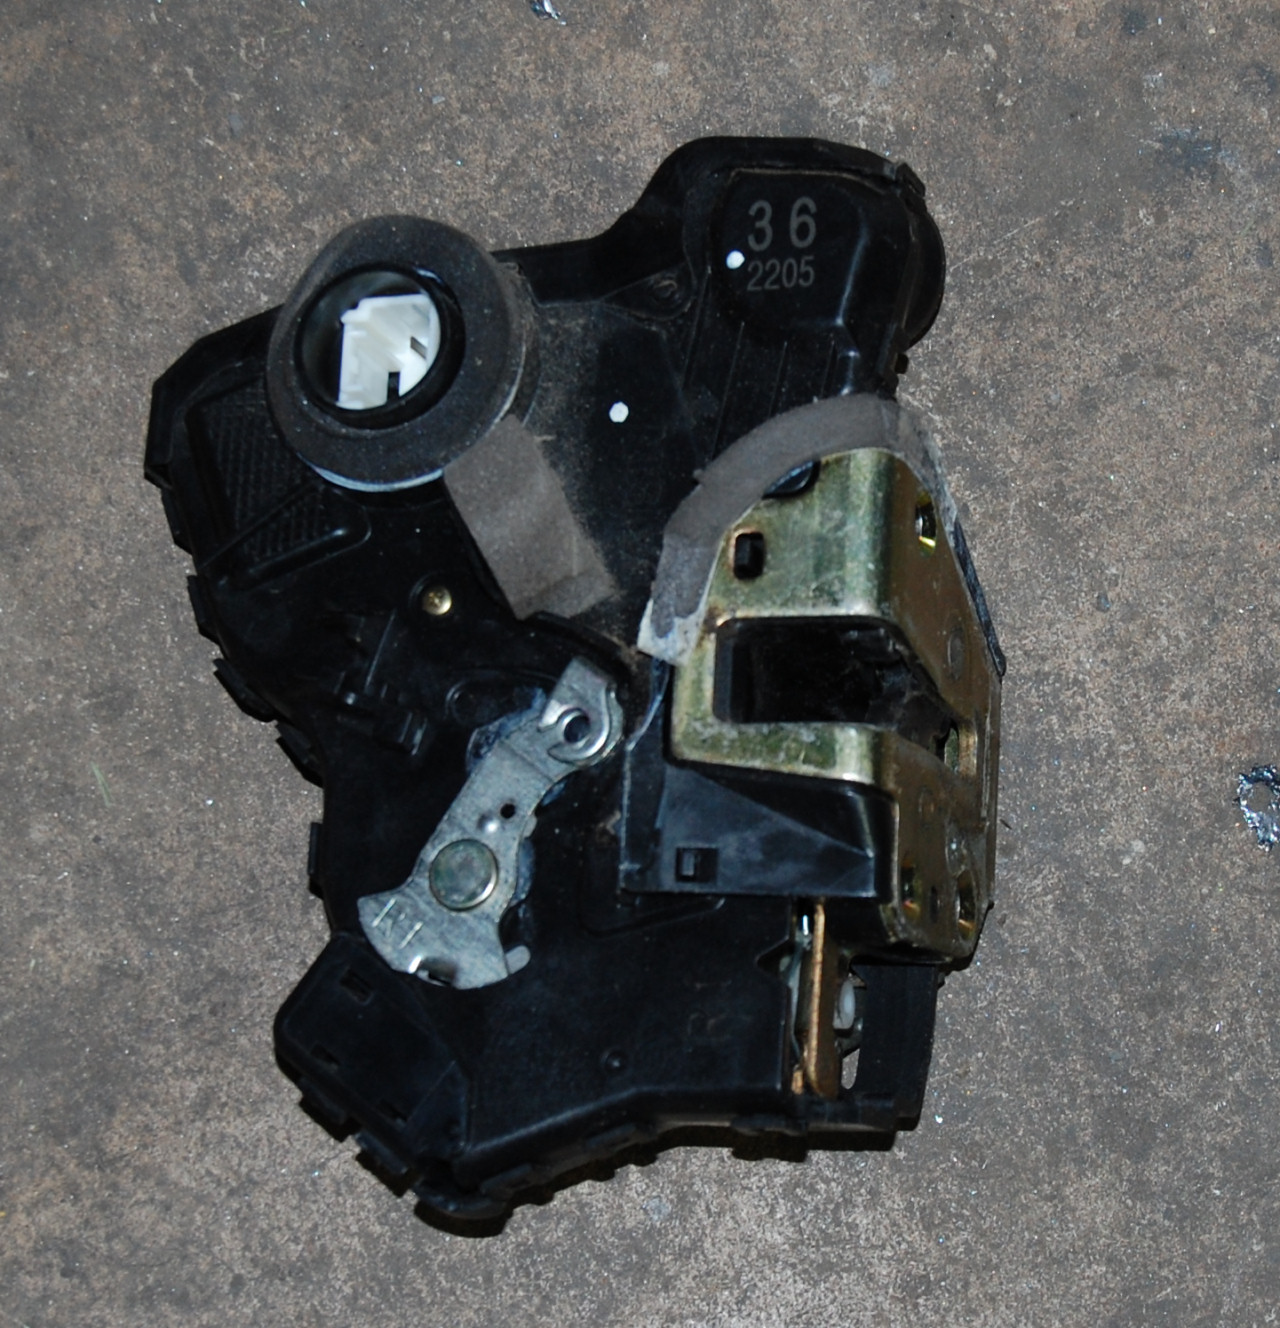
- Door latches are Camry/Lexus ES300 (2000s)
The actual procedure I will document as I go along. We will call this Part 1.
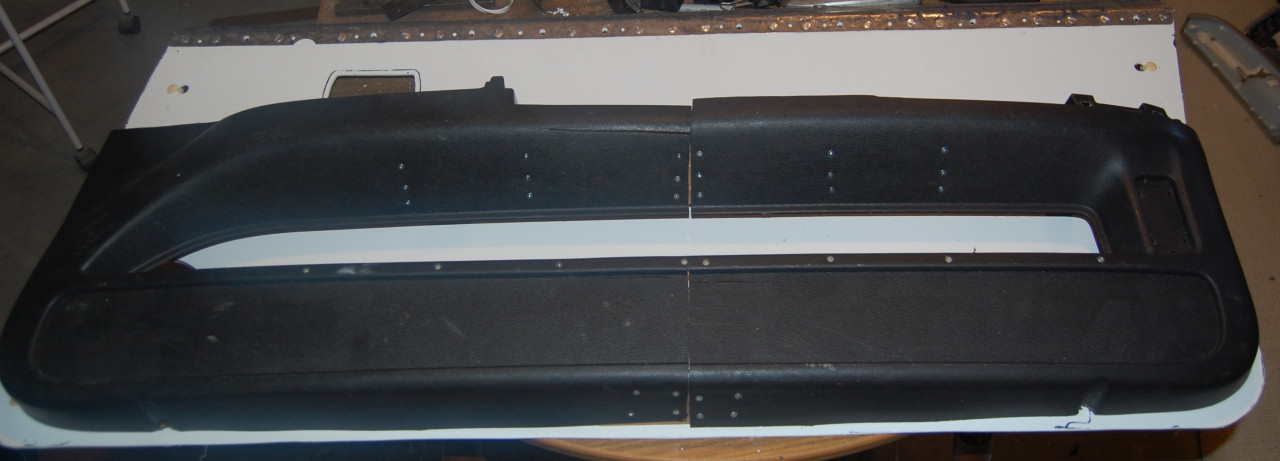
I am using a couple of P71 door panels from a junkyard. Begin by stripping the panels to the bare skins.

Pry the arm rest off and remove metal mounting brackets. Throw both of those into trash. Then split the panel in half by separating the plastic solder joints. Flat head screw driver works best for this. They just pry off. Be careful not to damage 4 joints by the door switches. It's important that those posts be kept intact as they will be later used to secure the door panel.
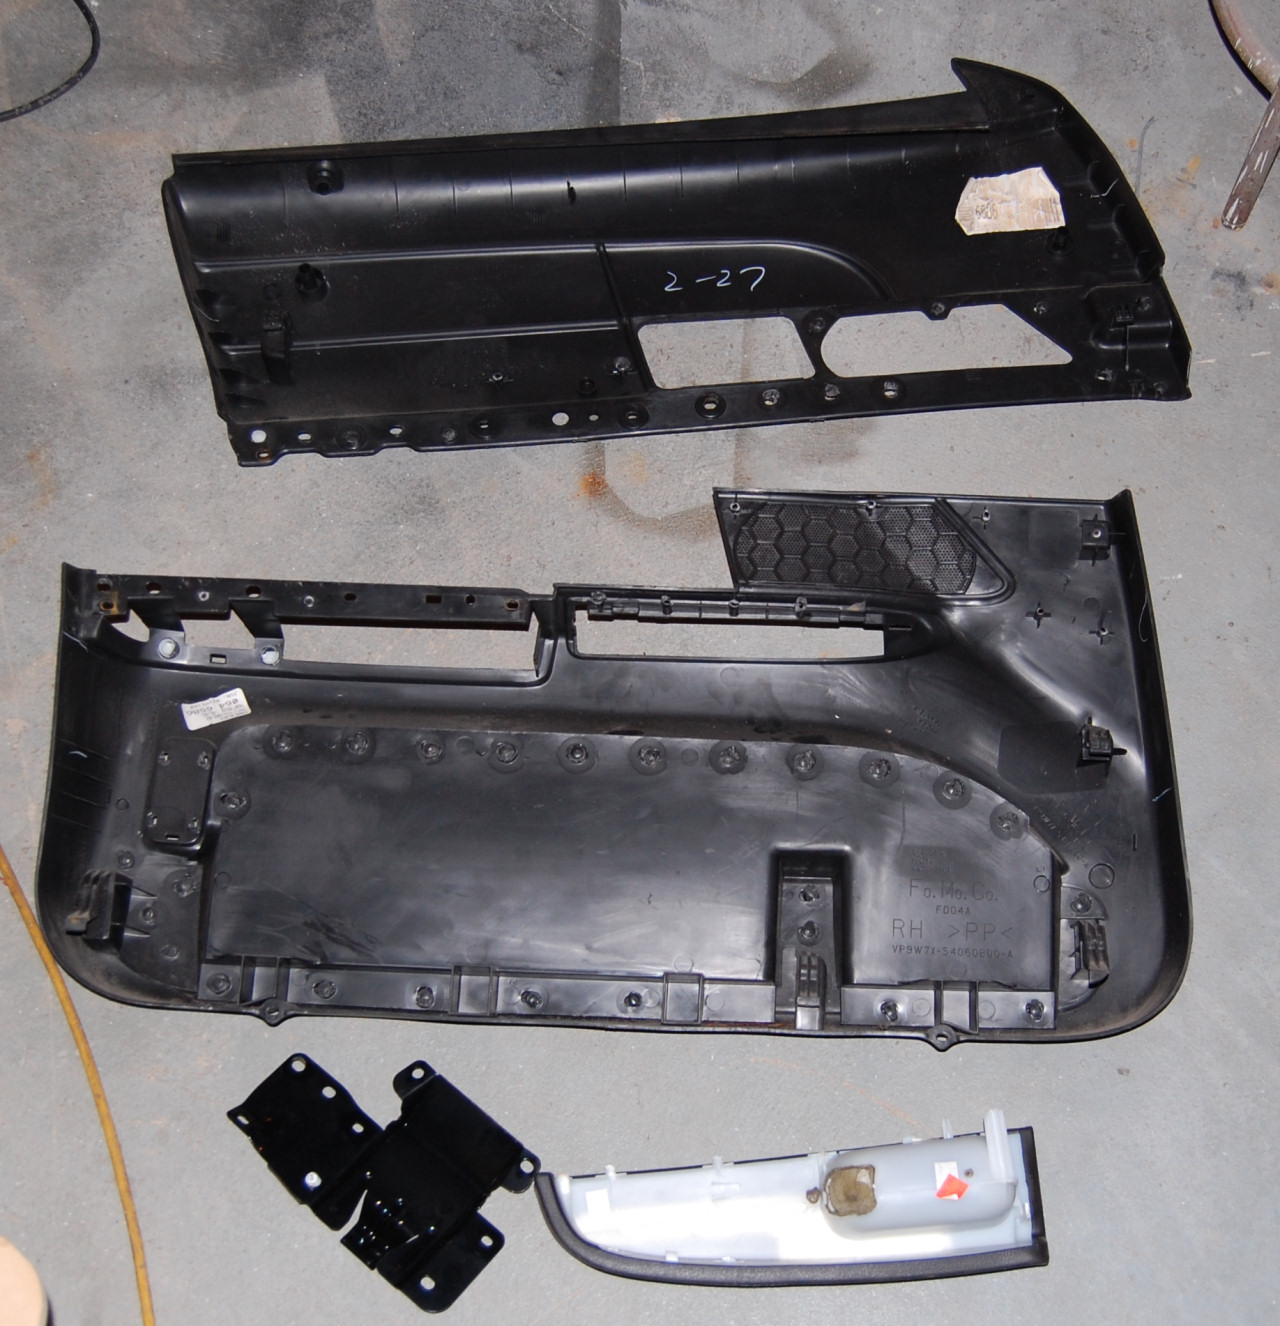
Repeat the procedure for door pocket backing. I found that cutting around the solder joints with a sharp blade and then prying with flat head works. You will also want to break off all the factory mounting hooks for the door panel. They won't be needed.
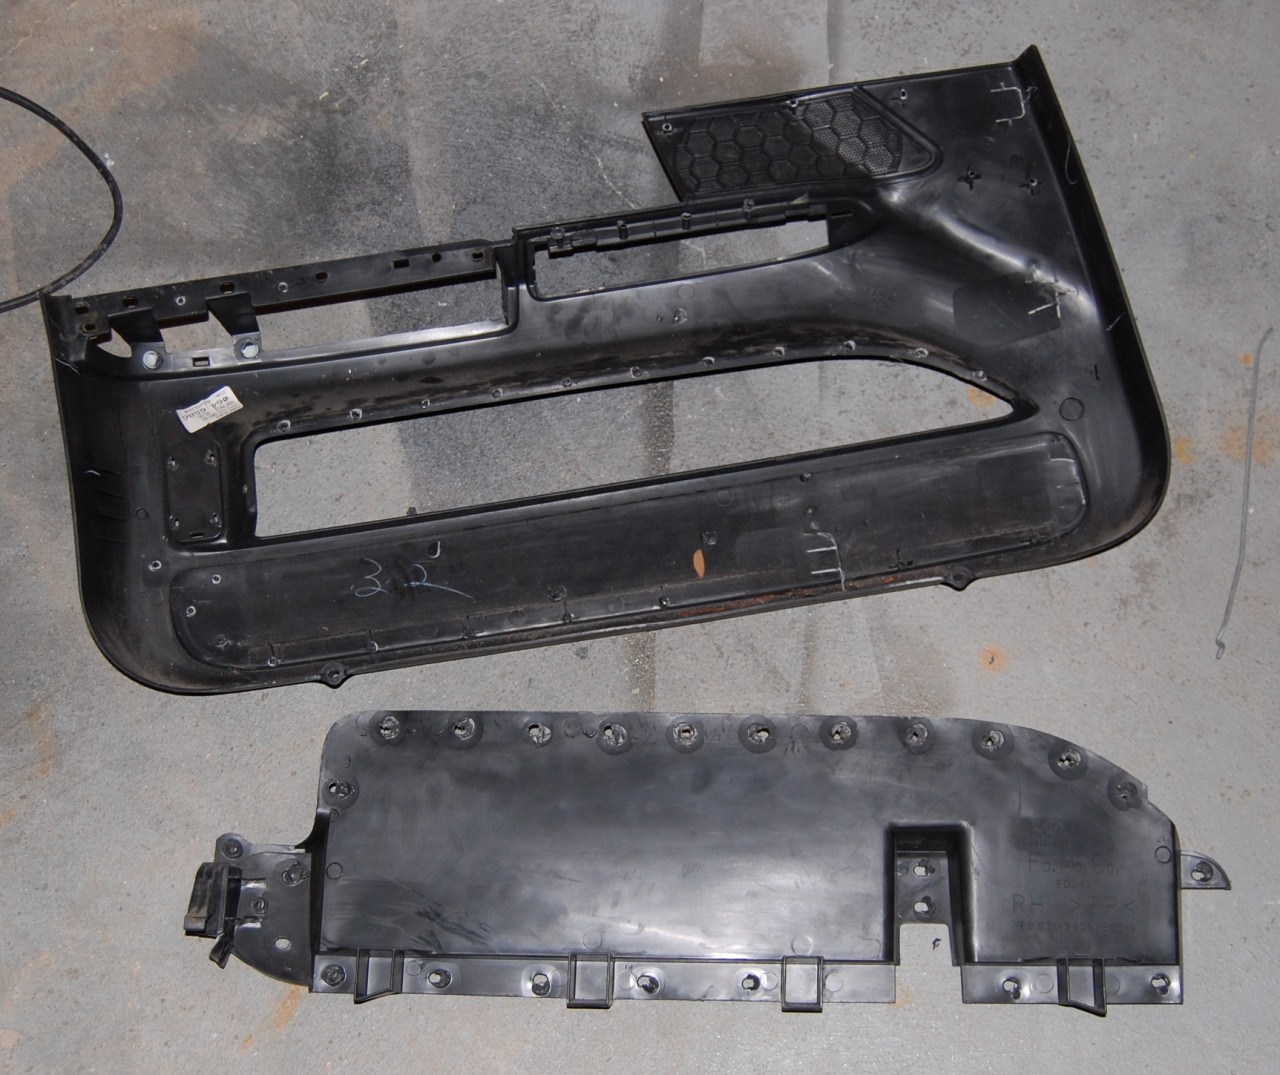
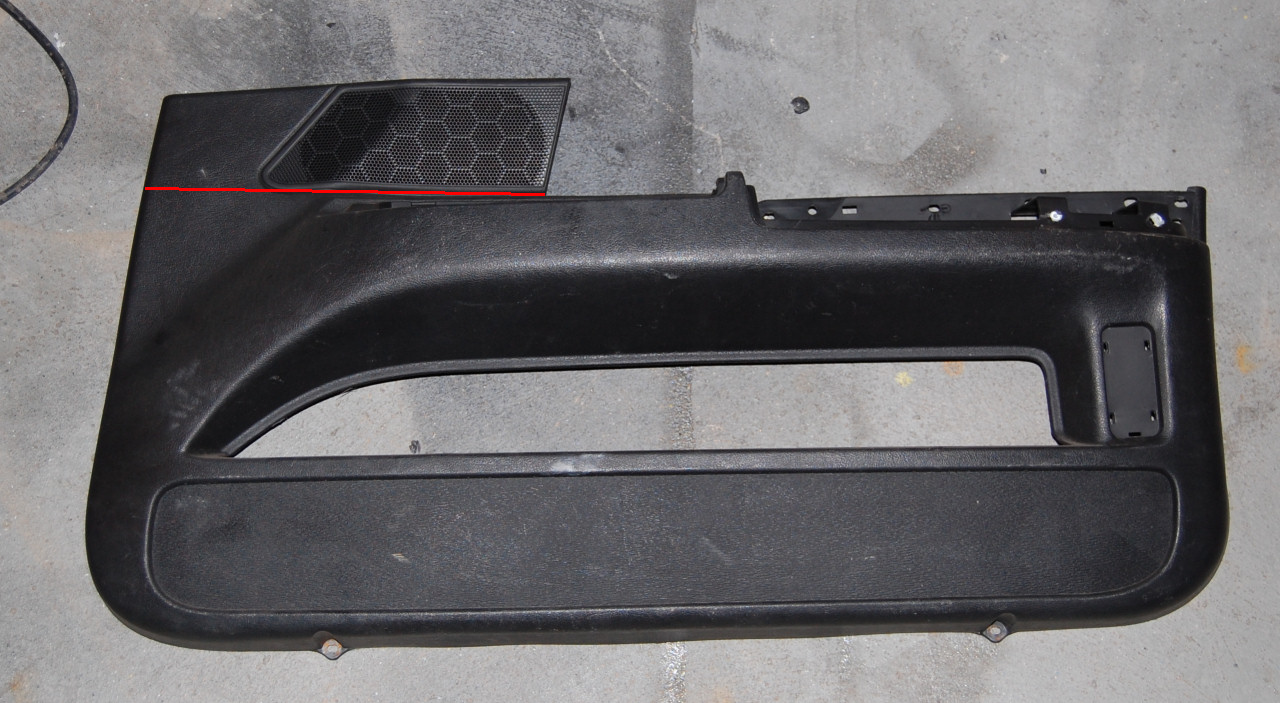
Next cut off the section above the red line and throw it into trash. It looks diagonal in the picture but red line should be parallel with top part of the panel.
Comment
-
So awesome. Looks forward to the write up. Nothing I would ever do (as I am content with my current panels) but I really do admire the work you put into these (as they look so fucking good) that I would love to read up about it.~David~
My 1987 Crown Victoria Coupe: The Brown Blob
My 2004 Mercedes Benz E320:The Benz
Originally posted by ootdega
My life is a long series of "nevermind" and "I guess not."
Originally posted by DerekTheGreat
But, that's just coming from me, this site's biggest pessimist. Best of luck
Originally posted by gadget73
my car starts and it has AC. Yours doesn't start and it has no AC. Seems obvious to me.

Comment
-
Mr Bean: the more you post the more I think you are magic.1990 Country Squire - weekend cruiser, next project
1988 Crown Vic LTD Wagon - waiting in the wings
GMN Box Panther History
Box Panther Horsepower and Torque Ratings
Box Panther Production NumbersComment
-
Haha thanks.
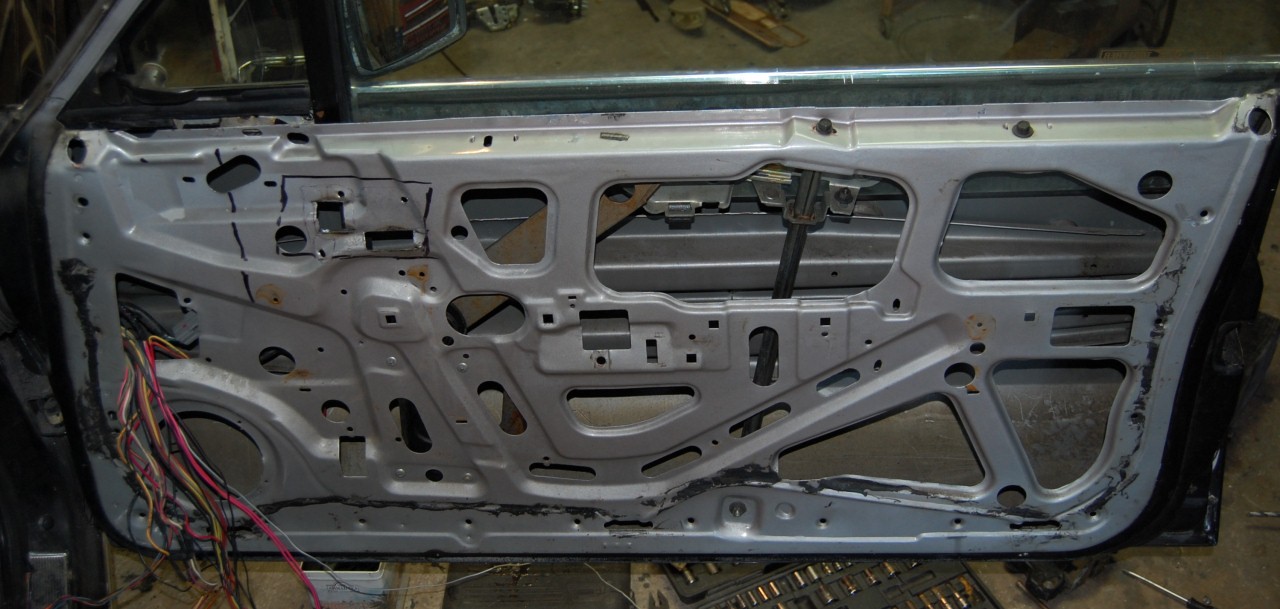
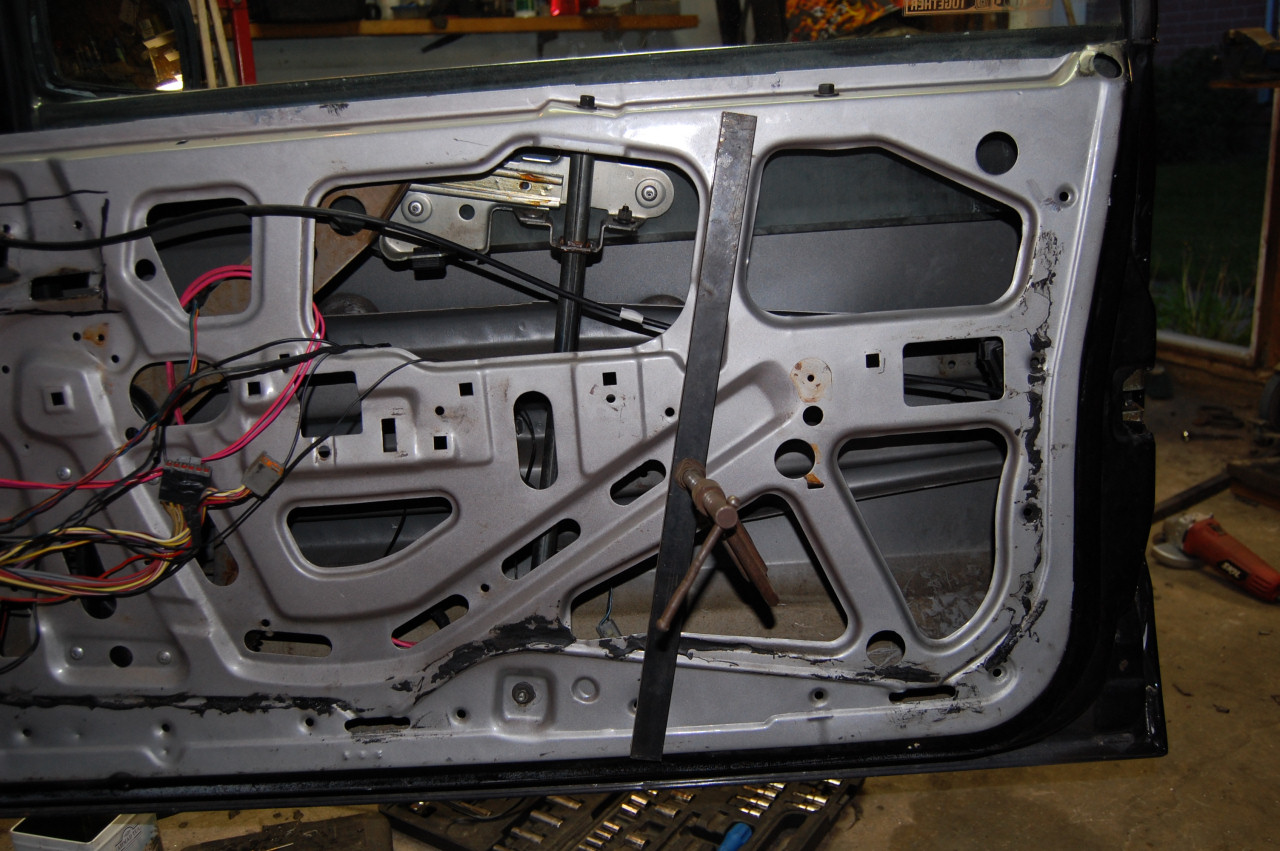
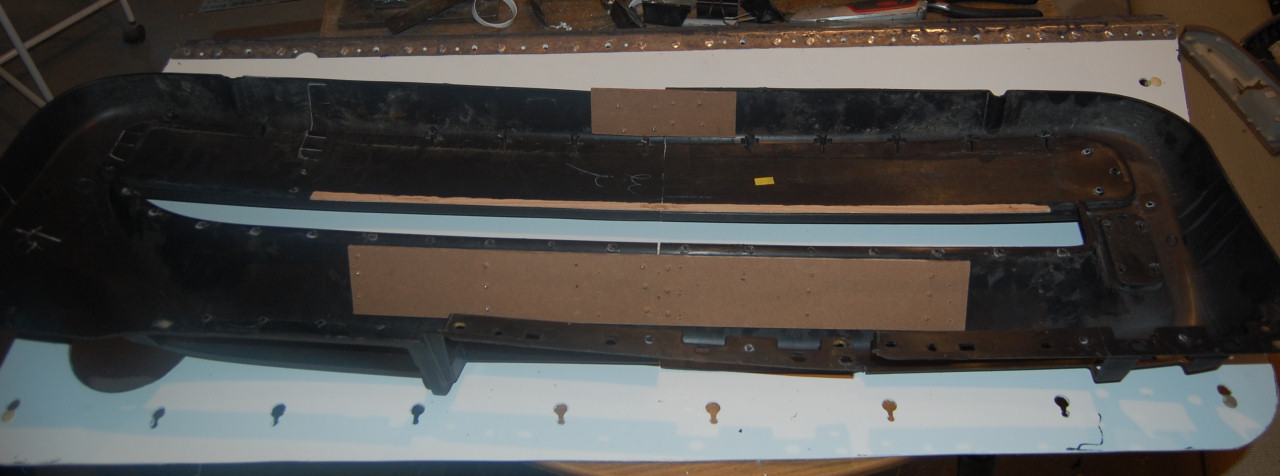
I am gonna be jumping back and forth between door panels and door hardware. Tonight I decided to tackle the hardware. Basically rip the old door panel off then gut the door. Remove the handle, door latch, door lock actuator, all the rods and all the metal brackets that hold the arm rest in place. To get those off just drill out the rivets. You should end up with a bare door. Leave the window regulator in place as that doesn't need to be touched.
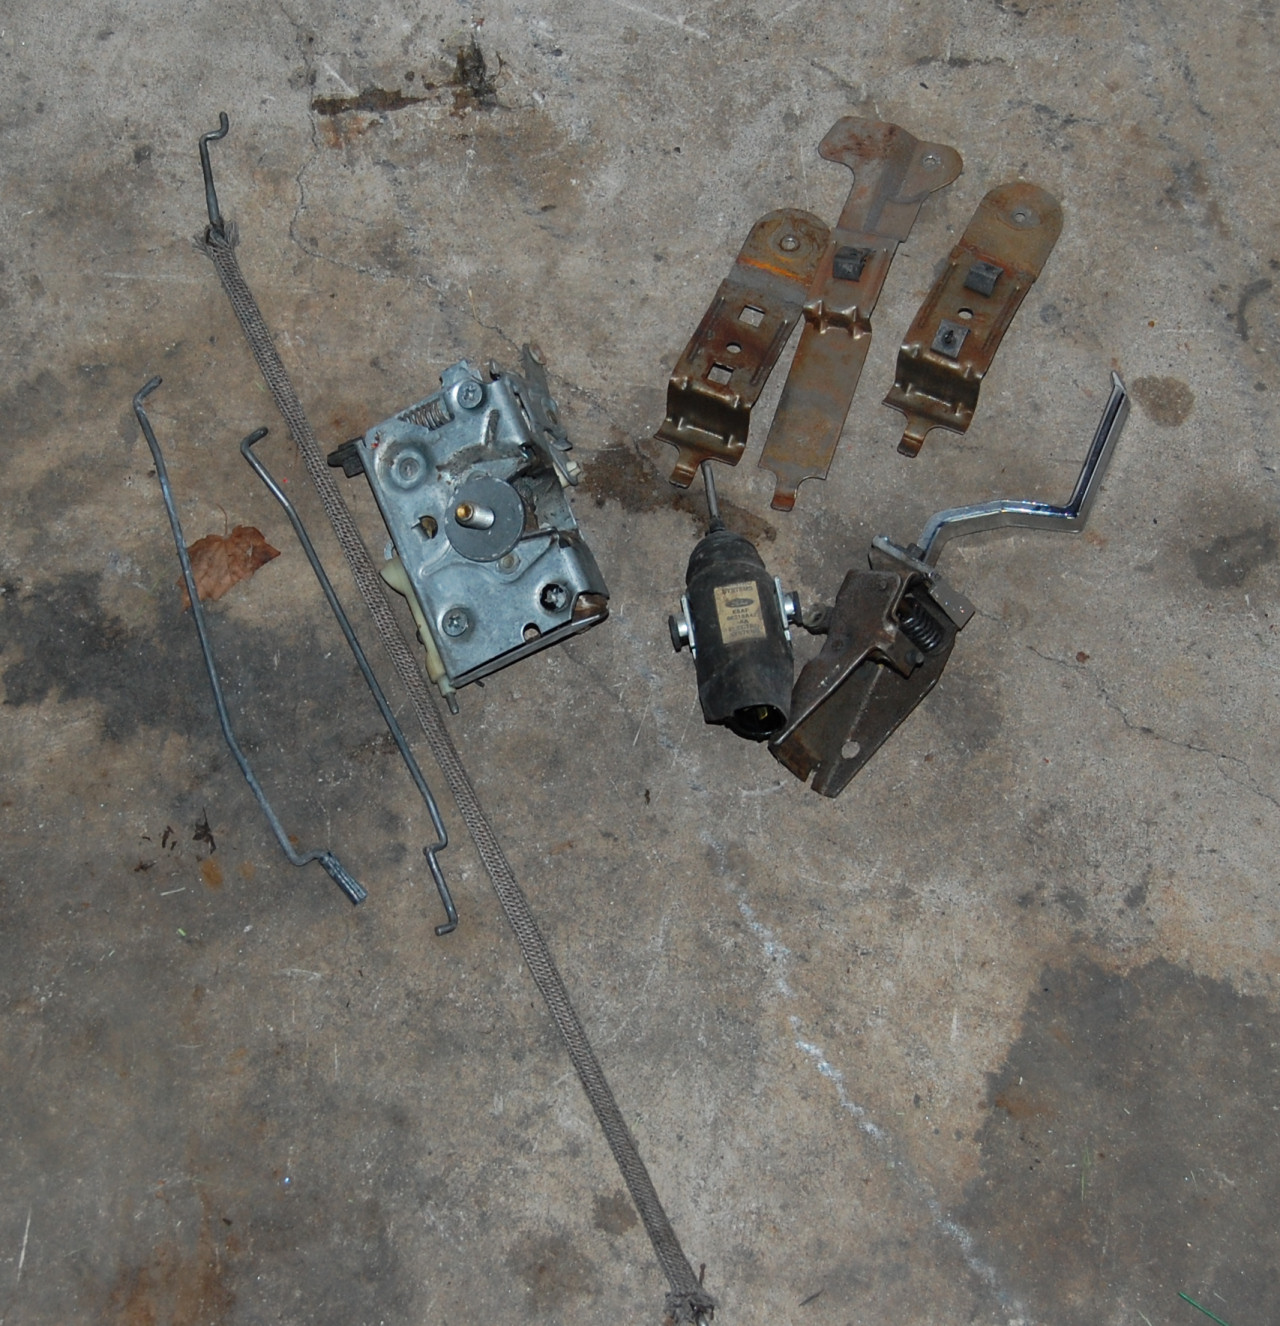
This is all the junk that was taken out. All those metal rods rattling around inside the door. I only have 3 here. Stock boxes have 4 if I am not mistaking. One for interior handle, one for exterior handle, one for lock/unlock plunger, one for keyhole.
This is what will replace it. It still requires 2 metal rods, one for exterior door handle and another one for keyhole but it's less than before.
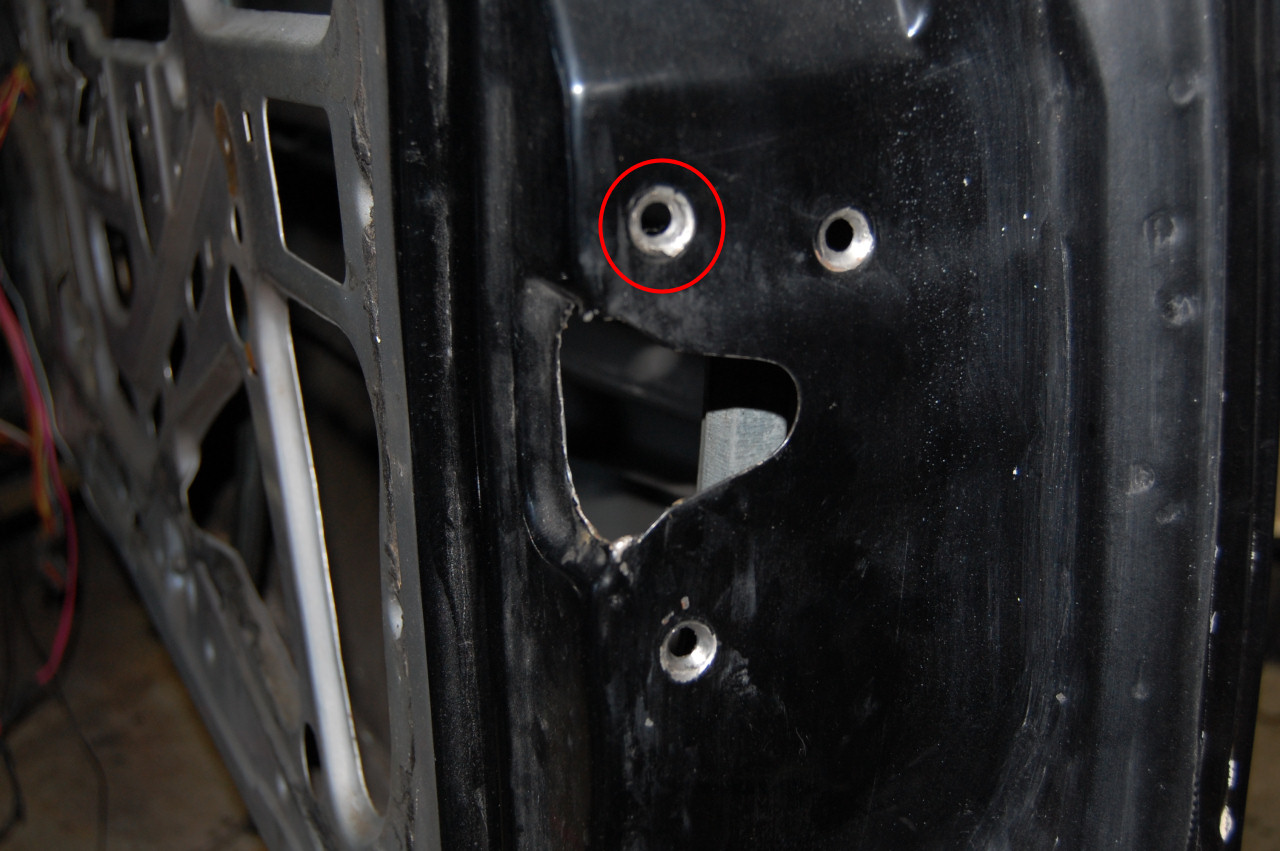
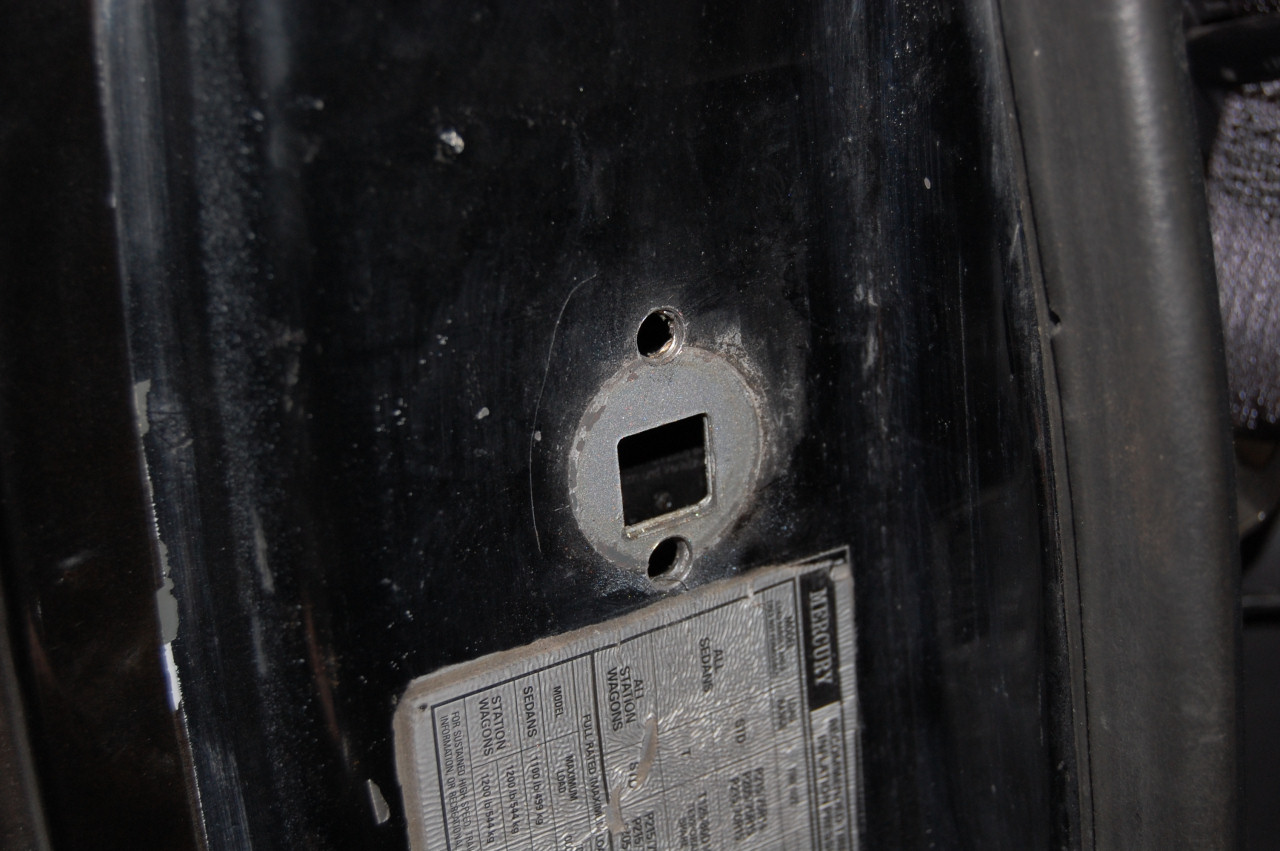
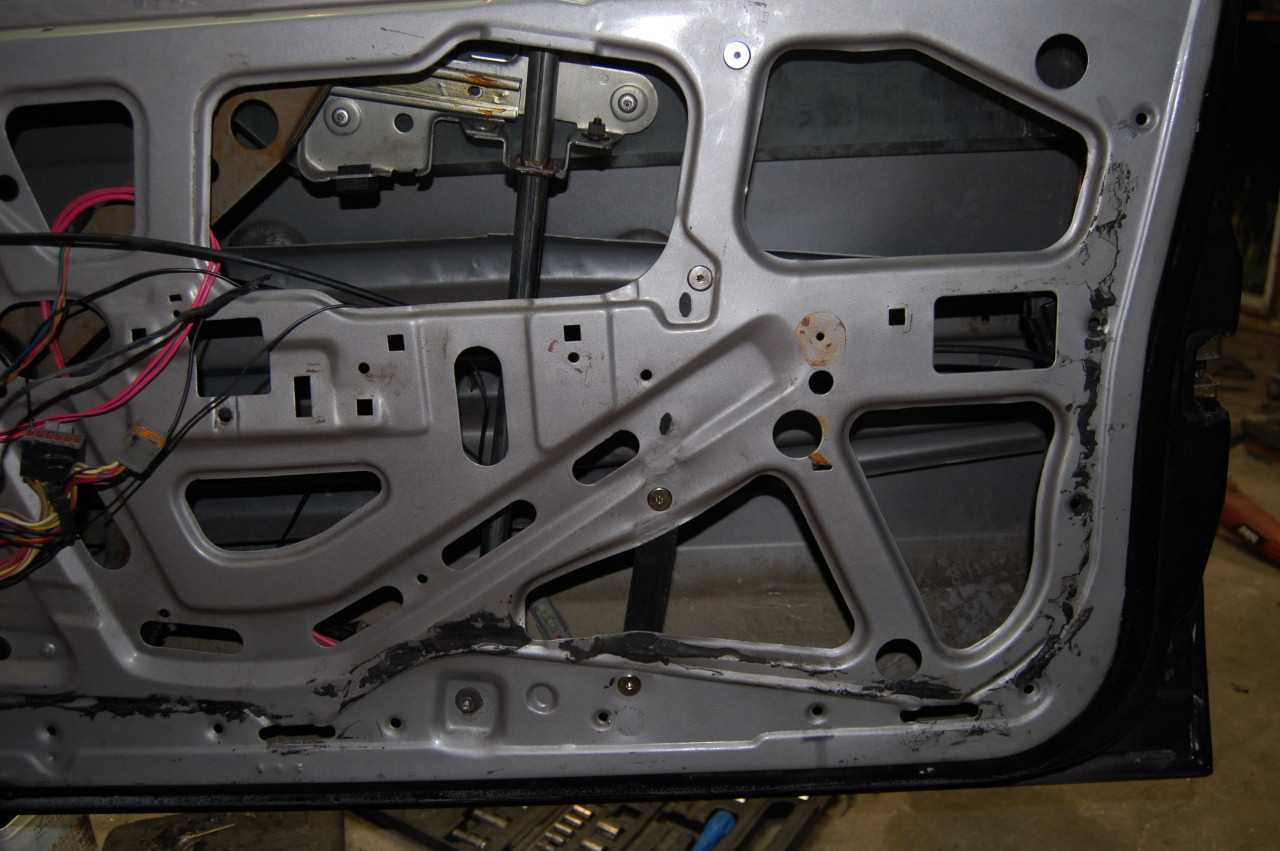
To install Camry latches will require drilling new bolt holes. Also, one of the stock holes(circled in red) will need to be flattened out so Camry latch can sit flush against the door.
Using piece of cardboard to make a template.
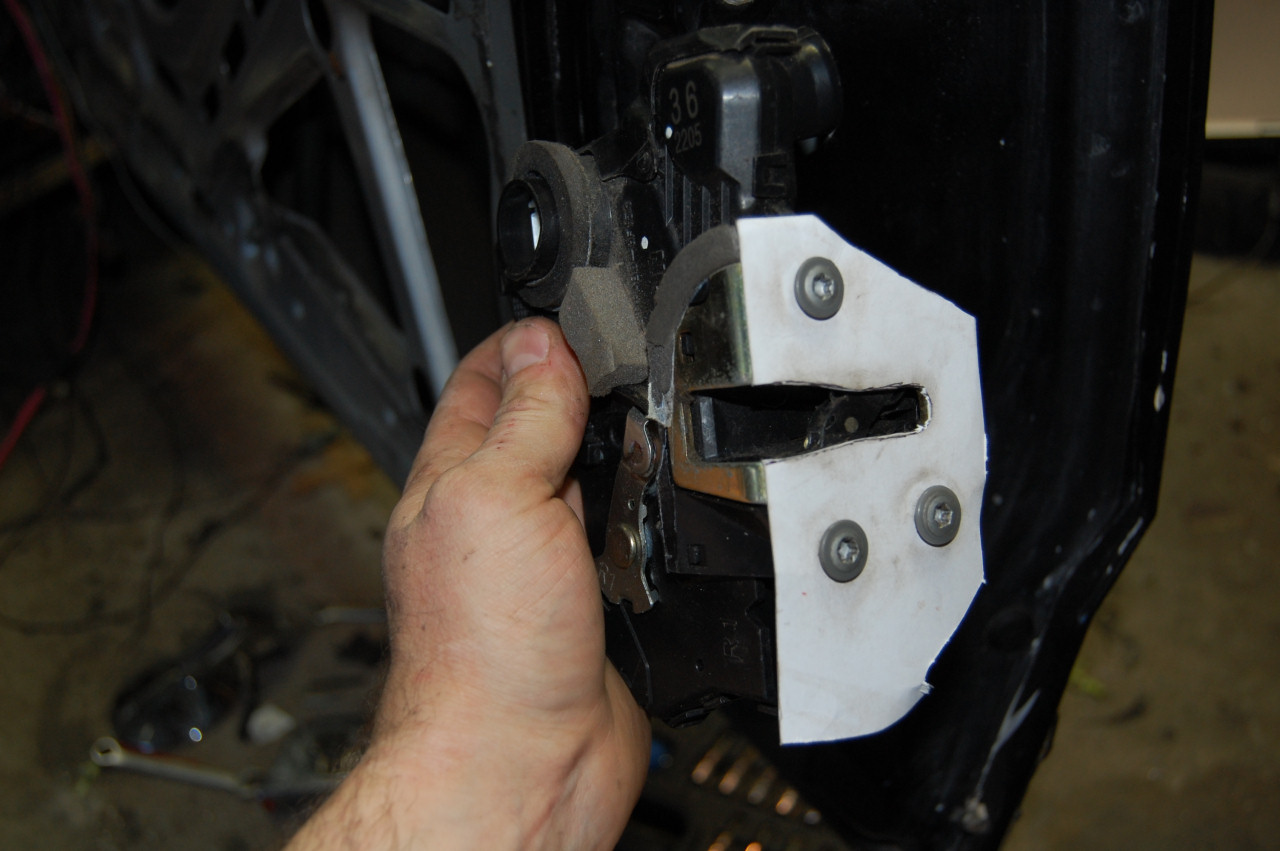
Line it up then mark you new bolt holes.

New holes drilled and indented so the bolts sit flush. Notice that the door had to be notched slightly so new striker can fit properly.
To be continued...Comment
-
you have much more patience than I would with this stuff.


Only two things are infinite, the universe and human stupidity, and I'm not sure about the former. -- Albert Einstein
rides: 93 Crown Vic LX (The Red Velvet Cake), 2000 Crown Vic base model (Sandy), 2003 Expedition (the vacation beast)
Originally posted by gadget73Originally posted by dmccaigComment
-
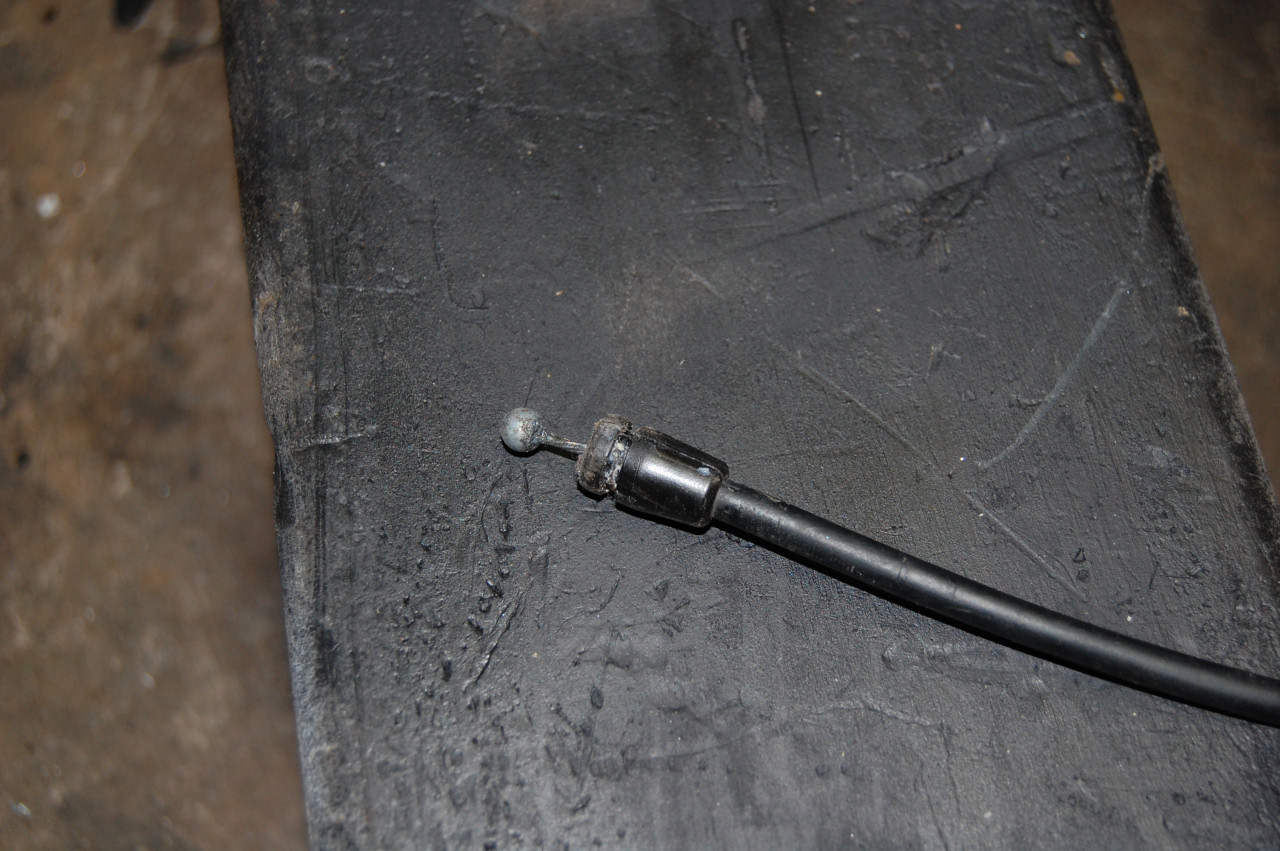
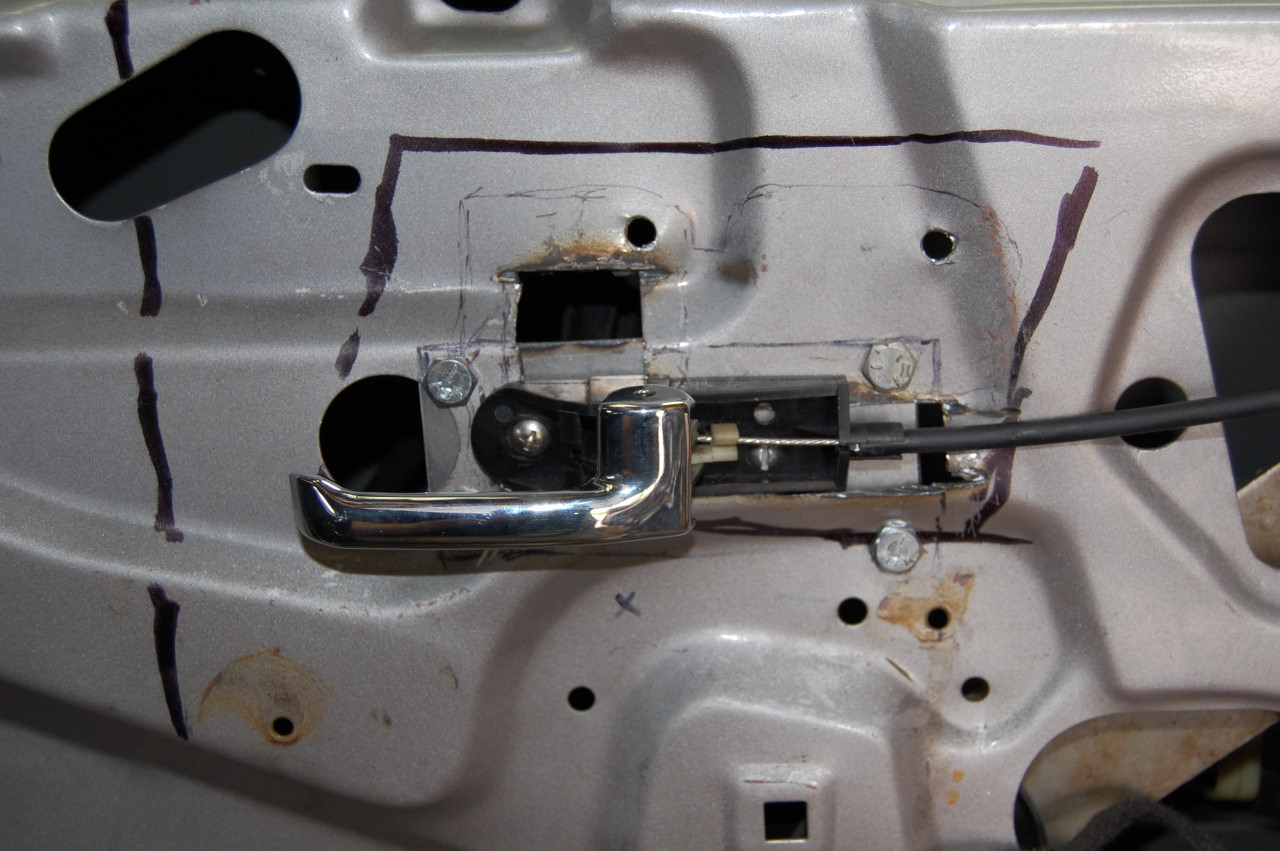
Next up are strikers. Before I install those I want to be able to open the door. Exterior handle requires fabbing up new rod so I decided to leave that till later. Interior handle on the other handle is easier so I decided to tackle that next.
I used Jaguar XJ handles and SN95 Mustang cables as those are the only ones I could find which are long enough to work on a tudor. They didn't quite fit the Camry latches and required shaving some plastic off to fit. 10 minutes with a grinding wheel and they fit like a glove.
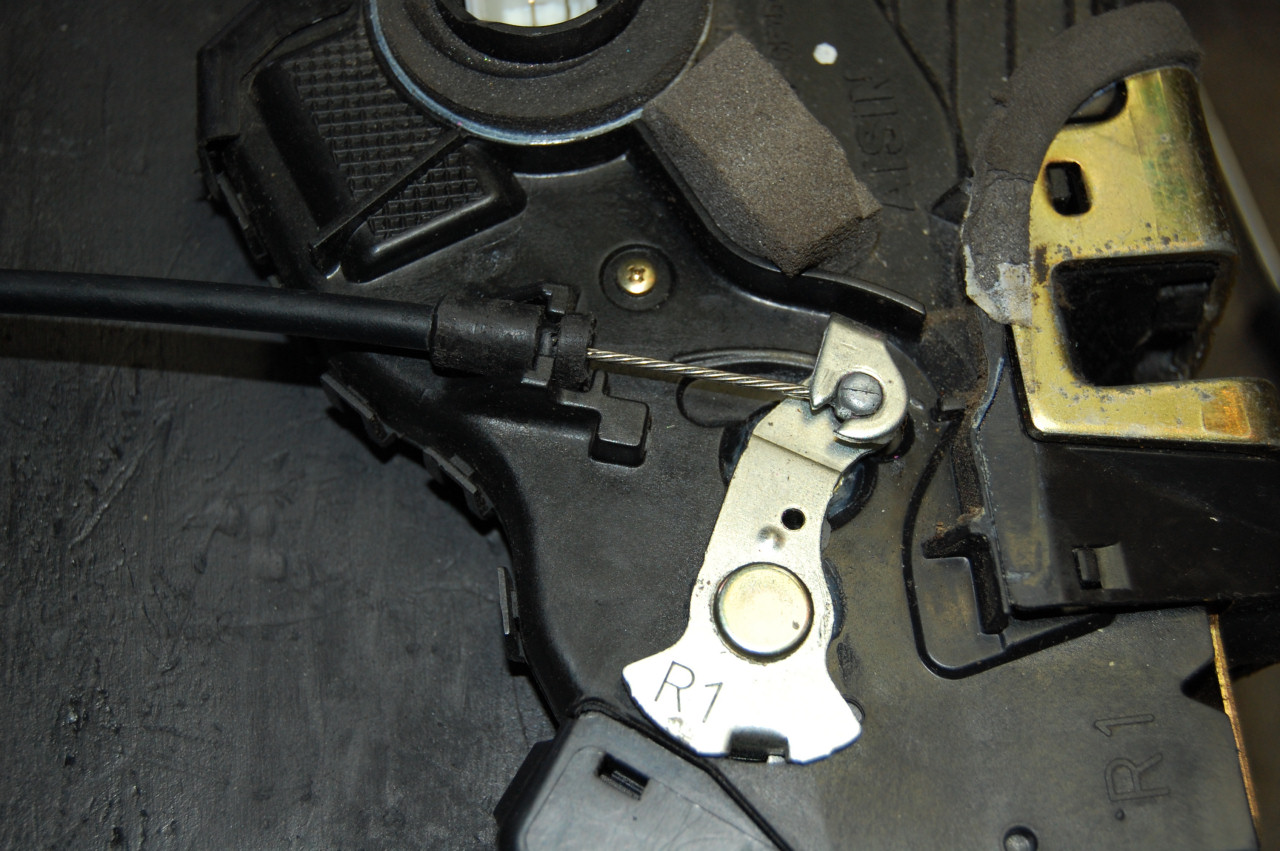
Other end of the cable needs to attach to Jag door handle. Once again, doesn't fit.
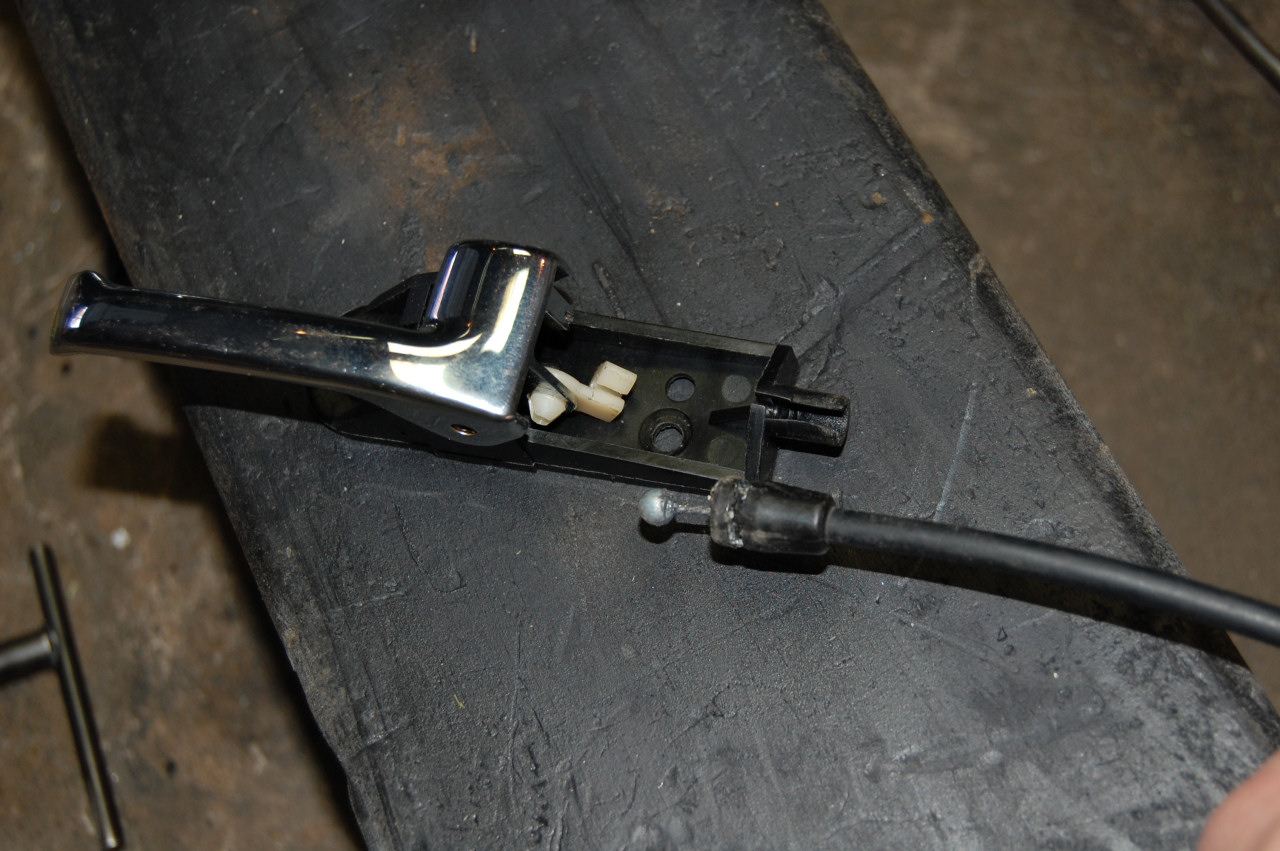
10 minutes with a grinding wheel and once again fits like a glove.

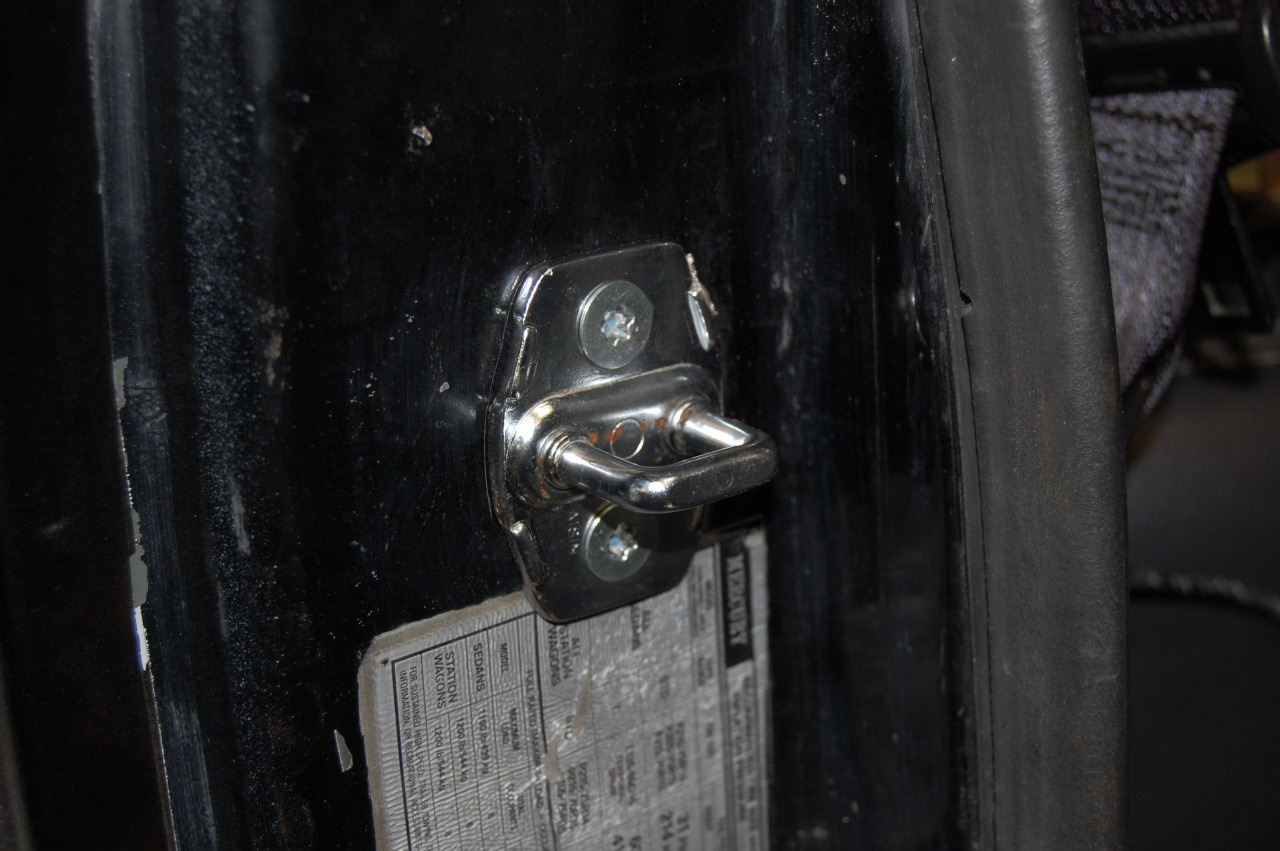
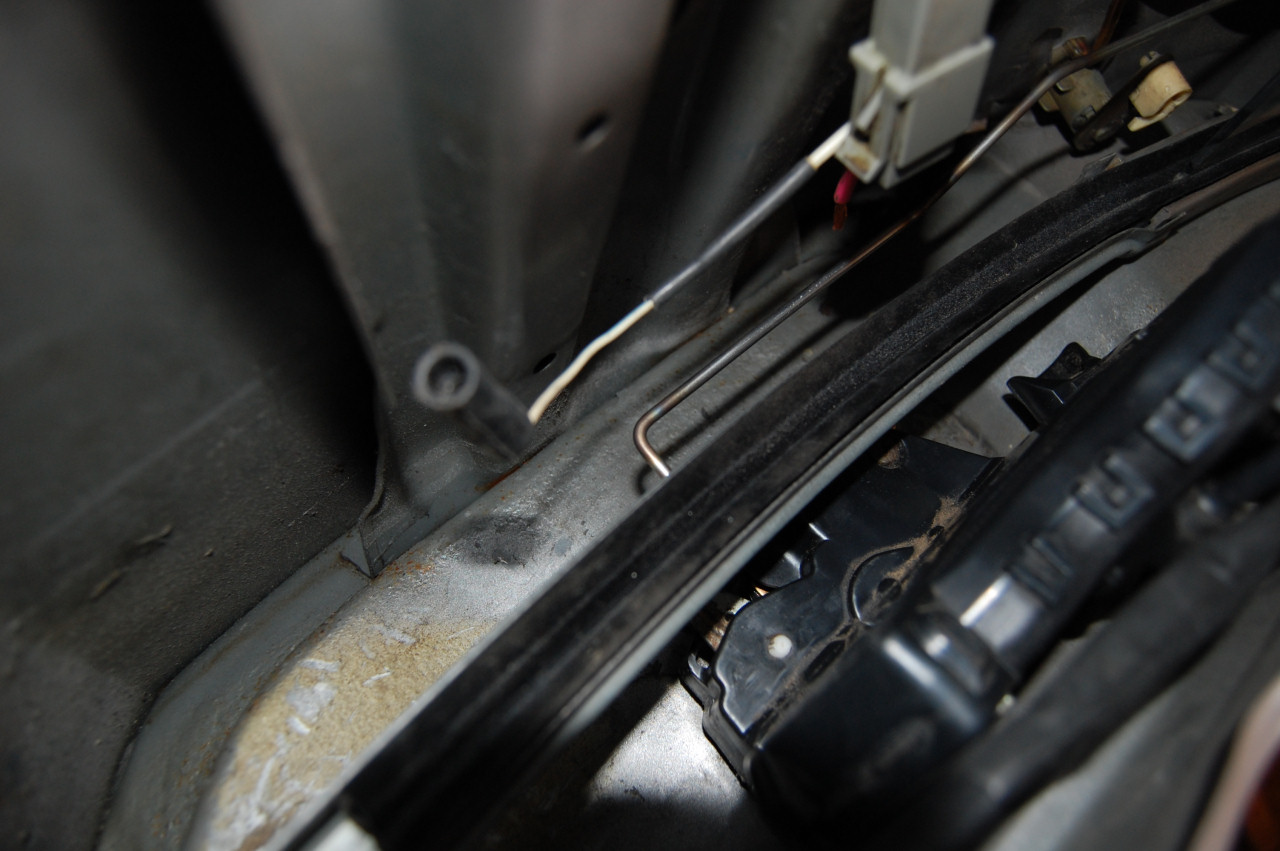
Now that I could open the door with a handle I put the striker plate on. It is more or less straight forward. Line it up, drill the holes then use bolts and nuts to hold it in place. Chrome duct tape works nicely for temporarily holding the striker in place so you can figure out where it needs to sit. During final assembly I will weld the nuts to the factory metal plate so the striker doesn't get ripped out if there is ever a crash.
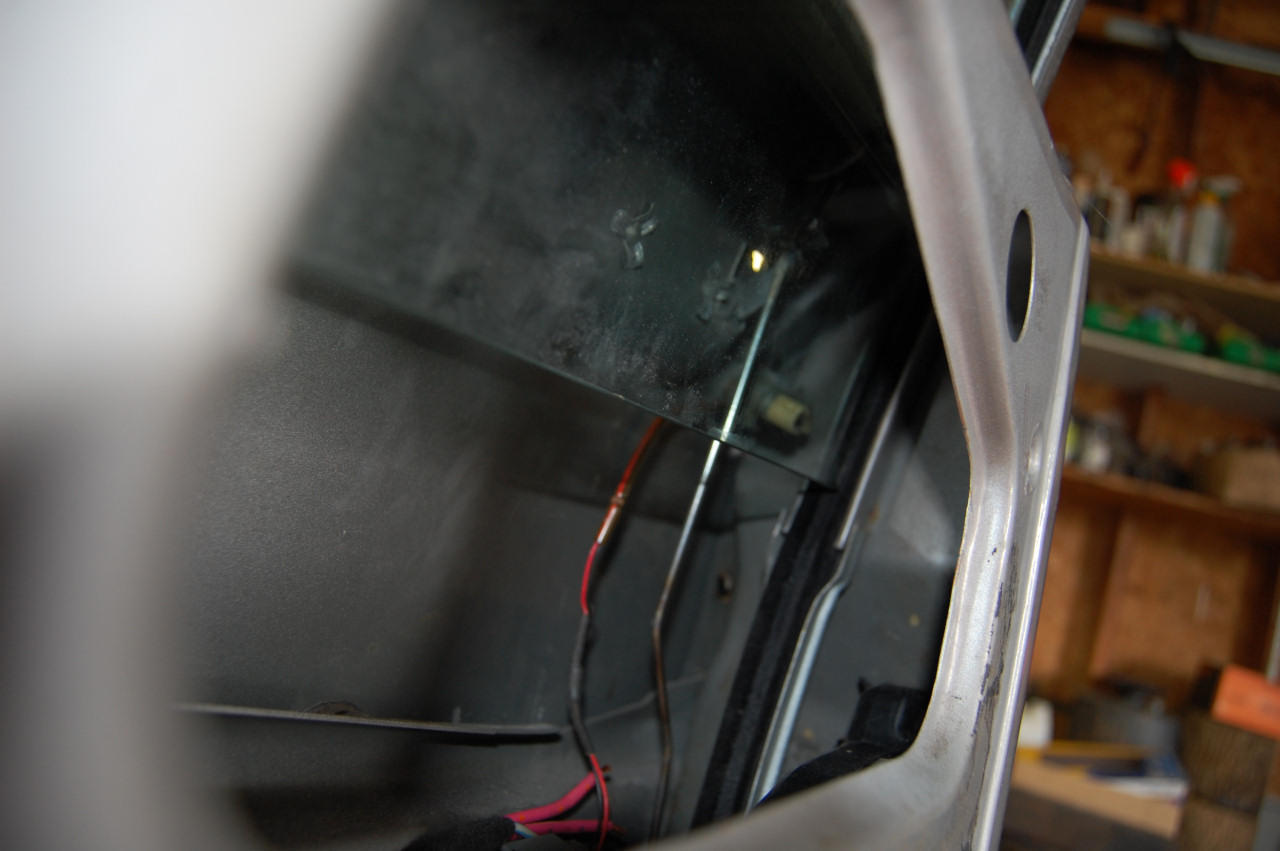
After that was done I move on to door reinforcements. I used some steel, square tubing that I had laying around. I put in 2 reinforcements per door which stiffened things up quite nicely. The pieces are roughly 20 inches long. This is showing how the brace will sit. I placed it on the outside to give you an idea.
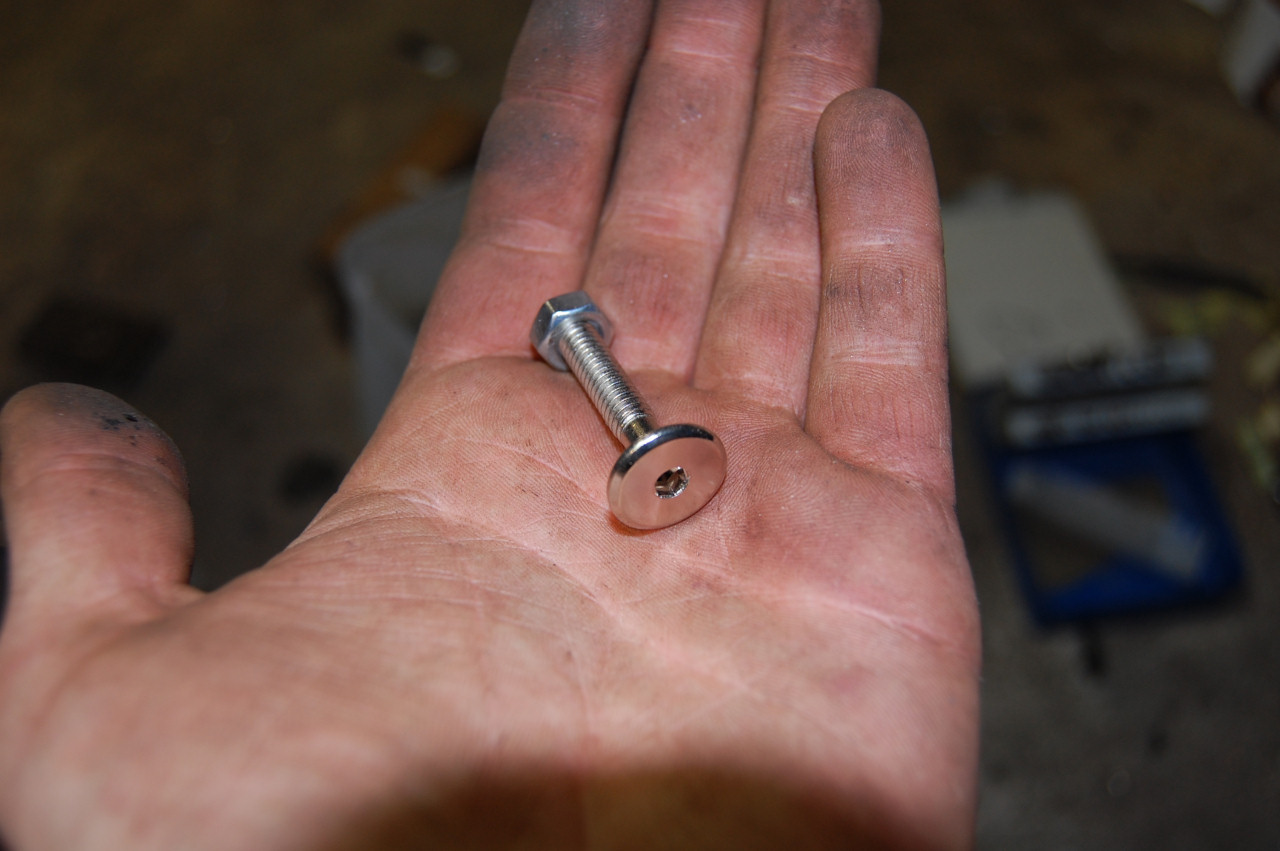
Got these bolts with flat heads at Home Depot to hold the braces in place. They work nicely since they are flat and don't interfere with the door panel.
And here is one of the braces installed. I will paint the braces before final assembly.
Comment
-
very nice.
Only two things are infinite, the universe and human stupidity, and I'm not sure about the former. -- Albert Einstein
rides: 93 Crown Vic LX (The Red Velvet Cake), 2000 Crown Vic base model (Sandy), 2003 Expedition (the vacation beast)
Originally posted by gadget73Originally posted by dmccaigComment
-
Had a day off today so did a bunch more work on the car.
Fabbed up exterior door handle rod. Using large soldering wire as template and then duplicating it onto steel rod. Gotta clean up the top section a bit more but it fits and works nicely.

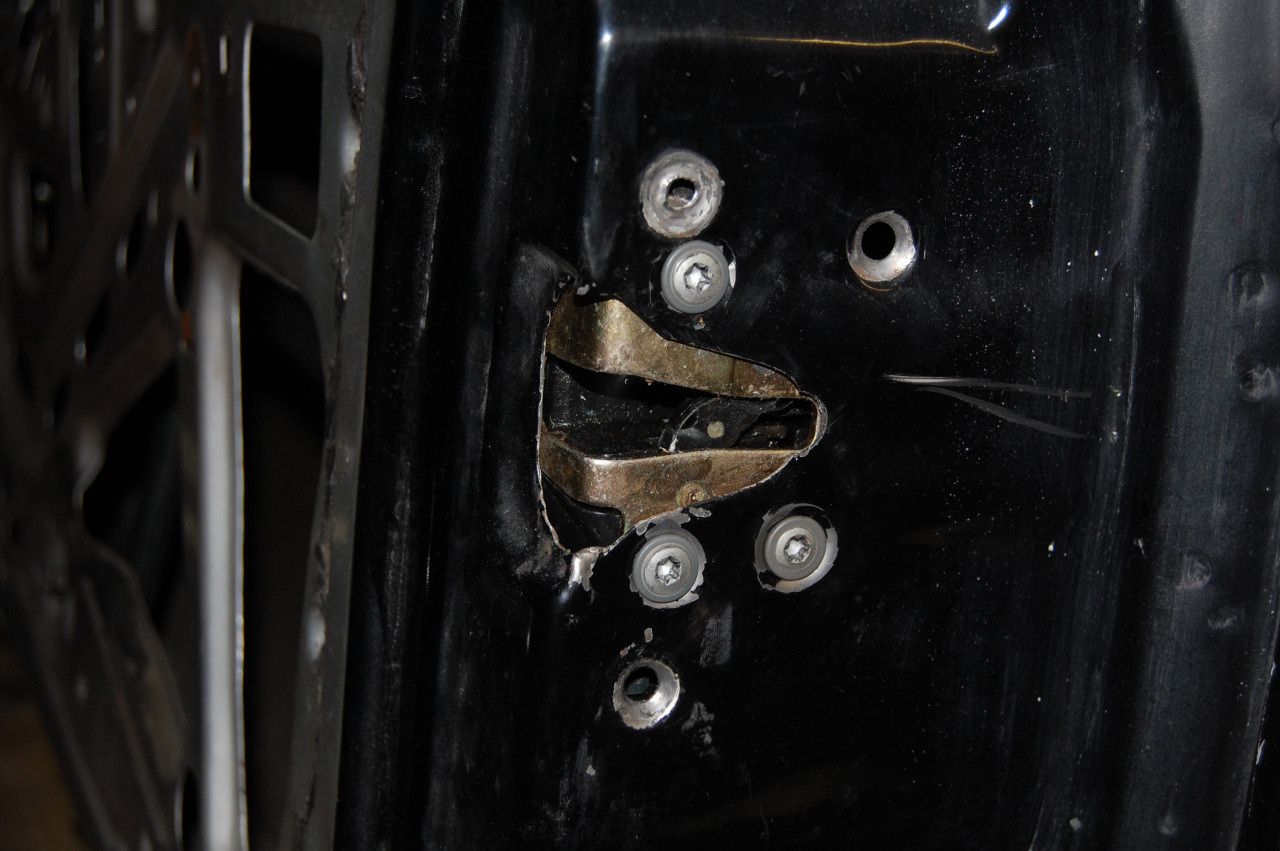
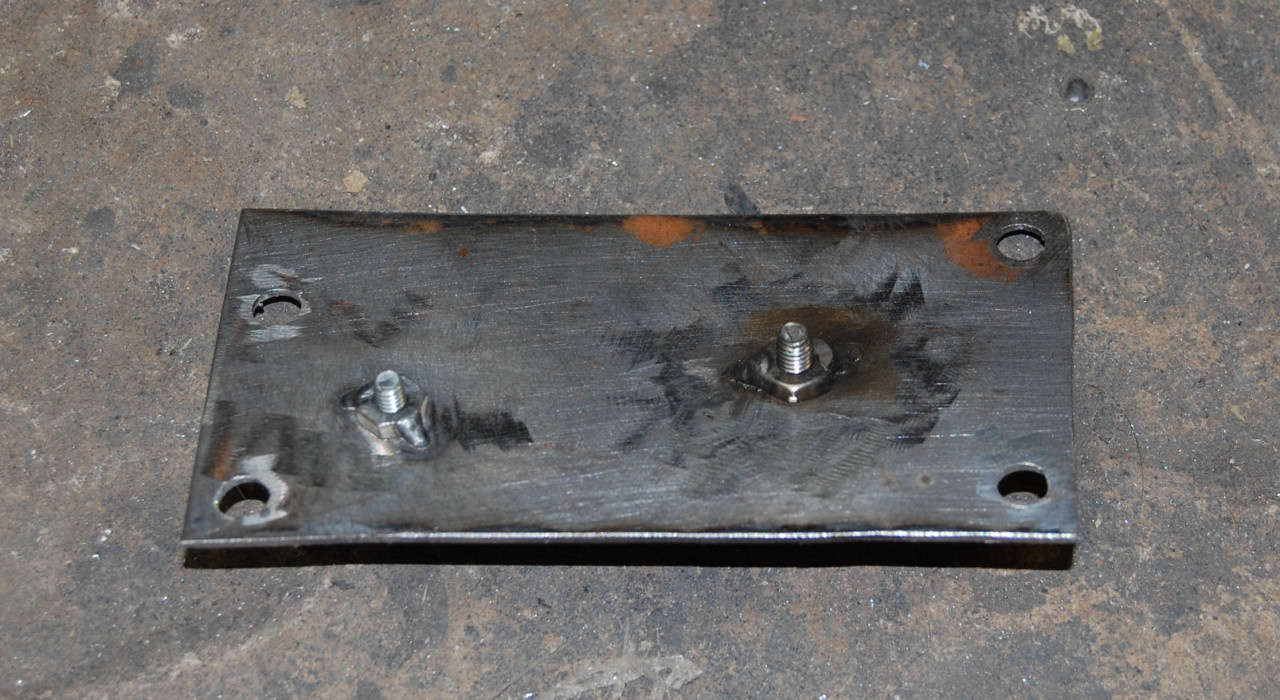
After that I decided to mount the interior door handle. Purists might want to skip the next image because it's not pretty. It requires cutting a hole in the door and installing a metal plate that will hold the handle in place. The handle could be placed elsewhere without having to cut a hole but I wanted it in that specific spot so it had to be done. My door is pretty butchered because initially I wanted to use 03+ Vic handles so I cut some extra holes. My driver door looks much prettier. lol
Metal plate is then bolted into place with a couple of holes drilled out for the door handle. I tuck welded the nuts on the back for easy removal installation.
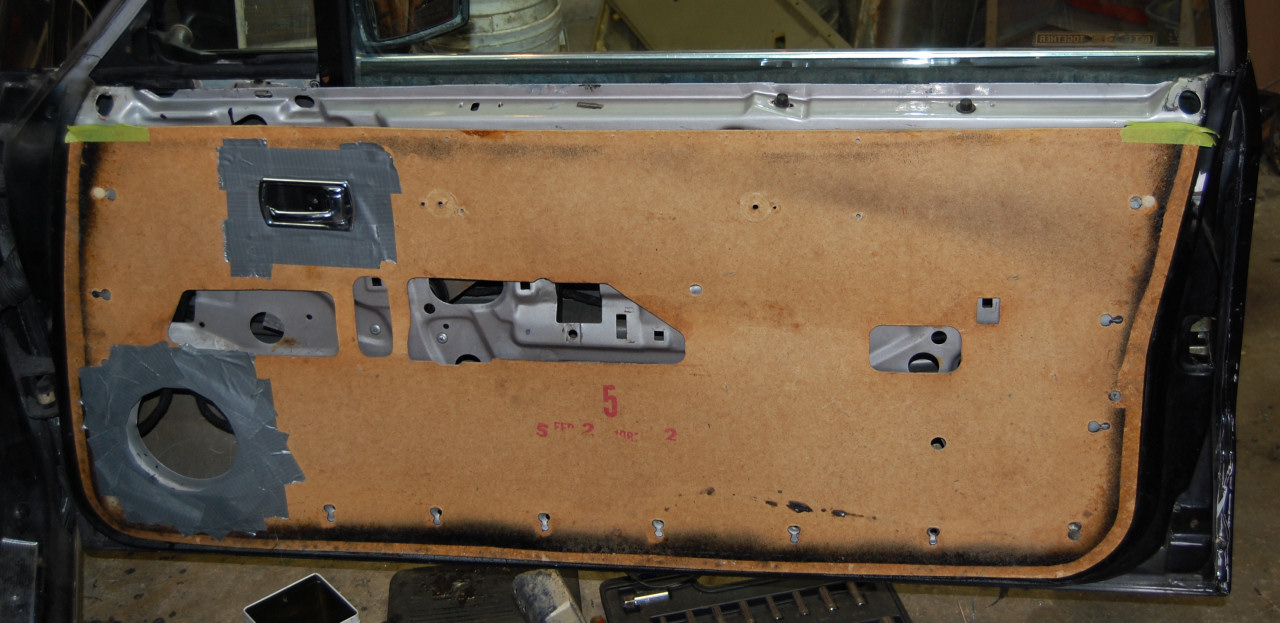
After that I decided to move onto the door panels again. This step might be beneficial to those who are simply looking to replace their warped door cards. Factory door cards and made from something that resembles a mix of cardboard and wood. IMO it's junk that isn't waterproof. I wanted something more durable. I did some research and saw a lot of hot rod guys using ABS plastic. Closest thing I could find locally was a sheet of puck board. It is quite soft and easy to work with.
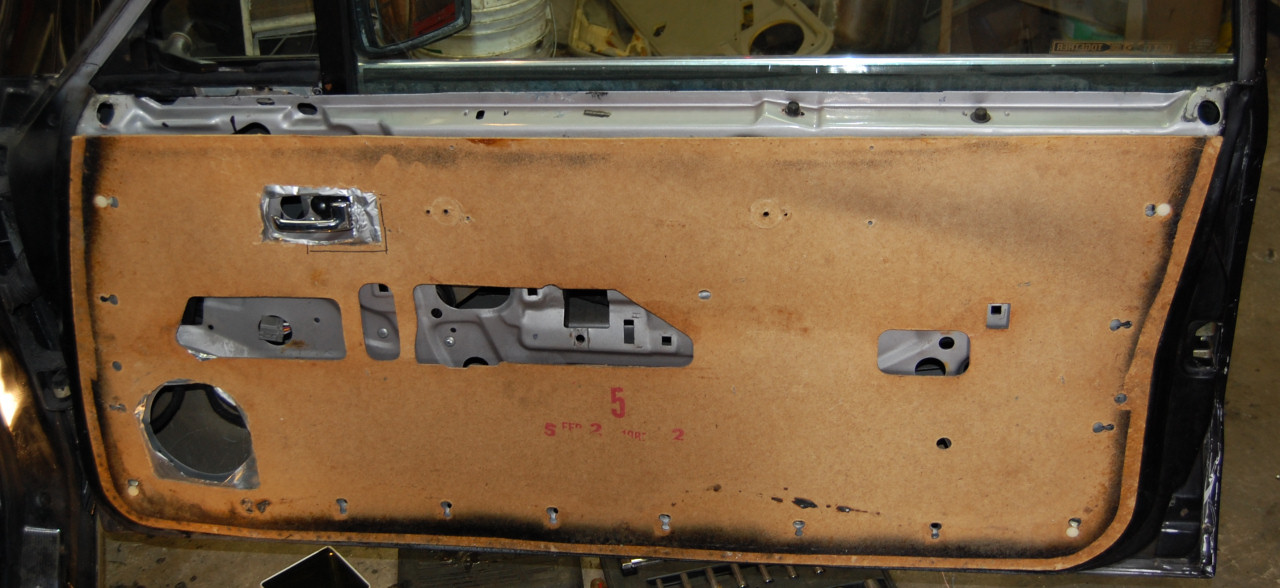
Using old door card as a template I made a new door card.
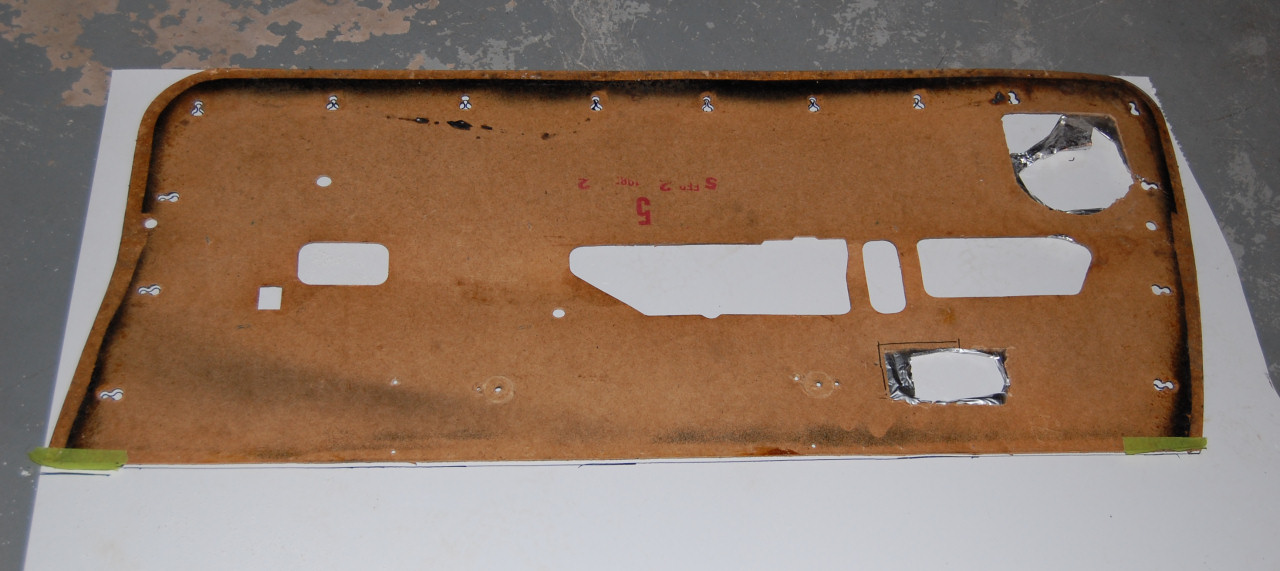
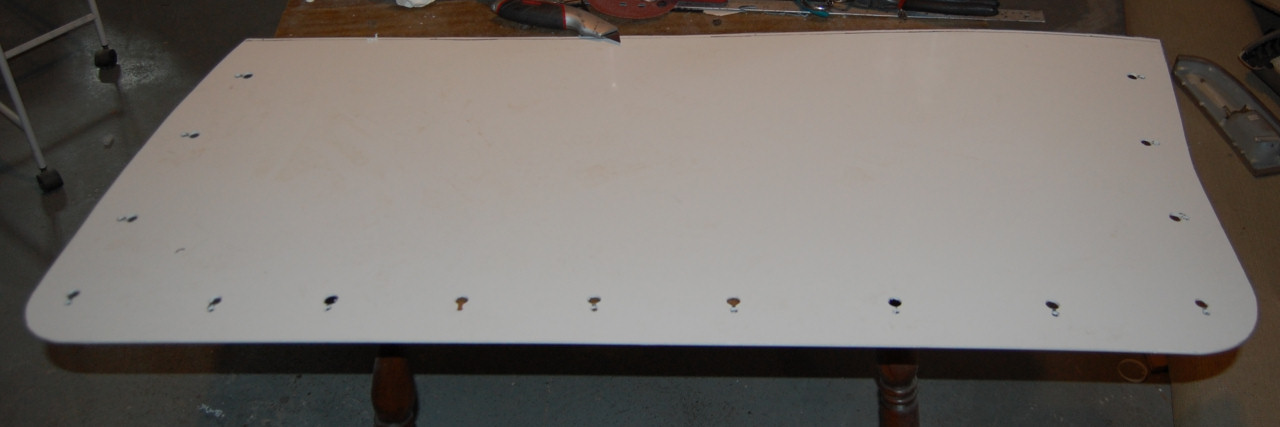
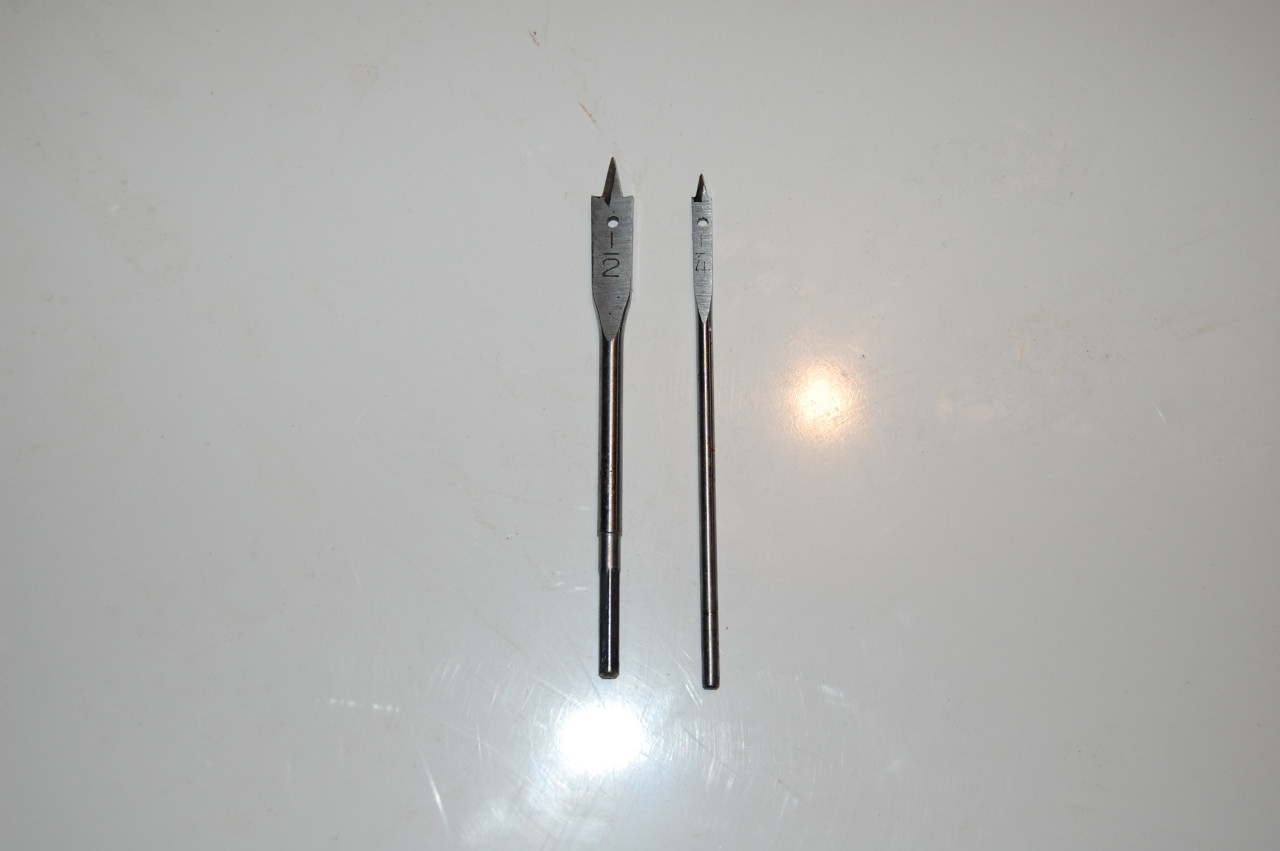
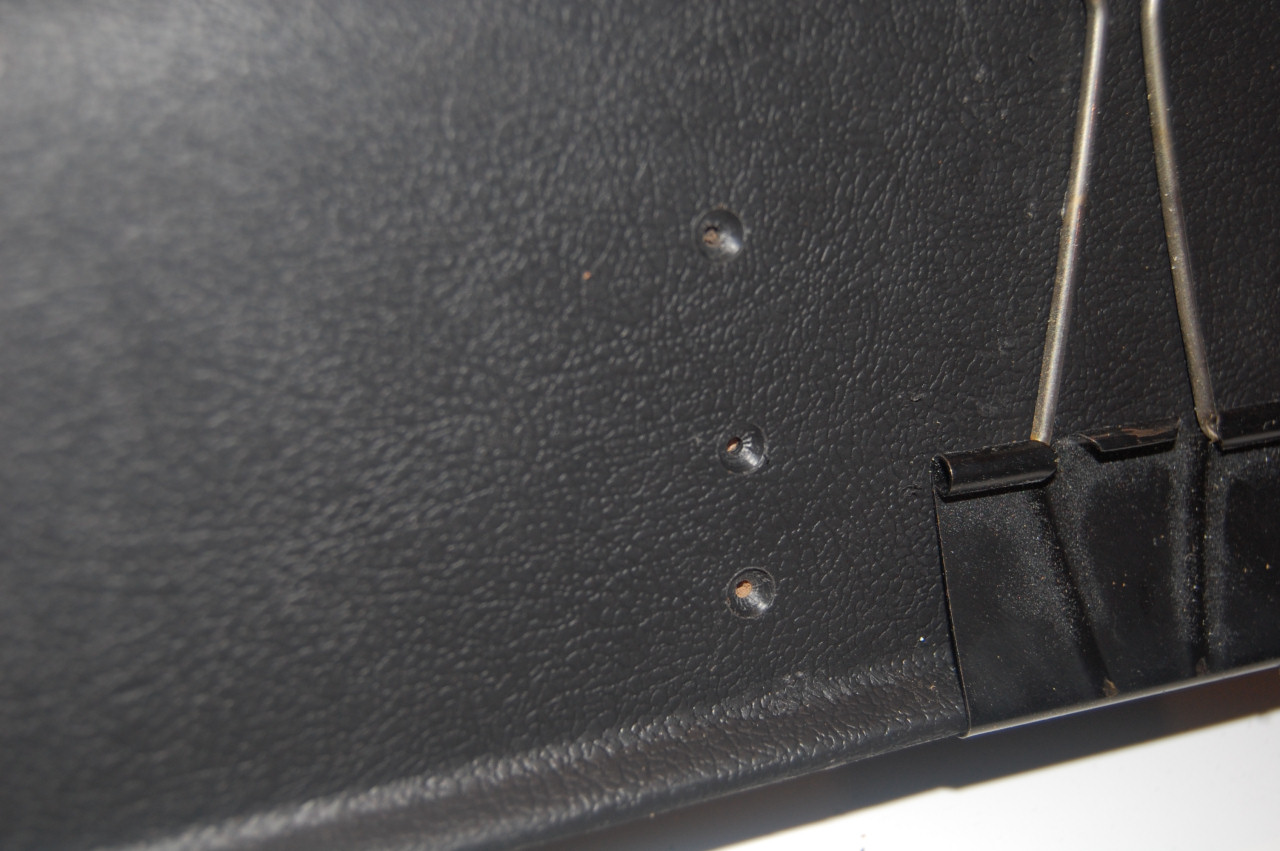
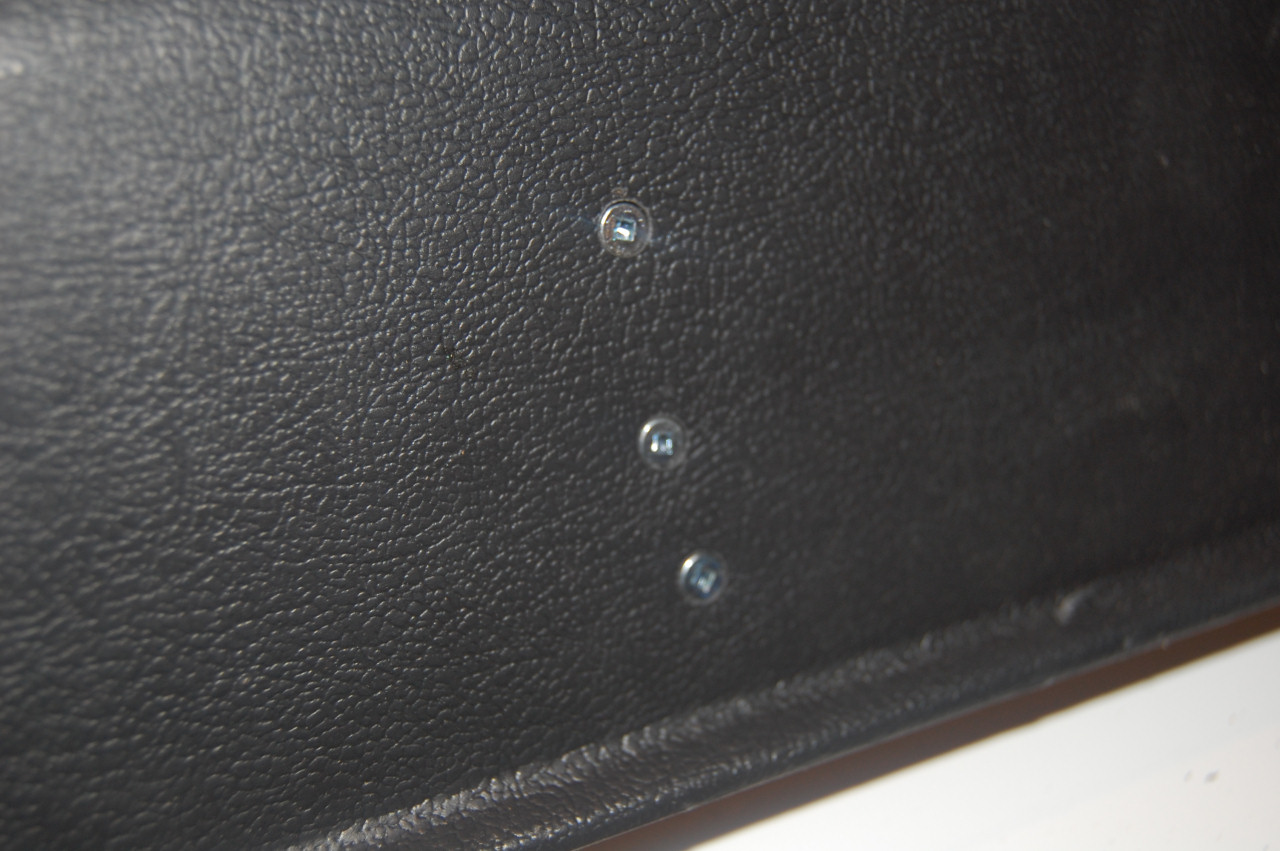
To make the required holes for plugs I used these. 1/2" and 1/4". Drill 2 holes then cut a slot with an exacto knife.

Making perfect speaker and door handle holes is easy. Using old door card and some duct tape to mark the holes.
Transfer them to the new door card.
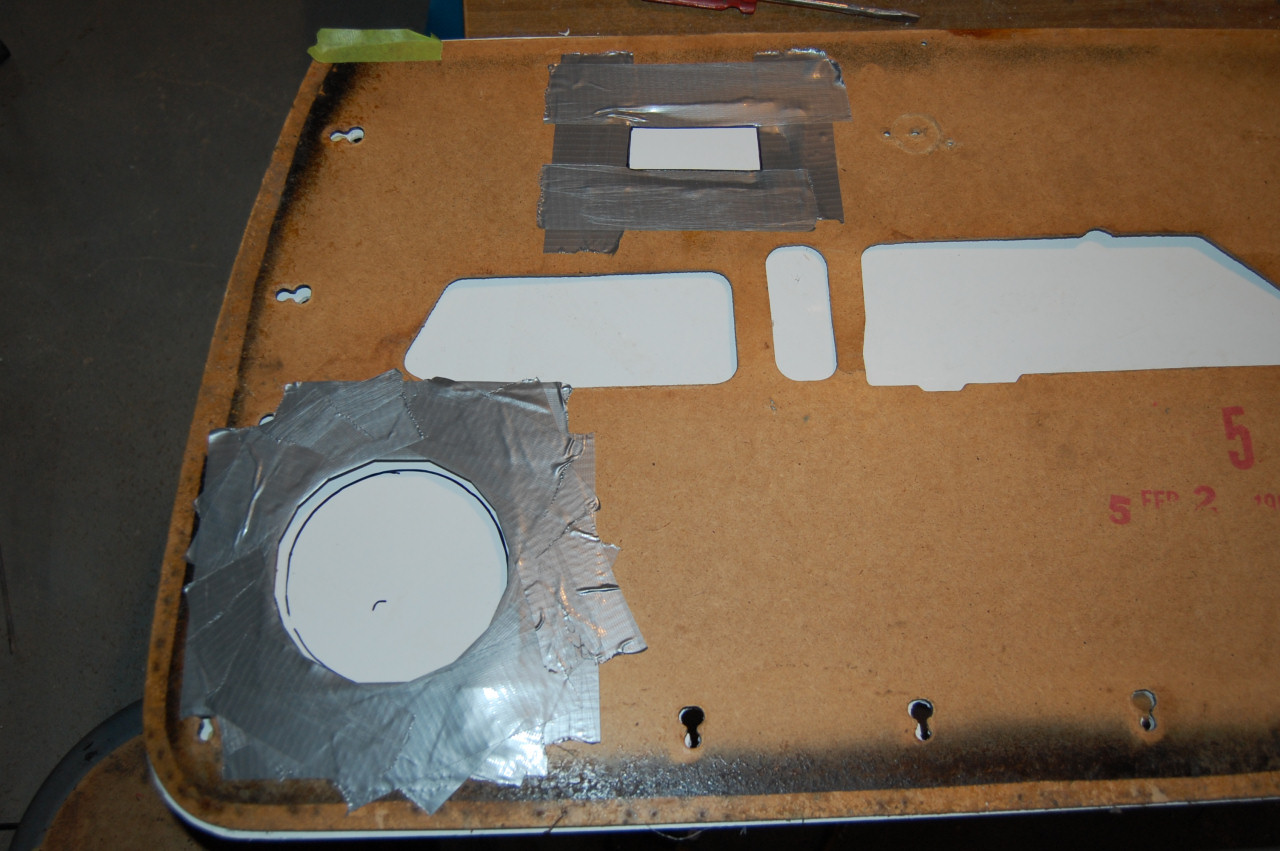
And now you have perfect, new door cards.
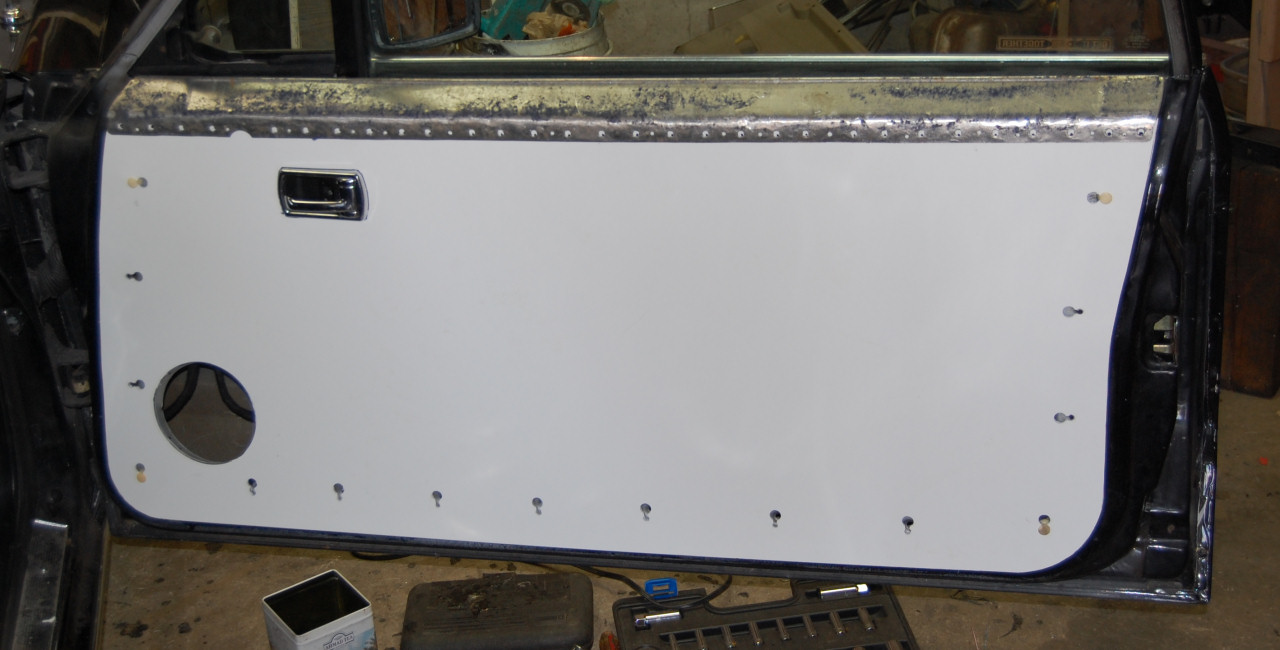
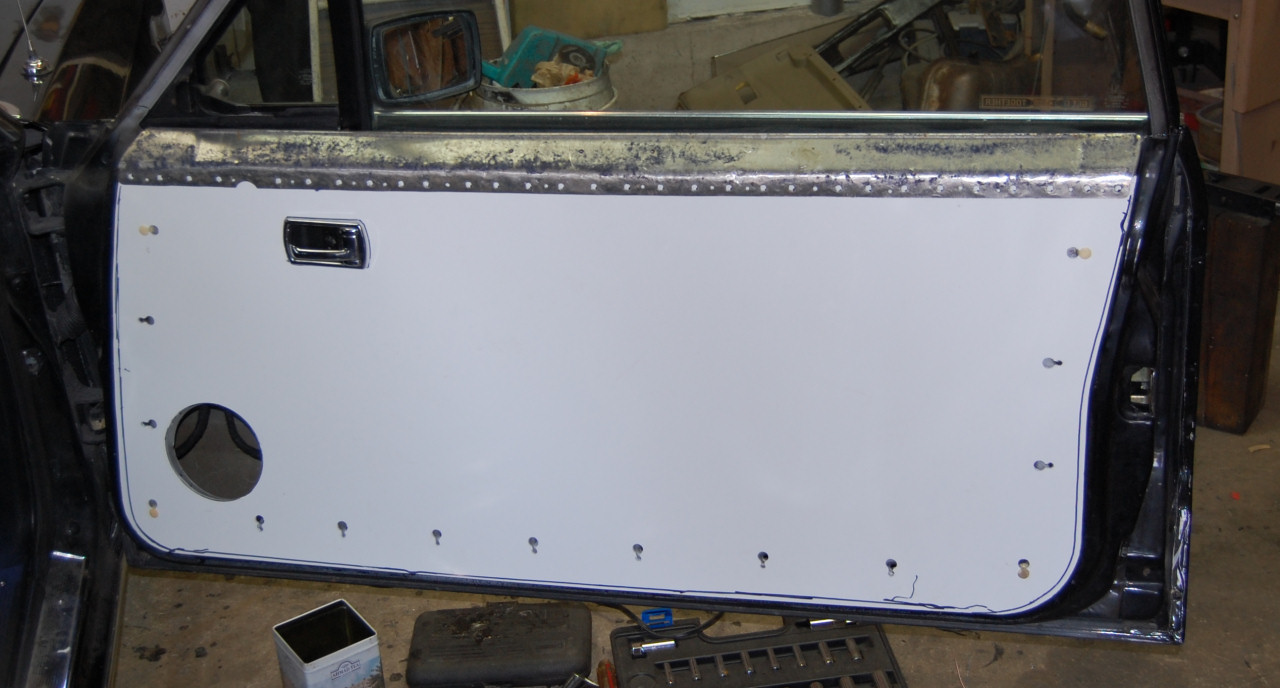
Next install metal piece that goes on top of the door card and mark all the holes. Now is also a good idea to check how the door closes to make sure nothing rubs. Trim new door card as required.
Comment
-
What was your method for attaching the metal piece that slips over the top of the door to the new puck board?~David~
My 1987 Crown Victoria Coupe: The Brown Blob
My 2004 Mercedes Benz E320:The Benz
Originally posted by ootdega
My life is a long series of "nevermind" and "I guess not."
Originally posted by DerekTheGreat
But, that's just coming from me, this site's biggest pessimist. Best of luck
Originally posted by gadget73
my car starts and it has AC. Yours doesn't start and it has no AC. Seems obvious to me.
Comment
-
Stay tuned. Took a long time to figure out what to use.Originally posted by 87gtVIC View PostComment
-
Depending how tough that is, you might be able to fab a punch to make the slot. I've done DIY punches made out of pipe or other hollow metal with the cutting edge ground on a bench grinder before. For that you might be able to squeeze something down to oval since the end shape doesn't matter any.86 Lincoln Town Car (Galactica).
5.0 HO, CompCams XE258,Scorpion 1.72 roller rockers, 3.55 K code rear, tow package, BHPerformance ported E7 heads, Tmoss Explorer intake, 65mm throttle body, Hedman 1 5/8" headers, 2.5" dual exhaust, ASP underdrive pulley
91 Lincoln Mark VII LSC grandpa spec white and cranberry
1984 Lincoln Continental TurboDiesel - rolls coal
Originally posted by phayzer5
I drive a Lincoln. I can't be bothered to shift like the peasants and rabble rousersComment
-
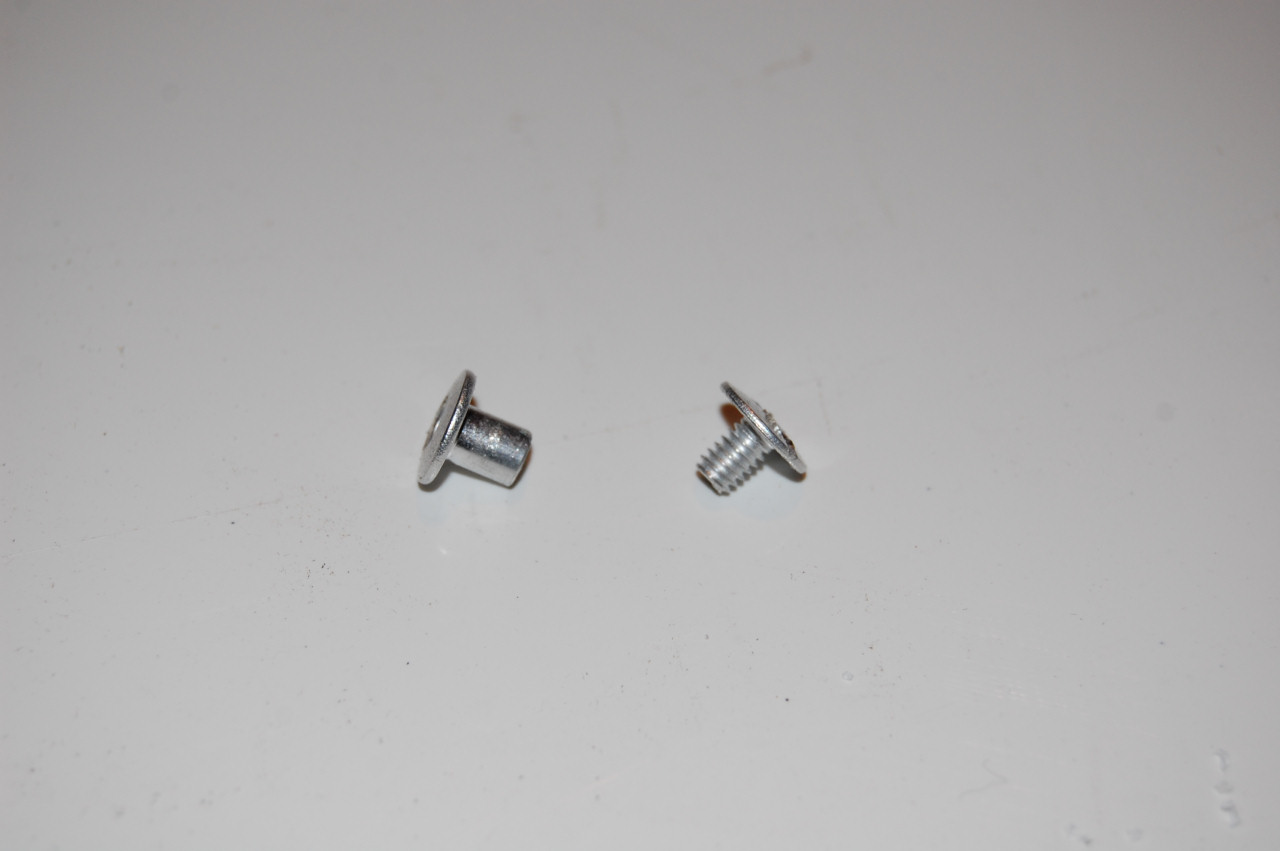
Moving on. To answer the question above about securing metal plate onto the new door card. Home Depot and Lowes both sell these things. I am not sure what they are called. They come in various lengths. The shortest one is still too long so I had to file them down. Being that they are aluminum they file very easily.
After that it was time to fab up the rest of the panel. Taking 2 sedan panels and cut them to make one. Panel on the left is used almost completely. It's cut at the very end where the door pocket ends. Then the second panel is pretty much cut at whatever length is needed.
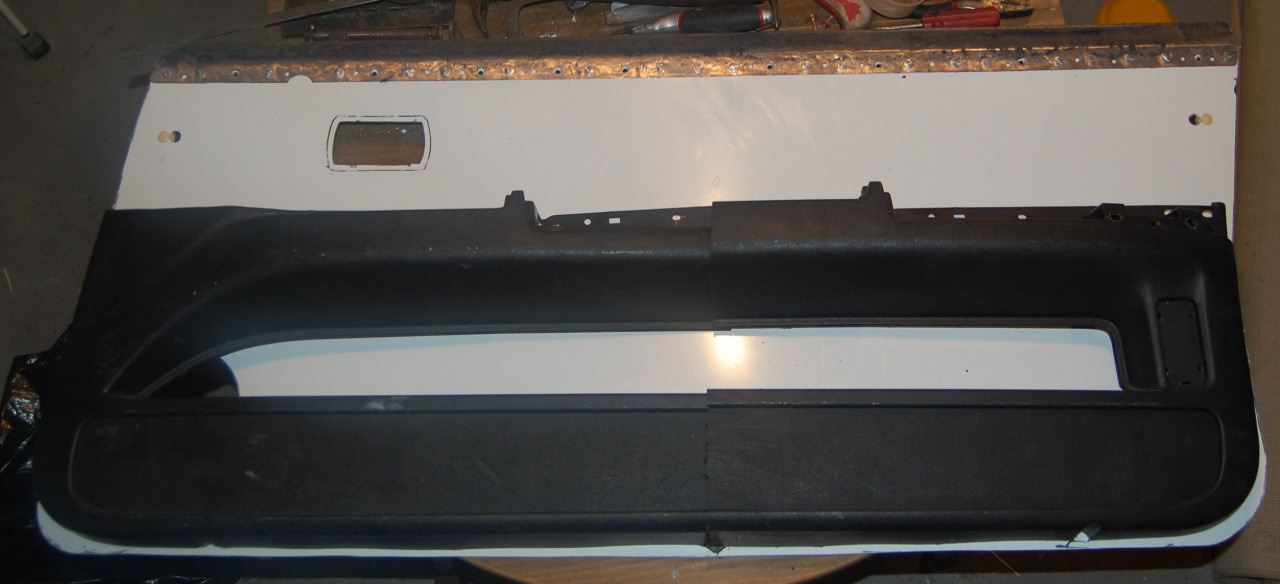
Then it's just a matter of joining the 2 panels together to make one.
To hold 2 panels together I used some oak strips cut to shape and attached with wooden screws. Reason I use oak is because it's hard wood so screws actually stay in place. I use pine for mock up but screws tend to spin in the holes since pine is very soft.
This is how they are attached. Holes are drilled then screws installed flush. Because I will be wrapping the whole panel in leather this works fine and screws can't be seen when wrapped.
Comment
-
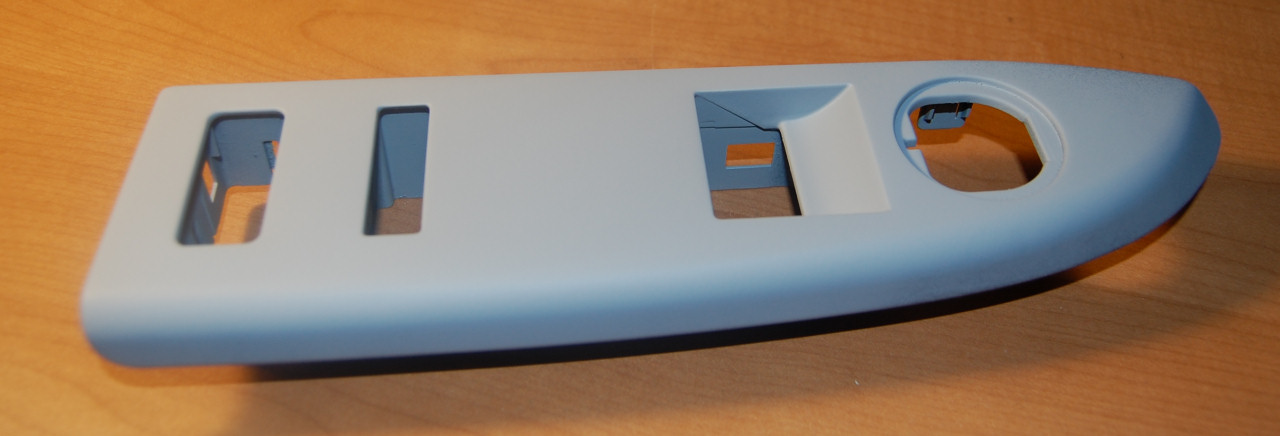
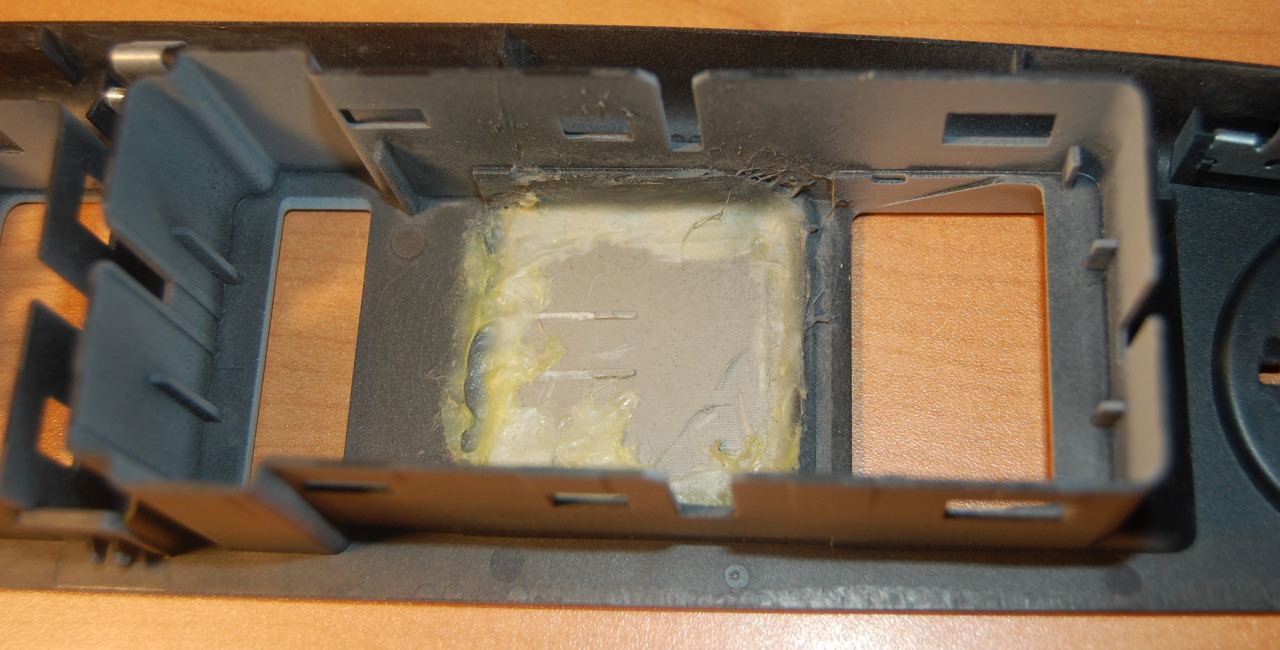
Modded driver side switch panel to eliminate rear window switches. Used Permatex plastic weld to put a filler plate in. After filing and applying a little spot putty to smooth it out it's good to go. Now just gotta paint it black. Decided against leather wrapping it.
Comment
-
Looks like sex bolts. No, I'm not making that up.
Looking good though.86 Lincoln Town Car (Galactica).
5.0 HO, CompCams XE258,Scorpion 1.72 roller rockers, 3.55 K code rear, tow package, BHPerformance ported E7 heads, Tmoss Explorer intake, 65mm throttle body, Hedman 1 5/8" headers, 2.5" dual exhaust, ASP underdrive pulley
91 Lincoln Mark VII LSC grandpa spec white and cranberry
1984 Lincoln Continental TurboDiesel - rolls coal
Originally posted by phayzer5
I drive a Lincoln. I can't be bothered to shift like the peasants and rabble rousersComment
Comment